Step-by-step guide: how to plant an orange from a seed at home
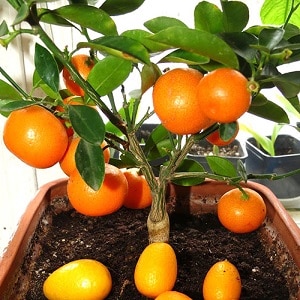
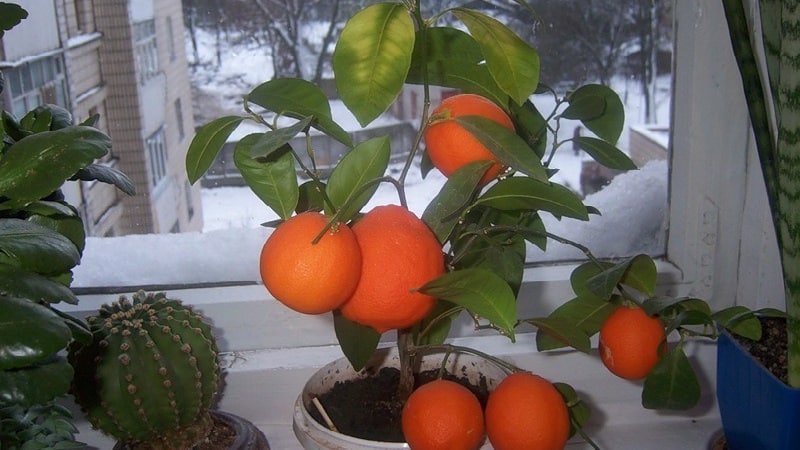
Orange is not only a healthy and tasty fruit, but also an ornamental plant that looks especially aesthetically pleasing during flowering and fruiting periods. In nature, the height of an orange tree ranges from 3 to 7 m. Plants grown at home grow miniature and have a dense crown.
You might have seen homemade oranges in flower shops. They are obtained from cuttings and are usually sold with fruit. Such copies are expensive. However, everyone can grow a citrus tree on their own from seeds collected from eaten fruit.
Let's look at how to plant an orange at home from a seed and make it bear fruit.
Is it possible to grow from seeds at home?
 It is quite possible to grow oranges from seeds at home.. Such plants will be stronger and more resilient than trees obtained vegetatively, but they will bear fruit much later. Their crown will be thicker.
Orange tree — plant with dark green, hard, glossy leaves with well-defined veins. The greenery of the plant contains glands that secrete essential oils. They aromatize the air in the apartment and cleanse it of harmful microorganisms.
Orange blossom looks beautiful: A plant with a dense crown produces a large number of miniature white or cream-colored flowers. The air is filled with a subtle delicate aroma. Flowering continues for several weeks.
Orange fruits are small, spherical, in the period of maturity - bright orange. Fruits grown on a windowsill are suitable for eating.
Reference! All citrus fruits grown in a pot can bear fruit at home. This usually occurs at 8–10 years of the tree’s life. However, using some tricks, you can actually get the first harvest in the 5th year.
An orange tree can bloom and bear fruit without grafting.. However, this procedure significantly advances the appearance of the first harvest.
Optimal conditions
To get not just a decorative, but a fruit-bearing plant, it is provided with conditions suitable for growth and development:
- Air humidity not lower than 40%, optimally - 80%.
- Temperature in summer and spring, in early autumn they are maintained within +18…+20°C. In winter, plants feel good at +14°C.
- From mid-spring to mid-autumn, the orange tree has enough natural light. In winter, the plant is illuminated with a phytolamp so that his daylight hours are at least 7 hours.
Planting seeds
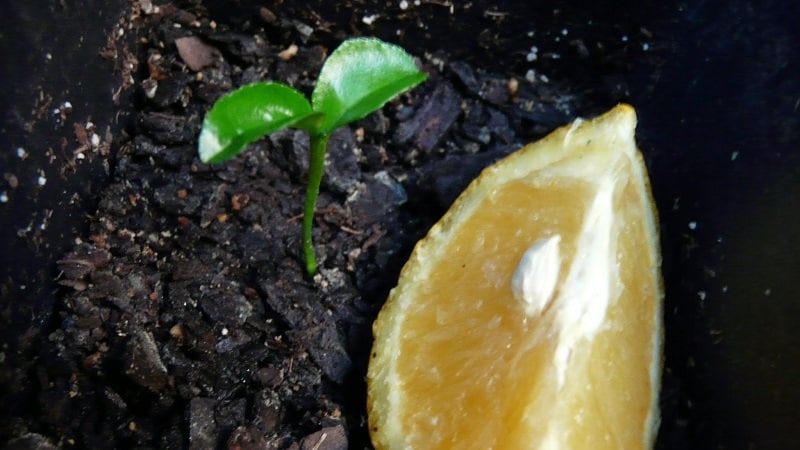
Orange seeds can be planted at any time of the year., but it is better to do this in spring or summer. This increases the chances that the seeds will germinate and the plants will take root.
Attention! From an orange seed bought in a store, not the usual fruits will grow, but small “wild” fruits.
Selection and preparation of planting material
Orange seeds are bought in gardening stores or taken from fruits. To get the maximum number of shoots, it is important to be able to choose seeds and fruits.
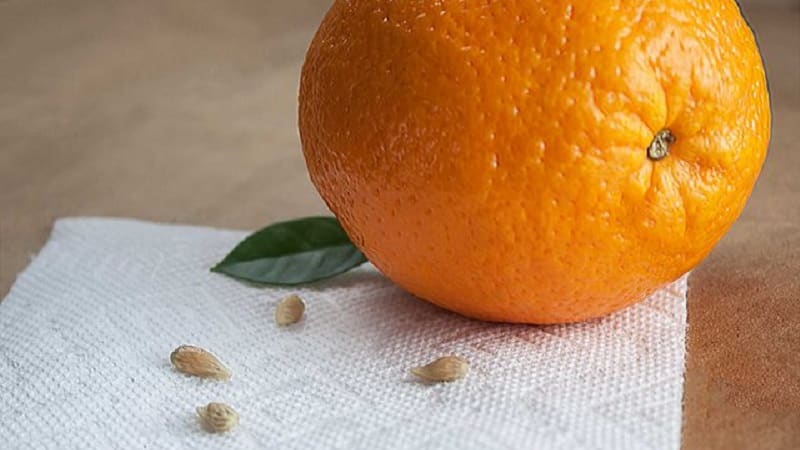
Fruits with smooth, bright skin without green spots are suitable for obtaining planting material., signs of illness and damage. They must have the correct round shape. It is better to take seeds from several oranges, preferably different varieties.
Seeds suitable for planting, large, round and light, without dark spots or damage. Dark, flattened and small seeds are not suitable.
Interesting things on the site:
How to grow lemon from a seed at home
To speed up germination, increase the percentage of germination and get healthy, hardy shoots, it is important prepare the seeds correctly:
- Extracted from the fruit the seeds are cleared of pulp and washed under running water room temperature.
- Bones disinfected for 30 minutes in Fitosporin, hydrogen peroxide or dark pink solution of potassium permanganate.
- To awaken, the seeds are immersed for 15 minutes in water with a temperature of +50°C. Then throw it into ice water for 5 minutes.
- To speed up germination, planting material is soaked overnight in a growth stimulant: “Epine” or aloe juice diluted in half with water.
If desired, the seeds are germinated in advance. To do this, they are wrapped in a napkin moistened with warm water, placed on a saucer and placed in a warm place. The saucer is covered with film. The material is moistened as it dries. Planting begins as soon as the seeds hatch.
Advice! To speed up seed germination, some gardeners remove the hard shell from them. In this case, it is important not to damage the cotyledons.
Preparing containers and soil
The health and speed of seed germination largely depend on the quality of the soil.. You can buy it in specialized stores (a universal mixture or soil for citrus fruits will do) or prepare it yourself.
In the latter case, mix:
- garden soil - 1 part;
- humus - 1 part;
- peat or sand - 0.5 parts;
- ash - 1 tbsp. for 1 bucket of soil mixture;
- superphosphate - 1 matchbox per 1 bucket of soil mixture.
Purchased and homemade soil is disinfected. To do this, it is calcined in the oven, poured with copper sulfate (take 1 tablespoon of the substance per bucket of water), a dark pink solution of potassium permanganate or “Fitosporin”.
In addition to soil, drainage is used (shell shell, crushed ceramics, small crushed stone, special glass). It is also disinfected.
It is recommended to sow more seeds than you plan to produce plants. Usually the seeds are planted in a common container.:
- wooden box;
- plastic tray;
- pot;
- cut bottle;
- cake packaging.
Other available materials will also work. Drainage holes are made at the bottom. Containers are disinfected by soaking in boiling water or a dark pink solution of potassium permanganate.
Step-by-step description of landing
Step by step landing:
- To the bottom of the container pour a layer of drainage 1 cm thick.
- Rest volume covered with soil.
- The soil is moistened from a spray bottle.
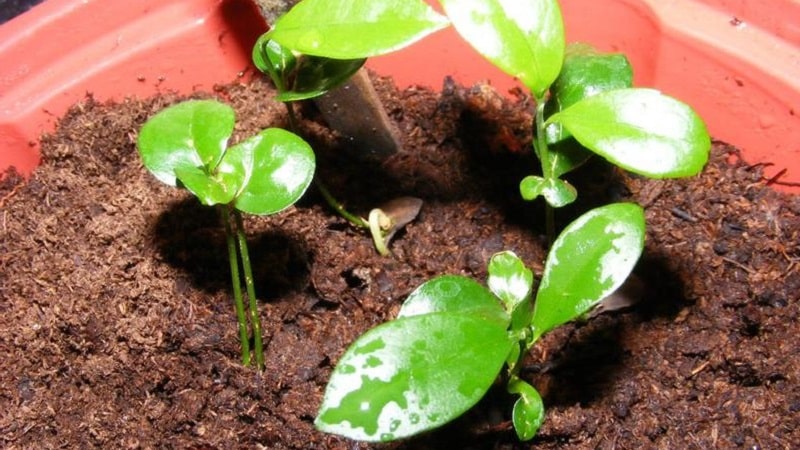
- Bones planted in the ground to a depth of 1.5–2 cm at a distance of 5 cm from each other.
Growing an orange
Growing a crop on a windowsill is easy. It is enough to follow the basic rules of care at different stages of the plant’s life.
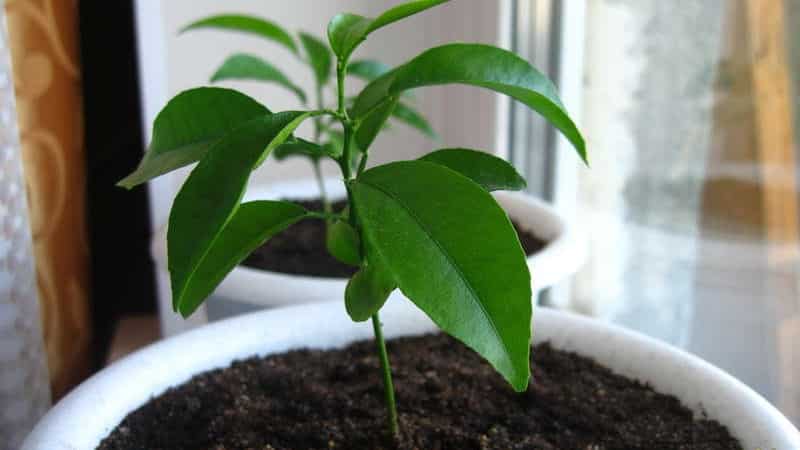
A beautiful orange tree, like this photo, can only be achieved with proper care.
Sprout care
While the oranges are growing in a common box, their care will vary from growing older trees:
- Before germination boxes with orange seeds are kept in a warm place. If the containers are on the windowsill, foam or other insulation is placed under them.
- Before 2 true leaves appear, sprouts require high humidity. air and complete isolation from any weeds. This is achieved by creating an improvised greenhouse.The boxes are covered with film. If the crop is grown in a bottle, it is covered with the trimmed part. For a cake box, a transparent bottom part of the packaging is suitable.
- Plants are ventilated, opening the film every day for an hour. A few days before the “greenhouse” is dismantled, the ventilation time is gradually increased, up to a whole day.
- Water oranges as the top layer of soil dries out. Use warm water from a spray bottle.
At this stage, the plants are not fed. They are treated with care, protected from drafts and direct sunlight.
Selection of seedlings and picking
Seedlings are planted in individual containers after the appearance of 4 leaves.. The best plants are selected. They are determined by the following criteria:
- small distance between leaves;
- bright green leaf color;
- thick stem;
- elastic leaves and stem.
All weak, stunted and pale plants are removed or thinned out at the stage of formation of 2 leaves.
Oranges are planted in individual clay pots 8–10 cm in size with drainage holes.
The soil for seedlings and picking oranges varies. This time the ingredients are taken in the following proportions:
- turf soil - 2 parts;
- humus - 1 part;
- peat - 1 part;
- sand - 1 part.
The soil is disinfected. Before pouring it into the pot, drainage is poured into the bottom. The soil is pre-moistened.
Selected the plants are carefully removed from the box, trying not to damage the root system. This is convenient to do with a fork. Before removing the oranges, water them generously. This way they will be removed from the ground much easier.
Plants transplanted into pots without deepening the root collar. The soil around is compacted.
Attention! When preparing the soil mixture for subsequent transplants, the amount of turf is increased to 3 parts, and 1 part of clay is added to the composition.
Further care
After transplantation, special attention is paid to care. Whether the tree will take root and bloom depends on its correctness:
- In summer, oranges are watered daily. In winter and late autumn, watering is reduced to 2 times a week. Use only settled water at room temperature.
- Orange tree spray every other day.
- In spring, summer and autumn, fertilizers are applied every 2 weeks. In winter, feeding is stopped.
- In the summer, at noon, the orange is removed from the window. Every day the pot is turned a few centimeters around its axis so that the tree develops evenly.
- For the first 3 years, the plant is replanted annually.. Then - once every 2-3 years. Each time the diameter of the pot should be 5–10 cm larger than the previous one.
- Because homemade oranges are not pollinated by insects, they do it themselves: Use a soft brush to touch the middle of one flower and transfer the pollen to another. All inflorescences are processed in this way.
- At the first flowering, half the flowers are removed, so that the orange does not reset everything.
- During the first fruiting, only 3-4 ovaries are left, the most developed and regular in shape. The next year, 7 fruits are left. Further, the ovaries are not cut off.
Proper formation of an orange is the key to its flowering and fruiting. Use the following scheme:
- The growth point of the main branch is pinched at a height of 15 cm;
- all subsequent shoots are pinched when they reach 15 cm;
- The upper leaves are left untouched, and the 2 leaves below them are torn off to stimulate the buds to eject shoots.
Fruits appear on branches of the 5th order. This means that the first harvest will be harvested no earlier than in 5 years.
Particular attention is paid to fertilizers. Use a special fertilizer for citrus fruits or prepare it yourself. To do this, dissolve in a 10 liter bucket of water:
- nitrogen fertilizers - 20 g;
- superphosphate - 25 g;
- potassium salts without chlorine - 15 g.
Copper sulfate is added to the fertilizer once a season., every month - potassium permanganate.
Important! Chlorine is harmful to oranges. Therefore, fertilizers for this plant are chosen without this substance, and only settled water is used for irrigation.
Graft
The tree bears fruit even without grafting, but with its help it will be possible to bring the first harvest closer and make fruits more delicious.
Graft an orange at 1-2 years of age:
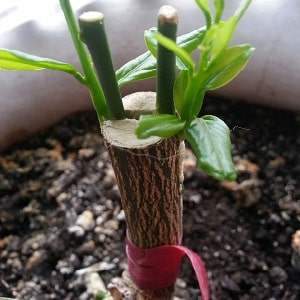 On a seedling obtained from a seed, cut off the top leaves. They don't do this on a scion.
- On the stem of the plant to which the cutting will be grafted, make cleft (cut 1 cm deep in the center).
- The lower part of the cutting is ground off to a height of 1 cm at an angle on both sides.
- The cutting is inserted into the split so that it fits in as tightly and deeply as possible.
- The junction of the scion and the rootstock is wrapped using grafting tape or electrical tape from bottom to top as tightly as possible (if even the slightest hole remains, the scion will not take root);
- A pot of orange is placed in a Zip Lock bag, at the bottom of which water is poured.
- The package is closed and put away warm, non-sunny place. Removed after 2 weeks.
Helps you understand the vaccination process video at the end of the article.
Read also:
Protection from diseases and pests
At home, oranges are affected by aphids, scale insects and spider mites.. To get rid of pests, they are removed manually with a cloth soaked in a soap solution. Plants are sprayed with a decoction of onion peels.
Most often, an orange on a windowsill suffers from root rot.. To combat it, the soil is watered with Fitosporin. Use a solution of tooth powder (1/2 cup water, 2 tablespoons each of tooth powder and ash, 1 tablespoon copper sulfate). The stem is moistened with it near the ground, the plant is not moistened for a week and put away in a dry place.

Useful tips on the topic
Here are some tips to make it easier to grow oranges and get a rich harvest: experienced gardeners:
- If in winter the plant is left at temperatures below +10°C, water 1-2 times a month and do not feed, then in the spring, when care resumes, it will grow faster. This will speed up the appearance of fruits.
- Other citrus fruits are also grafted onto oranges. plants.
- Yellowing of the leaves indicates a lack or excess of watering, lack of fertilizer or exposure to drafts on the plant.
- To reduce the risk of orange contamination and improve its photosynthesis, once a week the leaves are wiped from dust with a damp cloth.
- Plants affected by insects are washed in the shower room temperature.
Conclusion
It is possible to grow an orange from a seed. With proper care, it will delight not only with beautiful flowering, but also with a tasty harvest.
Wild fruits appear after 7-8 years and are small, sour and tart. Proper care and knowledge of some tricks will help bring fruiting closer and improve the quality of citrus fruits.