In what ways and how are potatoes propagated?
The cultivated plant potato has many methods of propagation. Each of them has its own characteristics, advantages and disadvantages. The choice of agricultural practices depends on the conditions growing, quality and quantity of seed.
Alternative methods are used if there are additional tasks, for example, to increase productivity or saving seed material.
How do potatoes reproduce?
Increasingly, domestic experimenters are using new technologies, agricultural techniques and non-standard methods when cultivating potatoes.
These include growing crops in such ways as:
- dividing tubers (the technique has been known for a long time, but was widely used only in lean years);
- propagation by potato sprouts;
- cuttings with green shoots;
- sowing seeds for seedlings or in open ground;
- obtaining seedlings from “eyes”;
- sprouting the peel;
- rooting of cuttings;
- dividing the bush;
- combined methods.
All these methods are quite worthy alternatives to traditional technology.
What is propagation using tubers called?
The usual way to propagate potatoes is by planting tubers. This method is a vegetative one and is considered the most reliable and does not require much time and labor. The only significant drawback of the traditional approach is its inefficiency.
The use of alternative methods guarantees not only good yields, but also significant savings on planting material.
Reproduction methods, advantages and disadvantages of each of them
Potatoes are such a resilient crop that almost all of its parts are suitable for propagation and harvesting. The main thing is to provide the necessary conditions for each method.
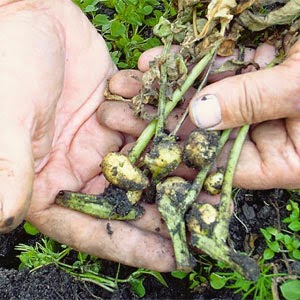
Tuber division
Farmers use this method in case of a shortage of planting material or when it is necessary to quickly propagate the desired variety.
Important. For division, only large tubers that have undergone vernalization are used - germination for 2-3 weeks at a temperature of 18-25 ° C and diffuse daylight. On such material, awakened buds – “eyes” – are clearly visible. And the sprouts that appear during the vernalization process are strong and do not stretch.
Method 1 (simple):
- Selected tubers are divided into several parts. Each fragment must have at least one “eye”.
- The sections are dusted with wood ash.
- The prepared fragments are planted in the soil in the same way as whole tubers.
- They are cared for as for traditional tuber plantings.
Method 2 (difficult):
- Selected tubers (which have not yet undergone vernalization) are laid out on a damp cloth or in boxes with moistened sawdust, spread in a layer of 3-6 cm.
- Maintain in room conditions at a temperature of at least 18°C.
- Maintain the moisture of the litter and material by spraying them with warm water twice a day.
- It is recommended to provide diffuse lighting during the day.
- In such conditions, the tubers are kept until the sprouts that appear reach 5 cm (about 2-3 weeks). Longer shoots can be easily damaged in the future.
- Prepared tubers are divided into small fragments.Each one should have an “eye” with a well-developed sprout.
- The sections are treated with wood ash.
- The prepared parts are planted in the traditional way for tuber plantings.
- Care is the same as for normal planting of whole tubers.
Due to the small size of planting material, soil condition is of particular importance. It should not dry out or become crusty. Severe waterlogging is also contraindicated.
Advantages: saving planting material and getting a good harvest (when using the second method, the yield can be significantly higher).
Flaws: Labor costs are higher than with traditional tuber planting.
Reproduction by sprouts
Using this method, gardeners obtain high quality sprouts. The time spent is approximately two months.
Technology:
- Determine the start time of germination of the material. To do this, count back 60 days from the usual time for the emergence of potato shoots. You can focus on planting dates, but in this case you need to completely eliminate the risk of late frosts.
- Provide a suitable temperature of 12 to 15°C. With this regime, powerful sprouts are obtained that can subsequently form a full-fledged seedling bush.
- The forcing allows two lighting modes: in the dark and in the light. In the dark, the sprouts grow faster, but they turn out thin and colorless. In the light, the germination process is slower, but the sprout material is formed strong and “stocky”. In both cases, the viability of the material is high.
- Provide the necessary humidity to avoid drying out of the growing points. The best way is to place the tubers on a damp “cushion” of thick cloth or sawdust. Periodic spraying is required.
- While the potatoes are sprouting, a soil mixture is prepared for the sprouts. It should be fertile and loose.
- Potato sprout buds awaken unevenly. The first to wake up are the “eyes” on the apical part of the tuber. The readiness of the sprout is indicated by the following signs: its size corresponds to a matchbox; from below, in the place of growth from the mother tuber, tubercles may stand out - future roots.
- The finished sprouts are carefully separated from the tuber, turning them slightly along the axis.
- Before planting, it is recommended to dip the lower part of the material in wood ash, providing micronutrient feeding and disinfection.
- It is allowed to plant seedlings in boxes indoors, in warm greenhouses, and in mild climates - directly into the ground, protected by a film cover.
- Seedlings are placed in a square-cluster manner at a distance of 6-7 cm from each other. The depth depends on the length of the planting material: the longer it is, the deeper it is buried. There should be about two-thirds of the sprout in the ground.
- Watering ensures the necessary soil moisture and its adhesion to the sprouts.
- The plantings are sure to provide shade.
- It will take about a week to engraft. Then the seedlings will begin to grow and greenery will appear on them. Plantings are accustomed to open sun, removing shading for a short time first. After three days, the seedlings can be opened completely. Now she is actively growing green mass and roots.
- After three weeks, strong seedlings are ready to be placed in open ground. It is planted in a permanent place according to a scheme suitable for a particular variety.
Advantages: significant savings in planting material, high productivity.
Reference. Used tubers can be used for the second forcing of sprouts.
Flaws:
- large expenditures of time and labor;
- violation of technology will entail not just a decrease in yield, but a complete loss of planting material.
Green cuttings
Potato propagation by cuttings is rarely used.
Technology:
- Sprouted potatoes are planted according to the traditional pattern or a little less frequently. The timing for planting mother tubers is two weeks earlier than standard for the region.
- As soon as the seedlings appear, they are fed with a solution of mineral fertilizer containing nitrogen, potassium and phosphorus. Fertilizers are added to water at the rate of 1 tbsp. l. each for 10 liters of water. Apply 200 ml of solution under the bush.
- When the height of the seedlings is about 7-10 cm, the plantings are hilled.
- Two weeks after the first, a similar repeated feeding is required.
- Grown plants are hilled a second time.
- Regularly loosen and weed the soil. If necessary, water and regulate the temperature using film covers.
- When the height of the bushes is 15-20 cm, the tops are pinched, which stimulates the forcing of future cuttings from the axillary buds.
- Cuttings are cut during mass flowering of potatoes. During this period the survival rate is higher. For cuttings, cut off the axillary shoots with a blade and divide them into segments. Each segment must have a whole internode and leaf.
- It is recommended to keep the cuttings in any biostimulant for the period indicated on the packaging of a particular drug. This technique will shorten the period of root formation.
- The resulting material is planted according to the traditional scheme, watered and shaded for the first days.
- The care is normal.
Advantages:
- significant savings in planting material;
- the opportunity to quickly obtain seed material for propagation of a rare or favorite variety.
Attention. The size of the harvest will depend on the timing of rooting and growing conditions.
Flaws:
- significant labor costs;
- obtaining only small (seed) potatoes in the first year.
Seeds
This technique is used by both professional breeders and those who like to experiment in their garden.
The material is the seeds that ripen in green berries on the bushes after the potatoes bloom.
Technology:
- At the beginning of March (the dates are indicated for the middle zone), the seeds are placed on a damp cloth in a transparent plastic container with a lid. Maintain the temperature in the range of 20-25°C.
- Open daily for 1-2 minutes for ventilation. If necessary, moisten with a spray bottle.
- After two weeks, the sprouted seeds are planted in a container with nutrient soil. They are laid out on the surface of slightly compacted and moistened soil and sprinkled with earth. Moisten with a spray bottle and place in a well-lit, warm place.
- After 3-4 weeks, the plants need to be transplanted. Water as the soil dries. Occasionally loosen the soil to aerate the roots. Feed with complex fertilizer 1-2 times a month.
- Fortified seedlings are hardened off by taking them out to a closed balcony or greenhouse during the day.
- Planting in open ground is carried out only when the threat of return frosts has passed. It is better to carry out the procedure in cloudy weather.
- They are planted in a new place for potatoes to protect the seedlings from diseases accumulated in the ground.
- Plants are placed according to a 20x60 cm pattern. They are buried, leaving only the upper leaves on the surface. Long stems can be placed horizontally or at an angle in the planting hole.
- The plantings are well moistened and shaded with covering material. It is removed when the plants take root.
- Care consists of timely weeding, hilling, and, if necessary, fertilizing and watering.
Direct sowing in open ground is possible in May. In this case, seed potatoes are obtained (small tubers suitable for planting next year).
Advantages:
- growing clean planting material free from viruses and diseases;
- the likelihood of obtaining a hybrid with good qualities.
Flaws:
- large expenditures of time and labor;
- lack of varietal purity due to genetic splitting of traits;
- unpredictability of the final result.
"With your eyes"
Even one “eye” with a small piece of adjacent tissue is enough to grow a new plant. The result is double savings: the product is used for nutrition, and waste is used for reproduction.
Technology:
- A week or two before the standard planting dates for the region, they begin to prepare the material.
- Disinfect a knife with a narrow blade.
- The “eye” is cut out, capturing the adjacent tissue. The depth of the notch is no more than 1 cm.
- The cut buds are laid out on a paper towel and kept for a week. Temperature range – within 18-22°C. Regularly moisten the material moderately. During this period, the cut surface should become rougher during the suberization process. Roots begin to grow and seedlings begin to appear.
- The material is heated daily for 2 hours at a temperature of 40°C. This technique will destroy any infection and fungus.
- Prepared “eyes” are planted at the usual time, waiting out the threat of late frosts.
- The planting depth is determined by the small size of the material and is approximately 4 cm. The scheme is standard for growing crops.
- Features of care at this stage include maintaining a water regime.The soil should not be allowed to dry out, as the roots are still very small.
- After the bushes get stronger, you can use any growing technology.
Advantages: lowest material costs.
Reference. With good care, the yield from one plant obtained as a result of germination of the “eye” can be about 2 kg.
Flaws: special attention is required during the first time after planting in open ground.
Peeled
Like the previous one, this method does not require consumption of tubers. Seedlings are grown from harvested and germinated peels.
Technology:
- In the spring, approximately 1-2 months before the standard time for the emergence of potato shoots, they begin to collect and prepare planting material. The seedling peel must have intact “eyes”. Store cleaning in a cool, bright room. Place the peels in rows, placing them as they accumulate on wet sawdust, peat or soil, poured into boxes.
- The spread out cleanings are covered with a layer of sawdust or other substrate 2-3 cm thick.
- The substrate is kept moderately moist.
- The sprouts will hatch in three weeks.
- At a height of 6 cm, the sprouts already have fairly developed roots.
- Seedlings are planted in open ground according to any scheme you like.
- Planting care is as usual as for traditional tuber plants.
Advantages: low material costs.
Flaws: it is necessary to organize a place for planting.
Combined propagation methods and their features
Methods and techniques of crop propagation are successfully combined:
- The tubers used for forcing sprouts can later be used for planting whole tubers or fragments - this is a significant saving of material.
- Having planted tubers at home in winter and grown full-fledged seedlings by spring, you can use the tops of plants for green cuttings (obtaining an early harvest).
- Dig up the early small tubers obtained by the method described above, divide them into fragments and plant them to grow independent plants.
- Use mother plants intended for cuttings at the same time for propagation by layering: cut some of the shoots into cuttings, root some without cutting them from the bush.
The viability of all parts of the potato, their flexibility and survival rate provide ample opportunities for various experiments.
How to quickly propagate potatoes on a plot
The use of not one, but several methods, their skillful combination will increase the likelihood of obtaining an excellent harvest.
The farmer’s aerobatics will be the following combination: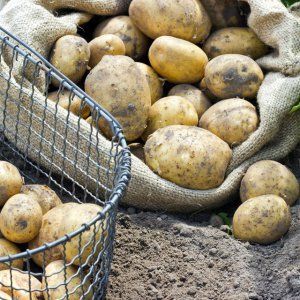
- the sprouts are forced, then broken off and planted for further cultivation;
- the used tuber is divided into fragments according to the number of “eyes” and planted in the ground;
- when the height of the bush is about 20 cm, it is divided;
- During the flowering period or immediately after it, cuttings are cut and rooted.
This accelerated propagation makes it possible to increase productivity even with a small amount of planting material.
This is interesting:
What to do to prevent potatoes from sprouting during storage.
Features of storing potatoes: at what temperature do they freeze.
What is the potato yield per 1 hectare and how to increase it.
Conclusion
The ability of potatoes to reproduce using various parts of the plant allows you to get a rich harvest at low cost, quickly propagate your favorite variety, and make up for the lack of seed material.
The variety of agricultural techniques and their unexpected combinations make the process lively and exciting, and the result significant.