Step-by-step instructions for growing watermelons for beginners
For many summer residents, growing watermelons on their own plots has long become a common process. This is not a difficult matter, but there are certain nuances and subtleties that must be taken into account when growing this melon crop.
Variety selection
Obtaining a high yield largely depends on the correctly selected variety of watermelons. Let's take a look at the most suitable of them for cultivation in the central zone and southern regions of Russia.
What are they and what criteria should you use to select them?
Largely the choice of variety watermelon depends on the climate zone in which it is planned to be grown.
For example, central Russia does not have long summers. In this case, it is better to give preference early ripening varieties. They will not produce fruits that are too large, but the ovary of such varieties and hybrids ripens as quickly as possible:
- Yellow Buttercup F1;
- Zenith;
- Lunar;
- Ogonyok;
- Winner 395;
- Prince Hamlet F1;
- Regus F1;
- Sagas F1;
- Sunday Special;
- Sugar Baby;
- Charleston grey.
The ripening time for these varieties is within 60-80 days, which is quite enough for Russian mid-latitudes.
For growing watermelons in regions located in warmer climatic zones, varieties and hybrids with longer ripening periods are suitable.
Most popular:
- Astrakhan;
- Bykovsky-22;
- Volzhanin;
- Delicacy F1;
- Imbar F1;
- Crimson Suite;
- Black Prince.
The fruits of these mid-season varieties ripen in 80-90 days, but they are somewhat larger in size.
As for the southernmost, and therefore warmest, regions, the following late-ripening varieties are suitable for growing watermelons there:
- King of Hearts;
- Chill;
- Melitopolsky 60;
- Favorite of the Pyatigorsk farm 286;
- Icarus.
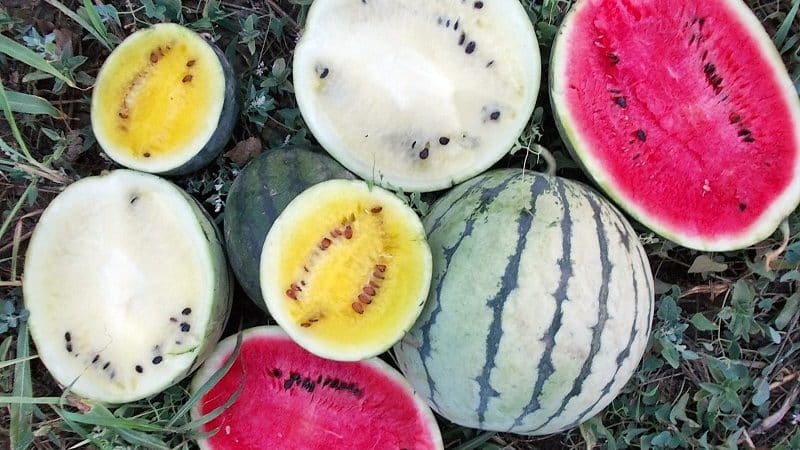
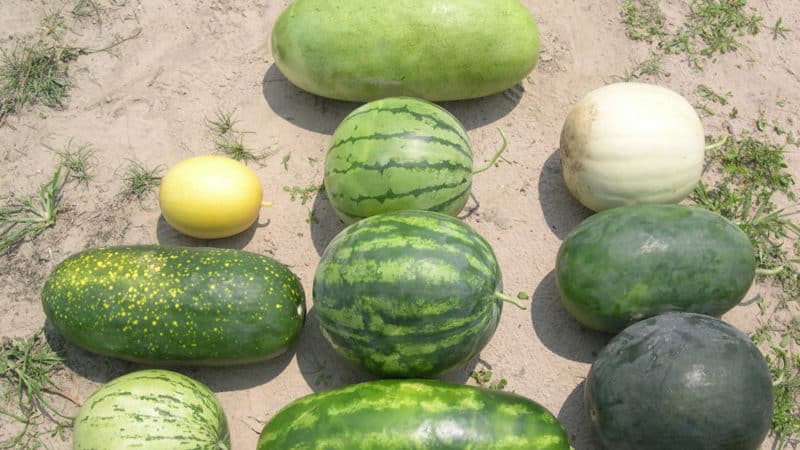
The ripening period for melon crops of these varieties is the longest - more than 90 days. However, their fruits are the largest in size.
The photo shows watermelons of different varieties.
Landing
Often, seedlings are used solely for later replanting in a greenhouse for faster fruit ripening. However, those who grow watermelons in open ground, You don’t have to deal with seedlings.
Seed preparation
To achieve good seed germination, before sowing, do the following:
- Calibration – sorting seeds by size. It is necessary to separate them because larger ones bones They develop more actively, and the smaller ones are killed. To balance the forces, the seed is divided into groups and sown in different beds according to size.
- Scarification – intentional damage to the seed shell. It is not necessary to perform the procedure at all. However, it speeds up seed germination. The operation is carried out by briefly rubbing each seed with a spout on fine-grained sandpaper.
- Warming up – unlike scarification, it is mandatory to perform. The procedure significantly accelerates seed germination. To do this, they are immersed in water heated to +50°C for 30 minutes.
- Disinfection – recommended disinfection procedure.It is carried out by immersing watermelon seeds in a light pink solution of potassium permanganate for 20-25 minutes, followed by natural drying without the use of heating devices.
Some summer residents, in addition to the above procedures, also germinate watermelon seeds immediately before sowing them. They are wrapped in a damp cloth and placed in a warm place near a heater or radiator. Complete drying of the fabric is unacceptable, so it is necessary to regularly spray it or moisten it with a damp hand.
Preparing soil and containers
Watermelon seeds are difficult to transplant, so each seedling is grown in a separate container with a diameter of at least 10 cm and a height of 12 cm.
Humus or peat-humus soil is suitable for growing watermelon seedlings. You can also use a mixture of humus and turf soil in a 3:1 ratio. In any of the mentioned substrates, it is necessary to add superphosphate or wood ash (1-2 tbsp per 1 kg of substrate) before sowing seeds in them.
To avoid subsequent picking, as well as possible injury to the root system of seedlings, it is very important to choose the right containers. The ideal option is plastic or peat cups, pots with a volume of 0.5-1 liters and a diameter of about 10 cm.
The main condition for such containers is the presence of a drainage hole. This does not apply to peat pots, which already allow moisture to pass through.
Sowing
Work order:
- A 2 cm layer of drainage is placed at the bottom of pre-prepared containers (broken brick, small expanded clay or perlite are suitable).
- Fill the container with soil mixture, not reaching the edges 20-30 mm.
- Moisten the soil abundantly with clean, settled water.
- Make a hole 3-4 cm deep in the center of the soil.You can do it with a wooden stick, pencil or finger.
- Place 1-2 watermelon seeds in the hole and cover them with soil, which is then compacted a little.
- Provide abundant watering.
- Cover the containers with lids or film.
Instructions for caring for seedlings
From the moment of sowing the seeds to planting in open ground, the seedlings grow in about 25-35 days. During this period, the watermelon requires good care according to all the rules:
- Immediately after sowing, containers with seedlings are placed in a warm place with a temperature of +23...+26°C.
- They are ventilated daily for 10-15 minutes, removing the covers or film.
- After the first shoots appear, the pots are placed on the south side. The room temperature is reduced to +21°C during the day and to +17…+19°C at night.
- Daylight hours for growing seedlings are maintained for 12 hours using phytolamps.
- Provide moderate soil moisture in containers with seedlings. Watering is carried out exclusively with filtered or settled warm water.
- Place the watermelon seedlings freely so that they do not crowd together.
- The seedlings need feeding. This is done in 2 stages: the first time - 7 days after the appearance of the first shoots with mineral complex fertilizer, the second - 7 days before planting the seedlings in open ground.
If the lower cotyledon leaves turn yellow, it is recommended to feeding ammonium nitrate or urea (urea), bird droppings or mullein, diluted in water in a ratio of 1:10.
How and when to transplant watermelons into open ground
In each region of Russia, the requirements for transplanting seedlings into open ground are different due to climatic conditions. Let's consider this issue using the example of the Moscow region:
- The optimal time for planting is the end of May, when the seedlings are 33-37 days old.
- The presence of 4 true leaves on each sprout.
- Before planting in open soil, seedlings must be hardened by exposing them to fresh air for 2-4 hours.
- Before planting, seedlings are sprayed with 1% Bordeaux mixture.
- Watermelons love free space and actively weave, so the optimal distance between them is 1 m.
Seedless growing method
It is best to start sowing watermelon seeds in the first half of May, since this crop is very heat-loving. If you do this too early, the plant will gain strength at a slow pace and will not have time to fully develop during the warm season.
How to grow watermelon without seedlings:
- Dig a hole 15-20 cm deep and 25-30 cm wide, water it with water.
- Fill the hole with a pre-prepared soil mixture, carefully level it and water it with water at room temperature.
- Place 5-7 sprouted watermelon seeds in the soil and sprinkle them with soil. Depth landings – 0.5 cm.
- The earth is lightly compacted to avoid the seeds being blown away by the wind or being injured.
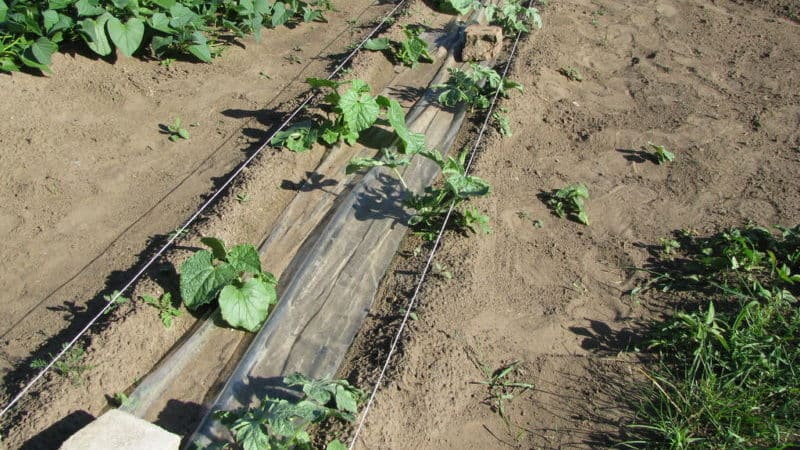
Further care
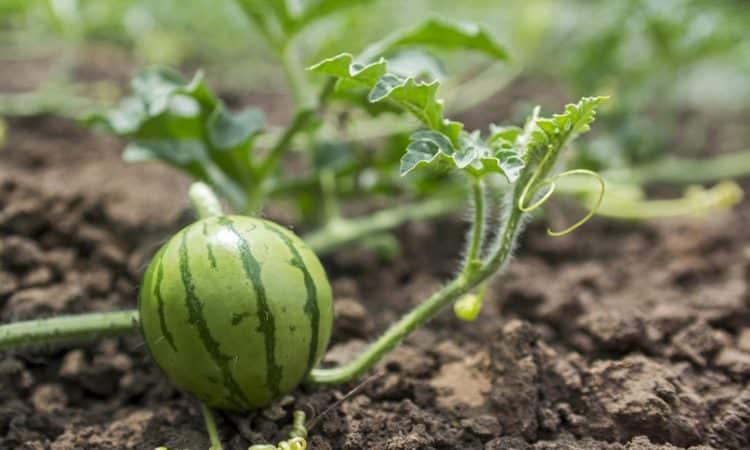
Growing watermelons in open ground is not too labor-intensive, but it still requires some effort.
How to care for watermelons:
- Water once a week. When flowers appear and in conditions of intense heat - twice. Water consumption – 7-9 liters per 1 sq. m. When fruits appear, stop watering.
- Fertilizing is carried out on the 10th day after planting. Chicken manure is diluted in water in a ratio of 1:12. Consumption – 1 l per 1 sq. m. After a couple of weeks, add nitroammophoska diluted in water - 1 tbsp. l. for 8-10 l. The expense is the same. The third feeding is done with infusion of ash - 5 tbsp. l. for 1 liter of water. Consumption – 500 ml for each bush.
- Trim the bush, leaving a maximum of 5 fruits.
Possible problems and ways to solve them
Watermelons are often attacked by pests such as meadow moth, wireworm, sprout fly, cutworm, and aphid. When they are detected, the plantings are treated with biological products (for example, Fitoverm).
In addition to pests, watermelon is susceptible to:
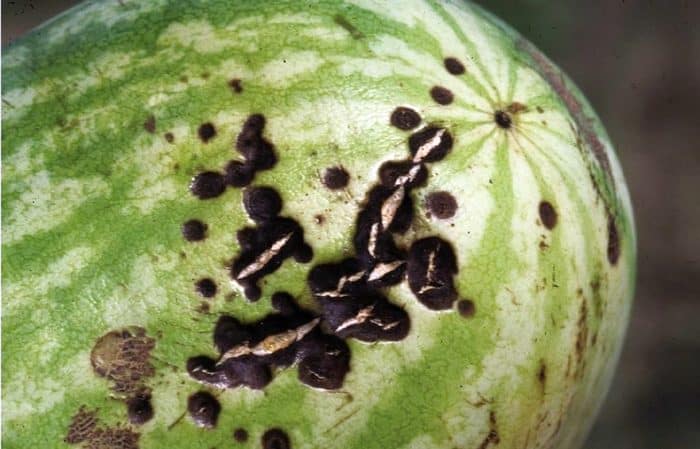
- Anthracnose. Brown or yellowish spots of uncertain shape appear on the leaves. Affected leaves dry out and fall off. The stem weakens and becomes brittle. Fruits affected by anthracnose become deformed and stop developing.
- Ascochyta blight. Yellow-brown spots appear on the foliage. It loses its elasticity, withers and falls off. Dry gray spots and later black dots form on the shoots. Fruits affected by ascochyta blight dry out and die.
Powdery mildew. The first stage of the disease appears as a whitish or gray-pink coating on the foliage of watermelons. It becomes deformed, dries out and falls off. Powdery mildew affects fruits very rarely. - Downy mildew. Brownish-yellow spots appear on the foliage, followed by the formation of grayish-purple lesions. They grow very quickly and cover the entire leaf. In just a few days, downy mildew can destroy an entire plantation.
Abiga-Pik, colloidal sulfur, Ordan, and HOM help fight such diseases.
Harvest and storage
Harvest dates are different for each variety, so we focus on the general signs of watermelon ripeness. The main one is a shrunken ponytail. A ripe berry will make a dull sound if you tap it with your finger. The combination of these signs serves as a signal for harvesting. Store watermelons in a cool and dark place.
Productivity per 1 ha
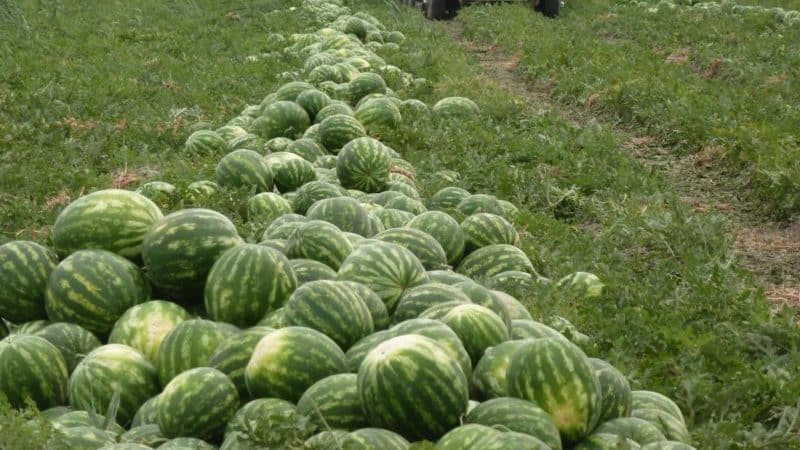
The yield of watermelons depends on the variety. On average, under favorable weather conditions and proper care, about 35 tons are harvested from 1 hectare.
Features of growing in a greenhouse
Since watermelons love space and are grown exclusively by trellis, the greenhouse for this plant should be relatively large in area and at least 2 m high. Otherwise, the principle is the same as when growing in open ground.
Advice from experienced gardeners

The main advice of experienced gardeners is to pre-disinfect both the greenhouse (or greenhouse) and the soil. Insecticides are used for these purposes.
From frost, seedlings are covered with 1.5 liter plastic bottles with a cut bottom and 5 liter cut plastic water bottles placed on top of them.
To prevent the fruits from rotting, flat, wide boards are placed under them.
To speed up the ripening of the ovary and obtain large and sweet watermelons, cut off the side branches, leaving no more than 5-6 fruits.
Conclusion
Growing watermelons is not a difficult task, but it does require some subtleties. If you follow all the above tips, an excellent harvest will be ensured. All season long you can enjoy the unique taste of this melon crop.