How to get a good pumpkin harvest: growing and caring in open ground, recommendations from experienced gardeners
The Mexican Indians were the first to grow pumpkins many centuries ago. They prepared various dishes from the bright fruits, made dishes and even rugs from pumpkin peels. The plant was brought to Europe by Spanish sailors about 500 years ago. Europeans liked the new product. Today, the healthy vegetable is cultivated on all continents except Antarctica.
In our country, pumpkin is loved by gardeners and gardeners. It is grown in all regions of the country except the Far North. The bright orange fruits are tasty, healthy and store well in winter. Decorative varieties of crops decorate an unsightly fence in a country house or garden plot. In this article we will talk about growing and caring for pumpkins in open ground.
Pumpkin varieties and their characteristics
Over the years of cultivation of the crop, dozens of varieties have been bred. Depending on the softness of the bark, the size of the pumpkins and the taste of the pulp, they are divided into 3 types:
- Die-hard. These pumpkins are distinguished by their hard, woody bark. The fruits are small and ripen earlier than others. The harvest is ready for harvest in August - early September. Vegetables store well and have the most delicious seeds.
- Large-fruited. These varieties are chosen for cultivation in household plots due to their high yield and sugar content of the fruit. The sugar content in some varieties reaches 15% (more than in watermelon).
- Muscat. Delicious and rich in vitamins.A distinctive feature of muscat varieties is the pentagonal stalk and elongated pear-shaped fruits. Such pumpkins ripen later than others and are very heat-loving, so in the Urals and Siberia they are cultivated through seedlings.
Interesting fact! The Irish and Scots were the first to carve lanterns from vegetables; for this they used rutabaga and turnips. Later, the tradition took root in the USA, where lamps began to be made from pumpkins.
Growing by seeds and seedlings
How to grow pumpkin fruits? The choice of cultivation method depends on the region of residence. In Ukraine and in the southern regions of our country, vegetables are planted with seeds immediately in open ground, in the Urals and in Siberia grown by seedlings. In the latter case, the ripening period is reduced and the harvest is harvested before the end of the season.
Growing from seeds
Paradoxically, the richest harvest grows not from fresh seeds, but from old ones. Therefore, the material is artificially aged by heating and soaking. To do this, it is wrapped in a dark-colored cloth and placed in the sun on a hot day (for 5-6 hours).
If warm weather has not yet set in, then use the oven to warm it up. The seeds are laid out on a baking sheet, placed in the oven and the temperature is gradually raised to +40 °C. After 3-4 hours, the seeds are removed and cooled.
After warming up, the planting material is soaked in water at room temperature or an ash solution (1 teaspoon of ash per 200 ml of hot boiled water). The seeds wrapped in cloth are immersed in liquid for 12 hours, then sent to the refrigerator. This way they will harden and in the future the plants will be able to withstand temperature changes more easily.
Growing by seedlings
Pumpkin is a southern crop accustomed to warmth and light.In the Urals and Siberia, summer is short and does not indulge in hot days. In such conditions, the optimal method of growing is through seedlings. In this case, the process of fruit ripening is completed before the end of the summer season.
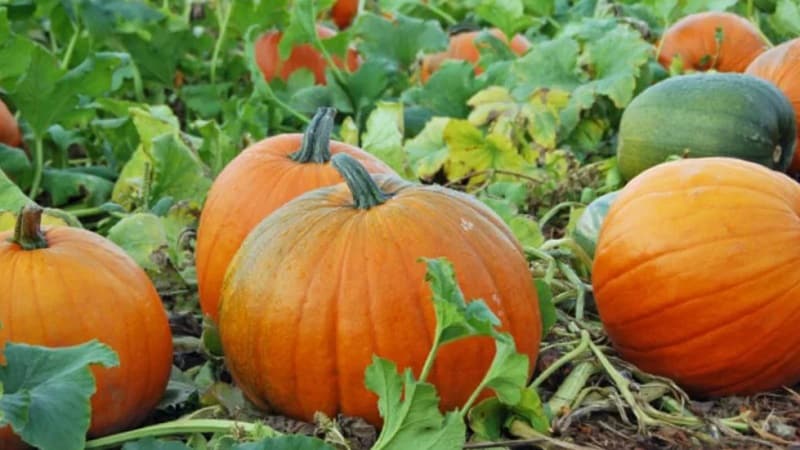
Sowing of seedlings is carried out about a month before planting in open ground. The crop is cultivated in a polycarbonate greenhouse or under a film cover. The soil in the structure must be heated to +15 °C.
How and when to grow pumpkin
Pumpkin is a surprisingly unpretentious plant that does not require the use of complex agricultural techniques. However, this crop also has its own preferences and secrets for increasing productivity.
Seed preparation
The key to obtaining a stable harvest is careful selection and step-by-step preparation of seed material. This is done in several stages:
- Visual inspection. All specimens with signs of disease or damage, as well as thin and small seeds, are rejected.
- Germination test. Selected grains are placed in a saline solution. The floating seeds are empty and will not sprout.
- Disinfection. An important stage that protects tender young shoots from diseases and pests. A solution of potassium permanganate has good disinfecting properties. The seeds are kept in it for 30 minutes. Then rinse with clean water and dry.
- Germination. Accelerates the emergence of seedlings. Planting material is germinated in damp cloth or sawdust.
Important! The cloth or sawdust should be damp, not wet. The seeds are not allowed to dry out.
After a few days, the first shoots appear. After completing all stages of preparation, planting begins.
Optimal temperature for seedlings or seeds
To obtain strong, healthy seedlings, ensure the correct temperature conditions.Until the seedlings emerge, the containers with the seeds planted in them are kept warm. Growing up, the culture often becomes very elongated.
To prevent this, the pots with seedlings are moved to a cool place with a temperature of +15...+18 °C during the day and +12...+13 °C at night. The plants are kept in the cold for about 7–10 days. Then the temperature is raised again.
Attention! Pumpkin loves warmth. When the temperature drops to +14 °C, the growth of the bushes stops.
Plants are ready for planting in the garden when they have 2-3 true leaves.
Soil preparation
Prepare the soil for seedlings yourself or buy special mixtures for pumpkin crops. The optimal soil for growing seedlings is a mixture of peat, rotted sawdust and humus (2:1:1).
The containers are filled to 2/3 of the volume with prepared soil. The soil is moistened with water at room temperature and sowing begins. Seeds are planted to a depth of 3-4 cm.
Advice! Pumpkin seedlings do not tolerate picking. Therefore, to grow pumpkin seedlings, use individual containers with a volume of at least 0.5 liters.
Preparing and planting pumpkins in open ground
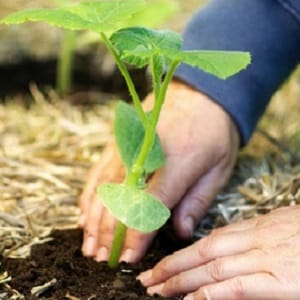
How long do seedlings grow at home? On average, 3-4 weeks after germination, the crop is transplanted to a permanent place. The plot for the pumpkin patch is prepared in the fall. The soil is dug up and fertilizers are applied. Immediately before planting, the soil is loosened and weeds are removed.
Sowing or planting in the beds begins when the soil warms up to +15 °C and the threat of frost has passed. Make holes 4-5 cm deep for seeds or the size of a container for seedlings. After planting, the bed is watered with warm, settled water.
Caring for a planted pumpkin
The first few days after planting, the crop is protected from cold and direct sunlight.To do this, use newspapers or special covering material.
Lighting requirements
Pumpkin bushes love sunlight. For cultivation, choose an open place illuminated by the sun from morning to evening. In the shade, the crop grows and bears fruit worse and often gets sick. If the area is small, then it is permissible to plant the pumpkin in partial shade.
Diseases and pests
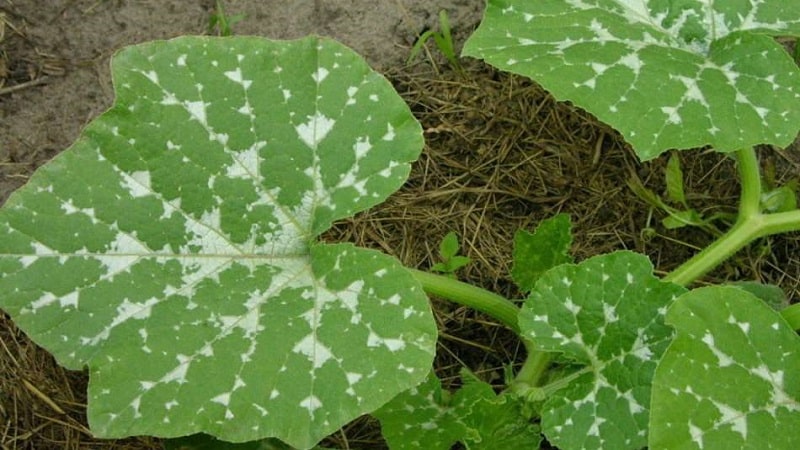
There are not many diseases and pests that threaten the pumpkin harvest. Plantings are affected by root and white rot, powdery mildew, and bacteriosis.
Root rot
The disease affects the root system of plants. The stems darken, the growth of the bush slows down or stops completely, the lower leaves dry out and fall off. The reasons are sudden temperature changes and watering with cold water. When the first signs of disease are detected, soil is added to the pumpkin vines. This way, additional roots are formed and the bush receives the necessary nutrition.
White rot
The leaves and stems of the bushes suffer, and a white coating appears on the foliage and vines. Tissues affected by rot become soft and slimy to the touch. At the first signs of disease, the affected parts of the plants are cut off. The bushes are treated with copper sulfate (30 g per 3 liters of water), paying special attention to the cut areas.
Powdery mildew
Powdery mildew is recognized by a white coating covering the leaves. The affected tops shrink and die. Treat sulfur disease. Sick bushes are sprayed with an 80% solution of colloidal sulfur or treated with a ground substance.
Bacteriosis
The development of bacteriosis is indicated by the appearance of brown spots on the leaves. The affected tissues dry out and die. Following the rules of crop rotation helps prevent the problem. If signs of infection do appear, the pumpkin is sprayed with 1% Bordeaux mixture.After a few days, the procedure is repeated.
Among the pests that are dangerous for pumpkin beds are melon aphids and spider mites.
melon aphid
The insect can be found on the underside of the leaves. Subsequently, aphids settle on ovaries and flowers. The pest feeds on the juices of bushes. Affected foliage curls, dries and falls off. The growth of culture stops.
To combat melon aphids, bushes are sprayed with chemicals (for example, “Karbofos”, “Commander”, “Iskra”, “Fury”). Among the folk methods, garlic infusion is effective.
Spider mite
The mite weaves around pumpkin bushes with a thin, light web, leaving many white puncture spots on the leaves. Affected leaves curl, turn yellow and dry out. If the pest is not dealt with, the entire bush will die.
In the initial stages of damage, spraying with a solution of laundry soap and onion peels helps. All diseased leaves are torn off and burned. In case of significant damage, special poisons against ticks are used - acaricides.
Cane formation and pollination
The vegetable’s homeland is the tropics, so the greenery of the bushes grows more intensively than the fruits. The formation of bushes allows you to speed up the formation and ripening of pumpkins.
Pinching begins from the main stem. The growth point is removed after the formation of 2–5 ovaries on the lash. The lash is pinched 5–7 leaves after the last fruit. Do the same with side shoots.
After the fruits have formed, all the leaves shading them are torn off.
Particular attention is paid to pollination of flowers. If the summer is rainy and there are few insects, female flowers are pollinated by hand. It happens that there are no men’s ones at all. In this case, the vegetable is pollinated by other pumpkin crops: for example, zucchini or squash.
Watering and fertilizing
Caring for beds involves regularly moistening and loosening the soil, removing weeds, and applying fertilizers.
Pumpkin plantings are watered not often, but abundantly. Use sun-warmed, settled water. Moistening the soil with cold water leads to rotting of the root system of bushes and the development of diseases. Water at the root, avoiding liquid getting on the leaves and flowers. Pumpkin especially needs moisture during flowering and ovary formation. Stop watering 2-3 weeks before harvest.
Large fruits cannot be grown in poor soil. To form and fill them, plants need a lot of nutrients. Fertilizers are applied 2-3 times per season. The first time the crop is fed at the seedling stage, the second time - a week after planting in the ground, the third time - after another 3-4 weeks. Ready-made complex fertilizers are used as fertilizing (strictly in accordance with the instructions). Wood ash and chicken droppings are also used.
Loosening and thinning
The developed root system of bushes needs oxygen. Therefore, the next day after watering or rain, the soil is loosened, while removing weeds. They do this until the green mass closes.
If there are a lot of leaves and they are large, the bushes are thinned out: shading of the ovaries has a bad effect on the yield.
Harvest and storage
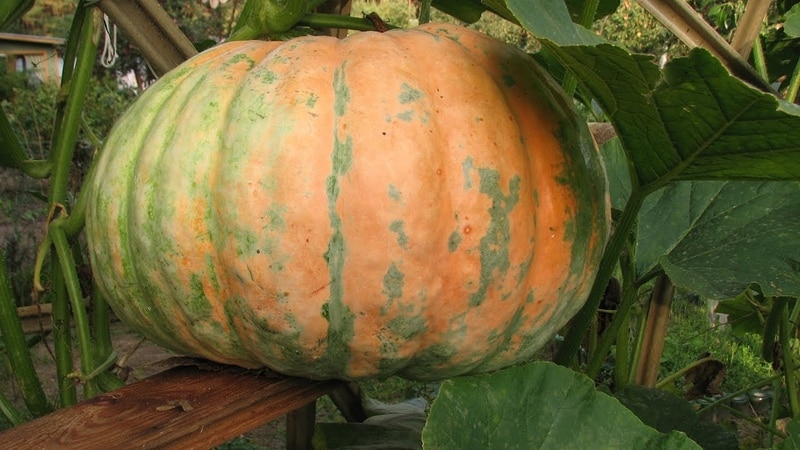
The rich color of pumpkins, dried vines and leaves indicate the arrival of harvest time. Fruits are removed from the garden in dry, warm weather, without waiting for the onset of cold weather. Frozen vegetables do not store well and are only suitable for immediate consumption.
Remove pumpkins carefully, avoiding impacts and mechanical damage. Leave a long stalk (about 10 cm).If the harvest was carried out in rainy weather, then the pumpkins are first dried in a closed, dry room and only then sent to winter storage.
The fruits have a long shelf life, while the pulp does not lose its taste. Some hard-barked and large-fruited varieties are left until the next harvest. Butternut squash don't last as long.
The harvest is kept in special storages, cellars and basements at a temperature of +1…+5 °C.
Predecessors of pumpkin
The place for pumpkin patches is chosen in accordance with the rules of crop rotation. Favorable previous crops are potatoes, cabbage, tomatoes, legumes, and onions.
Advice! In early spring, plant early-ripening crops: radishes, lettuce or greens in a free bed prepared for pumpkin.
Unsuitable predecessors for vegetables are related crops (zucchini, cucumbers, melons, squash).
Monthly care plan
After seedlings emerge or seedlings are planted in open ground in June, caring for pumpkin plantings consists of regular watering, fertilizing, loosening the soil and removing weeds.
In June, while the plants are still small, deep soil moisture is not required. After watering, the soil is loosened, providing the roots with access to oxygen. A few days after planting, fertilizers are applied (nitrophoska, ash, mullein or rotted manure).
By July, pumpkin bushes grow, forming a powerful root system. During this period, the soil is loosened carefully and shallowly so as not to damage the roots. Water generously, as large leaves evaporate a lot of moisture. They continue to apply fertilizing.
In August, watering is reduced, and at the end of the month it is stopped altogether. Fertilizers are no longer applied. During this period, the fruits accumulate sugar and gain sweetness.
Features of cultivation in different regions of Russia
The unpretentious pumpkin is cultivated throughout Russia, except for the Far North. Each region has its own characteristics of growing crops.
In Siberia and the Urals
In regions with cool and short summers, predominantly early and mid-ripening varieties are grown. When choosing, pay attention to the variety’s resistance to temperature changes.
In Siberia and the Urals, pumpkin is cultivated in seedlings, since the threat of return frosts remains even in June.
In outskirts of Moscow
Here, early ripening varieties are planted immediately in open ground. Mid-season and late - through seedlings.
Dates for planting pumpkins
When determining the timing of crop cultivation, they are guided by the climatic conditions of a particular region. It should be taken into account that Southern belle can't stand the cold. Planting in open ground is carried out only after warm weather has established.
In Belarus, Ukraine, and southern Russia, the dates fall in the second half of May.
In the Leningrad region and Moscow region - at the beginning of June.
In the Urals and Siberia - in mid-June.
Tips and tricks from experienced gardeners
The following recommendations from experienced farmers will help when cultivating pumpkin:
- when growing in areas with cool and short summers, use warm beds;
- sprinkle the side shoots with soil to form additional roots;
- follow the rules of crop rotation;
- place the pumpkin in sunny, spacious areas;
- Do not allow the fruits to come into contact with the ground: this may cause them to spoil. Place planks or other suitable material under the pumpkins.
Conclusion
Orange beauty pumpkin is a dietary product that does not require special care when growing. The key to obtaining a rich harvest is proper preparation of seeds and soil, correct choice of site, timely fertilizing and watering of the crop. Carefully harvested pumpkins will last until spring in a cool, dry place without losing their flavor.