Important steps for obtaining a good harvest of Alligator dill: from seed preparation to disease prevention
Dill is one of the most popular types of greens. There is hardly a summer resident who has never grown it. Housewives use almost all parts of this plant for cooking. Its leaves are added to salads and hot dishes, its inflorescences are used for winter preparations, and its seeds are considered an aromatic seasoning for fish and vegetable dishes.
Breeders have developed many varieties of greens. They differ in taste and size of the ground part, duration of the growing season and some other parameters. One of the most popular varieties of dill is Alligator. Is it just the name that makes this variety attractive and what gardeners need to consider when growing it - read on.
Description of the variety
Dill Alligator - a variety known to summer residents since 2002. The developer of the crop is the well-known agricultural company Gavrish in Russia. Its seeds are produced by various manufacturers in all countries of the former CIS.
The variety is characterized by increased cold resistance and is suitable for cultivation in all regions of the Russian Federation. The alligator is unpretentious in care and produces crops not only in black soil, but also in poorer soils.
The parameters of the variety ensure its popularity among gardeners. Unpretentious greens are distinguished by high yield and excellent taste of leaves.
Characteristics and description of the variety:
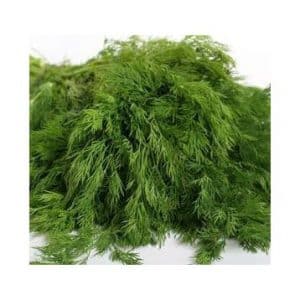
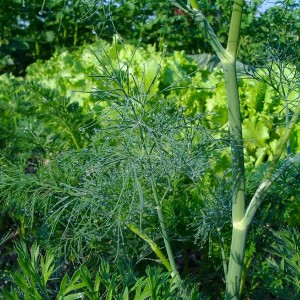
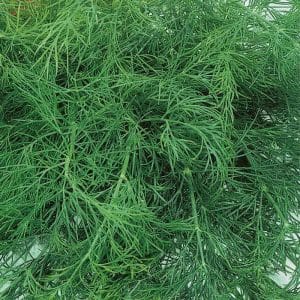
- The leaf rosette is large and raised. The leaves are strongly dissected, green in color, with a bluish undertone. The greens are juicy and dense.
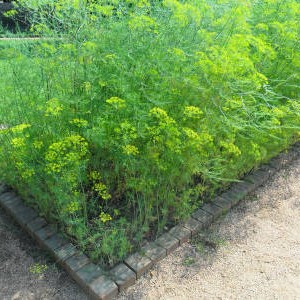
- The height of the bush reaches 1.5 m.The weight of green mass, depending on care, varies between 60-150 g.
- Plant later. Greens are harvested 45 days after sowing the seeds. Seeds are received only after 115 days.
- The alligator is easy to care for. It is resistant to cold weather. Able to tolerate frosts down to -6 °C. Suitable for growing in open ground, in a greenhouse and on a windowsill in all regions of our country.
- Dill has no immunity to disease.
- Productivity is high. From 1 sq. m on average they get 1.5 kg of greens.
Alligator greens can be cut several times per season. To do this, pinch off all the leaves except the top. After some time, new greenery will appear on the bushes.
Interesting. In the original, this variety of dill is called Alligator. People often call him the Crocodile.
The variety does not throw out inflorescences for a long time, so the harvest is harvested until late autumn. The only negative is that the older the dill, the tougher its leaves.
Advantages and disadvantages of Alligator
Dill Alligator has a number of advantages:
- cold resistance;
- ease of care;
- juiciness, meatiness and rich taste of greens;
- duration of harvest;
- high yield.
The Alligator has no disadvantages. Farmers who grow dill as a spice (for the sake of its seeds) consider the late ripening of the variety to be a disadvantage.
How to grow
Even a novice gardener can cope with growing dill. This greenery is easy to care for and resistant to adverse environmental factors.
Dill is grown without seedlings. Its seeds are sown immediately in open ground in autumn or spring. In the first case, the harvest will be ready for harvest much earlier.
Dill is also grown in a greenhouse. If the room is heated, greens are collected throughout the winter.
Preparing for cultivation and sowing seeds
Dill seeds require preliminary preparation. This will not only speed up their germination, but also reduce the likelihood of infection of adult plants.
Dill seeds have a film of essential oils. It protects seeds from bacteria and slows down appearance of the first shoots. It is removed before sowing.
At home, you can get rid of the oil film by soaking the seeds. They are kept for 2-3 days in water at room temperature, changing the liquid every 6 hours.
Advice. If you have an aquarium compressor, it is possible to carry out a bubbling procedure. To do this, the seeds are placed in warm water with the compressor turned on for a day. During this time, air bubbles will gently remove the oil layer from the sedimentary material.
After soaking, the seeds are disinfected. This is done in one of the following ways:
- 30 minutes in a light pink solution of potassium permanganate;
- 15 minutes in hydrogen peroxide;
- 2 hours in phytosporin;
- 12 hours in a soda solution prepared from 1 tbsp. water and 1 tsp. soda;
- 12 hours in aloe juice, diluted half and half with water.
The soil for growing dill is prepared in the fall, regardless of when the seeds are planned to be sown. To do this, it is dug up and cleared of plant debris. For every 1 sq. m of soil add 6 kg of humus or manure.
Before sowing seeds, the beds are watered with a solution of copper sulfate. It is prepared by adding 1 tbsp to 10 liters of boiling water. l. vitriol.
For dill, choose well-lit areas of the garden. With a lack of light, the greens will turn yellow.
It is not recommended to plant dill in the same place for several years in a row. It is better to grow it in areas of the garden where fruit crops previously grew.
If dill is sown in winter, then this is done at the end of October or at the beginning of November.In spring, the seeds are placed in the ground as soon as the snow melts.
Alligator seeds can germinate at a temperature of +3°C:
- make grooves 2-3 cm deep at a distance of 10 cm from each other;
- seeds are scattered in one line along the bottom of the depression;
- the grooves are sprinkled with soil (preferably humus or peat), which is lightly compacted;
- the beds are watered with warm, settled water;
- The crops are covered with film until germination.
If dill was sown in early spring, then in case of severe frosts it is recommended to cover the beds with film even after the first shoots appear. This is especially important to do at night.
After the first shoots appear, the vegetation is thinned out. There should be 10-15 cm free between the bushes.
Advice. Some gardeners cut off dill bushes completely 40-45 days after the first shoots appear. They then reseed the beds with this crop. So over the summer it is possible to collect young greens several times.
Watering
Dill is watered 1-3 times a week, depending on how hot the summer is. For 1 sq. m use at least 5 liters of water. It should be warm and settled.
Plants are watered in the morning or at sunset. If you do this when the sun is active, burns will appear on the leaves, and the risk of developing diseases will increase.
While the plants are still small, the soil is loosened after each watering. This is necessary to destroy the earthen crust, which prevents full root air exchange and promotes stagnation of water in the roots. If this is not done, the root system will begin to rot, and fungal infections will have ideal conditions for development.
Feeding
Gardeners' opinions are divided on whether it is worth fertilizing dill beds. Some believe that this will help plants increase maximum green mass.Others claim that it is unsafe because the greens accumulate chemicals that have fallen into the ground.
To get a bountiful harvest and avoid the accumulation of harmful substances in dill, special attention is paid to adding organic matter to the beds before sowing the seeds. Potassium and phosphorus fertilizers are applied during plant growth if symptoms of a lack of such substances appear (yellowing of leaves and loss of turgor).
Soil care
In the first two weeks after the first shoots appear, dill beds are regularly cleared of weeds. At this stage, harmful plants negatively affect the roots of dill and often lead to a slowdown in its development and death.
When the plants grow up, there is no need for weeding. Dense plantings of dill prevent weeds from developing.
If you plan to sow dill multiple times in the same beds in one summer, then the beds are prepared before each new batch. The dill roots remaining after cutting off the above-ground part are dug out of the ground. The soil is watered with a hot solution of copper sulfate and mixed with a new portion of fertilizer (if you re-apply organic matter, 2-3 kg per 1 sq. m will be enough).
Prevention of diseases and pests
Alligator dill is susceptible to a number of diseases, but since the greens absorb chemicals, it is not recommended to treat them with store-bought potent products. To minimize the risk of plant infection, it is important to follow the rules of prevention:
- Disinfection. Pathogens are transmitted through soil, garden tools and planting material. Therefore, they must be treated with disinfecting compounds.
- Compliance with crop rotation. It is not recommended to plant dill in beds after any greenery for several years in a row.It grows best after fruit crops.
- Proper watering. Watering plants with cold water will make their roots more vulnerable. High soil moisture is ideal for fungal infections, while drought will promote the development of viruses.
Most often, dill is affected by fomoz, powdery mildew and blackleg. If symptoms of these diseases are detected (darkening of the stem, white coating on the leaves), the diseased plants are removed. Healthy ones are sprayed with a light pink solution of potassium permanganate. If this does not help, you will have to pull out all the dill in the garden and water the soil with copper sulfate. Such beds are not used for the next 2 years for growing dill.
To prevent damage to plantings pests they are sprayed with a soap solution (1 piece of laundry soap is rubbed into a bucket of water) or pepper tincture (3 hot peppers minced in a meat grinder are taken per 5 liters of water).
Features of growing dill on a windowsill
Dill is grown not only in the garden, but also on the windowsill - throughout the year.
Dill will need nutritious soil. To do this, mix garden soil or peat with humus in equal proportions. Add half a portion of sawdust or sand to the mixture. In prepared soil, dill does not need additional fertilizing during the growth period.
The alligator is grown in individual pots (special pots, 0.5 liter disposable cups, plastic mayonnaise buckets) or in a common spacious container (wooden boxes, plastic trays).
To grow dill on a windowsill you will also need drainage. Use any small pebbles, shell rock and broken ceramics.
The soil and drainage are disinfected. They are calcined in the oven or poured with boiling water.The containers are soaked for half an hour in a dark pink solution of potassium permanganate.
3-4 seeds are sown in individual pots. Grooves 3 cm deep are made in the boxes at a distance of 5 cm from each other. Seeds are poured into them. After the first shoots appear, the dill is thinned out. Leave a distance of at least 10 cm between plants.
In summer, dill grown on a windowsill will have enough sunlight. In autumn and winter, it is advisable to additionally illuminate the plants with fluorescent lamps. Otherwise, the greens will turn out yellowish.
There is no point in waiting for the seeds to appear in pots. Plants are completely cut off as soon as they gain green mass.
note! Late varieties of dill are best suited for growing on a windowsill. Alligator is one of them.
Reviews from gardeners
Reviews from gardeners about Alligator dill are mostly positive. The variety is easy to care for and cold-resistant with high yields.
Valentina, Tula: “I raise alligators all year round. In winter on the windowsill, in summer, spring and autumn - in the country. Very unpretentious, I don’t get sick, it grows almost independently. I water it only once a week. The bushes turn out fluffy and large, as in the photo. I cut them off completely while they are young, and then sow new ones. I leave the first few plants for seeds, which I use both for planting and as a seasoning.”
Valery, Dnepr: “I’ve been planting an alligator for several years now. Excellent high-yielding dill. Requires minimal care and rarely gets sick.”
Read also:
An effective remedy for facial beauty: dill.
What does dill decoction help with, how to prepare and use it correctly.
Effective dill treatment for urinary incontinence: folk recipes and dosage regimen.
Conclusion
Dill Alligator is distinguished by its beautiful dark green greenery with a bluish bloom and a rich aroma. It does not throw out the inflorescence for a long time, which allows you to get tasty greens until the end of summer. The variety is easy to grow. It is cold-resistant and easy to care for.