We protect the future harvest from pests and diseases - proper processing of garlic before planting
Such a useful plant as garlic is a relatively unpretentious crop. In some cases, it even grows on its own as a weed, with large heads and a bountiful harvest. But not all gardeners are so lucky. It also happens the other way around - a lot of unsuccessful attempts, resentment and disappointment because of small fruits that rot even after thorough drying. Why is this happening? In most cases, due to basic mistakes that novice gardeners have never heard of.
There are two types of garlic, which differ in the timing of planting the cloves in open ground and the time of harvesting. Spring garlic is planted in early spring and ripens in late summer. The winter variety is planted in the fall and harvested in July.
Spring garlic heads are smaller, but store better. The teeth in the winter bulb are located around the trunk, while in the spring bulb they are arranged in a chaotic manner. Winter garlic is very popular among gardeners, but some prefer spring varieties. To get a high-quality, long-lasting harvest with large heads, it is important to follow simple rules for preparing garlic for planting in spring or autumn.
Processing spring garlic before planting
These varieties of garlic are among the first crops to be planted early in open ground. Determining the optimal planting time is simple: as soon as the snow has melted and the frosts have stopped, wait for clear weather.
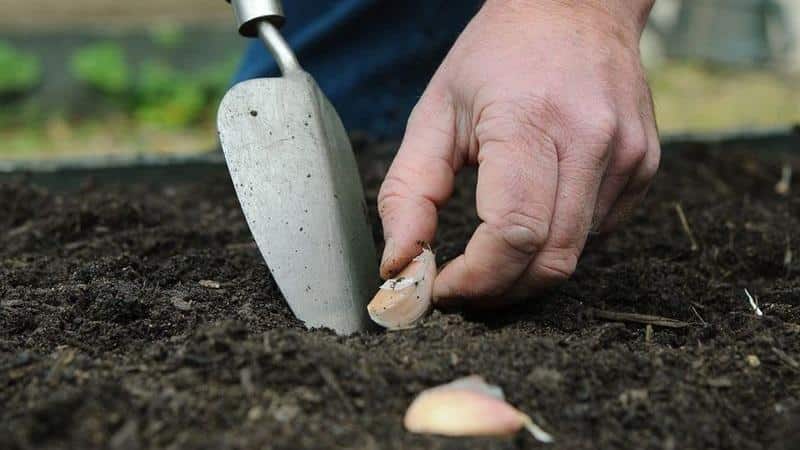
The soil should warm up well under the sun's rays during the day, but not dry out. Moisture from melted snow, vital for future crops, should remain in the soil. In temperate climates, spring garlic is planted around mid-April. An air temperature of +5ºС and above will contribute to the active growth of crops.
Where do you start preparing for planting spring garlic? First, you should inspect and select suitable bulbs, then prepare the cloves for planting. Before planting in the ground, be sure to disinfect the planting material. This guarantees a high-quality harvest that will not be affected by pests or diseases during the growth process.
Garlic is disinfected in the following ways:
- treat the teeth with copper sulfate;
- use a solution of wood ash;
- soak briefly (3-4 minutes) in a solution of table salt;
- disinfect with ash liquor;
- etch with Fitosporin.
We will consider each stage in more detail below.
Selection and preparation of cloves
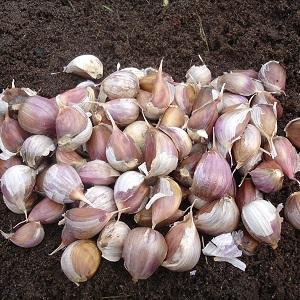
How to prepare garlic for planting? The process begins with a visual inspection of the selected heads. It is recommended to use last year's harvest for sowing. We select the best and largest healthy bulbs. Species with bluish or pinkish husk are preferable. Those that are not overdried will germinate faster.
Important! The heads must be clean, without signs of rot or any damage.
Spring garlic is planted as individual cloves, and whole heads. For planting, it is better to use varieties that meet certain climatic conditions.
The cloves are selected and separated from the head immediately before planting, otherwise you can dry out the bottom, which will significantly delay germination. Carefully separate each element from the head.It is important that there is no damage to the husk, lower or upper edge of the tooth. If you come across a large onion, but its cloves are small, it is better not to use such material for sowing.
The next step is calibration. We sort the teeth and sort them by size (we will plant them in the same way).
Soil preparation - putting the area in order
One of the factors that invariably affects the quality of the crop, – competent choice of location and proper preparation of beds. It is better to plant garlic after crops such as cabbage, peas and zucchini. Agronomists do not recommend planting it after turnips, carrots and spices.
There are two ways preparing the soil for planting spring garlic in the spring:
- Preparing the soil in the fall. With autumn digging, a compost solution (in a proportion of 10 liters per 1 sq. m of bed), wood ash (1 kg per 1 sq. m) and double superphosphate (10 g per 1 sq. m) are added to the soil in the area chosen for garlic.
- Spring preparation of beds. With spring deep loosening of the soil, humic fertilizers are added to the soil (10 liters of solution per 1 sq. m of bed) with wood ash (1 kg per 1 sq. m) and “Azofoska” (1.5 tbsp. per 1 sq. m ).
 Another option for spring tillage in front of the plantings - well-rotted manure in combination with wood ash (10 kg of humus and 3 tbsp. ash per 1 sq. m).
How to use fertilizers correctly? It doesn’t matter whether it’s winter or autumn, the soil needs to be dug up with one shovel, fertilizer added and a bed formed. Then thoroughly loosen the soil and level it.
Reference. In some cases, the bed is raised 10-15 cm above the level of the garden. To better retain moisture, a small border of black soil is made around the perimeter of the bed.
Before planting crops in the spring, it is advisable to disinfect the soil from possible viruses and pests with a weak saline solution. Dissolve 60 g of salt in a bucket of water and saturate the bed.
Treatment of spring garlic from pests and diseases
Treating garlic against diseases and pests before planting – the most important and mandatory stage. We process the teeth immediately before planting in the ground. First, decide which method is best to process the planting material, prepare the necessary ingredients and follow further instructions.
Read more:
Top 30 best varieties of garlic
Soaking in a solution of wood ash
This method helps accelerate the germination of spring garlic. It is better not to soak winter varieties in such a solution before planting. It is recommended to keep the garlic in the refrigerator for about 30 days before processing.
For the solution, pour 2 cups of ash 2 liters of hot water. We wait until the solution cools and the mixture separates. We pour the light top layer of the mixture into a separate container and soak the prepared planting material in it. After an hour, we remove the teeth, dry them and plant them in the ground.
Treating cloves with copper sulfate
Copper sulfate is a universal disinfectant for plant crops. To treat garlic cloves, a 1% solution of the substance is used.
There are two ways:
- Soak the planting material for 3 minutes in the solution. Then we remove them, dry the teeth and plant them in the garden.
- A more correct way to process garlic is in two stages. First, keep the material for a couple of minutes in a solution of table salt (3 tablespoons per 5 liters of water), this is necessary for additional disinfection. Then half an hour in copper sulfate (1 teaspoon of substance per bucket of water).
To prevent fungal infections, copper sulfate is used for already sprouted crops.. The solution is made in approximately the same way as for pre-sowing treatment, but additionally 1 tbsp is added to it. l. crushed 72% laundry soap.
Soaking garlic in a solution of potassium permanganate
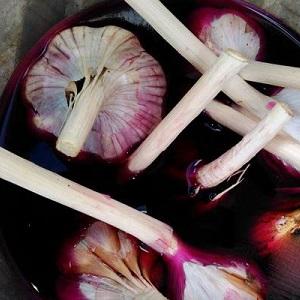 Treating garlic with potassium permanganate before planting involves soaking the teeth in a weak solution for 12 hours.
Complex processing is also carried out with potassium permanganate:
- The first stage is soaking the seed in a solution of “Nitroammophoska” (1 tablespoon of substance per bucket of water). The teeth should remain in it for 24 hours.
- Then the teeth are kept in a weak saline solution for 20 minutes.
- The final stage is a 20-minute treatment of the material with a 1% solution of copper sulfate.
Disinfection with “Fitosporin”
The drug is based on the action of beneficial bacteria, which destroy harmful microorganisms and fungal infections.
Prepare the solution according to the instructions indicated on the package and keep the garlic cloves in it for half an hour to an hour. Then the same composition can be used to treat the beds before planting.
Fitosporin-M improves crop growth and has a general strengthening property.
Processing garlic before planting in saline solution
This approach destroys possible fungal infections and any pathogenic bacteria.
Immediately before planting, soak for 3 minutes. seed in saline solution (6 tablespoons per 10 liters of water). We plant the teeth in the ground immediately after removing them from the solution, without washing or drying.
Disinfection with ash liquor
Ash liquor is the same solution of wood ash. In addition to disinfecting the teeth, it also serves as a mineral fertilizer, which has a positive effect on crop growth.
Prepare the ash liquor solution with the same proportions as the ash solution. The only difference is keeping it on low heat for at least half an hour. In the top layer of the mixture, poured into a separate container, soak the garlic for an hour.
There is another way to prepare the product and material processing. Sift 1.5 kg of ash several times to remove large fragments. Add the sifted material to boiling water (5 l) and bring the mixture to a boil. Before soaking the garlic, dilute the resulting cloudy liquid with plain water approximately 1:1. Soak the garlic in this solution for at least 20 minutes.
Read more:
How to prepare a bed for planting garlic before winter
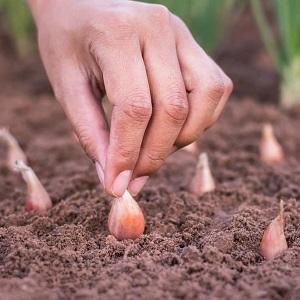 Planting winter garlic differs from the spring variety in thatthat the first species is planted in late autumn, preventing its early shoots.
To begin, select a site for the future garden bed.. It is advisable that the place be elevated and receive a lot of sunlight. The main criterion for choosing a site is that melt and rain water should not stagnate on it. If you choose an area where there is almost no sun, the harvest will be pale and small.
You can select an area where legumes grew (beans, peas), zucchini, cucumbers, cabbage, etc.
Digging the beds involves adding fertilizers.
Attention! Do not add fresh manure to the soil. It will provoke deformation of the developing head and entail a significant loss of yield.
It is best to treat the soil before planting winter garlic with potassium salt and superphosphate.. You can also sprinkle already formed beds with wood ash.
Dug up and leveled beds need water well.
A prerequisite for planting winter garlic is soil disinfection.. Before planting the planting material, we carry out the procedure in two stages. Before planting the crop, we spill the prepared bed with a weak solution of copper or iron sulfate at the rate of half a bucket per 1 square meter. m.
The second time we treat the soil with nitrogen fertilizer urea within 24 hours. before the scheduled landing. We dissolve the substance in water or scatter it dry, but be sure to water it after that. The approximate consumption of the product is 15-16 g per 1 sq. m.
Important! After treating the soil with dry fertilizer, be sure to water the bed before planting so that the product dissolves and releases useful minerals to the soil. The dry product can burn the seedlings.
How to treat garlic before planting before winter
Before processing, planting material must be selected. As in the case of spring garlic, the heads must be inspected for damage and the largest ones must be selected. Shortly before planting, divide into slices, choosing the largest ones.
Attention! If the head consists of 3 or 4 teeth (even though they are large), then it is better not to use such material for planting. This is a sure sign that the culture is beginning to degenerate.
If there is more than enough planting material, we select the largest cloves for planting. If there is not enough garlic, we perform calibration - we sort the cloves by size and then plant them in groups. This approach will give more uniform seedlings and, accordingly, a harvest.
Garlic cloves should not have damage on the peel and bottom. You should not select wet tines for planting, as this will provoke early germination of the crop. Before winter, this is completely unnecessary, since the plants will simply freeze.
To prevent garlic from rotting in the ground, we process the cloves immediately before planting in the ground.
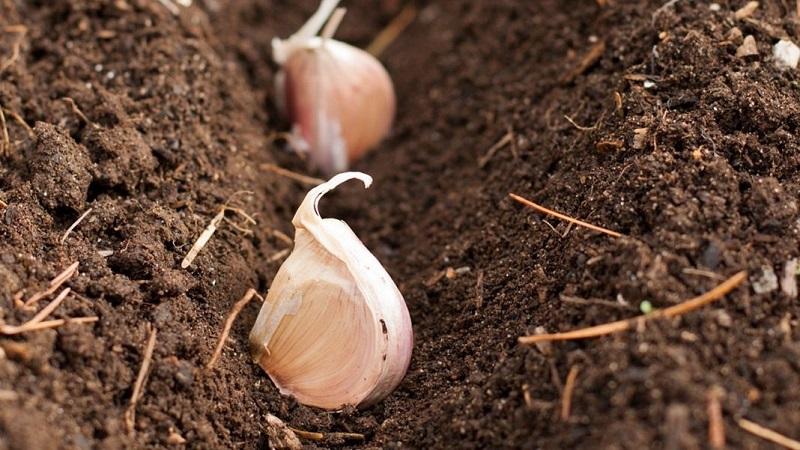
How to process garlic? We do this in the following ways:
- Soak the teeth for 10 hours in a 1% solution of copper sulfate. It is more convenient to do this in the evening before the morning landing.
- Before planting, we also process winter garlic in stages in three solutions: soak for a day in Nitroammofoska (1 tbsp per bucket of water), for 20 minutes in a salt solution (10 tbsp per bucket of liquid) and for a minute in copper sulfate (the proportions are the same as with “Nitroammophoska”) immediately before planting.
- To process winter garlic, you can use the drug “Maxim”. Its difference is that it, having a completely natural origin, serves as a kind of antibiotic and acts throughout the entire period of growth and development of the culture. We dilute an ampoule of the product with 1 liter of water and place the planting material there for half an hour. After use, the solution can be poured onto the garden bed before planting.
- We treat winter garlic with a solution of wood ash. The recipe for preparing the substance and the processing principle do not differ from spring garlic.
- You can disinfect planting material in a saline solution by placing the teeth there for 1-2 minutes before planting, then for a minute in a solution of copper sulfate.
- The drug “Fitolavin” will protect against various infections and protect the plant from possible root rot and fungus. The substance is highly effective and can cure even disease-affected plants. The rules for using the substance are indicated in the instructions on the packaging for each specific case.
- Treatment with a slightly pink solution of potassium permanganate. Place the seedlings in the solution for an hour before planting.
- Another option is to treat winter garlic with Fitosporin. The proportions of dilution of the substance and the processing time are completely identical to the version with the spring variety of the crop.
Proper processing of garlic in the fall will allow the plant to develop normally. and please the owner with a bountiful harvest for the summer.
Do I need to peel winter garlic before planting in the garden?
Garlic peel is a natural protection for the teeth from pests and infections.. There is no need to remove it under any circumstances. Firstly, the plant will be unprotected. Secondly, you can accidentally damage the bottom of the tine, and the seedling will not be able to germinate.
After what crops is it best to plant garlic?
 Winter and spring garlic will give a bountiful harvest if you choose the right place for planting. In addition to the fact that it is advisable to make the bed on a hill and with free access to sunlight, it is extremely important what previously grew in the chosen place.
There will be a good garlic harvest if the crop is planted after:
- green manure;
- squash and pumpkins;
- cucumbers and zucchini;
- 40-day potatoes;
- early and cauliflower;
- peas, beans and beans.
It is highly undesirable to plant garlic if in the chosen place carrots, turnips, herbs and spices grew.
Neutral crops:
- late cabbage;
- pepper;
- tomatoes;
- garlic;
- beet;
- eggplant;
- onion.
Results
Properly preparing garlic for planting is half the success on the path to a bountiful harvest. All stages are important - from choosing a location to the necessary treatment of plants with fertilizers, natural antibiotics and useful minerals. You will find some more important tips for preparing garlic before planting in the video.