Step-by-step guide to growing Exhibition onions through seedlings
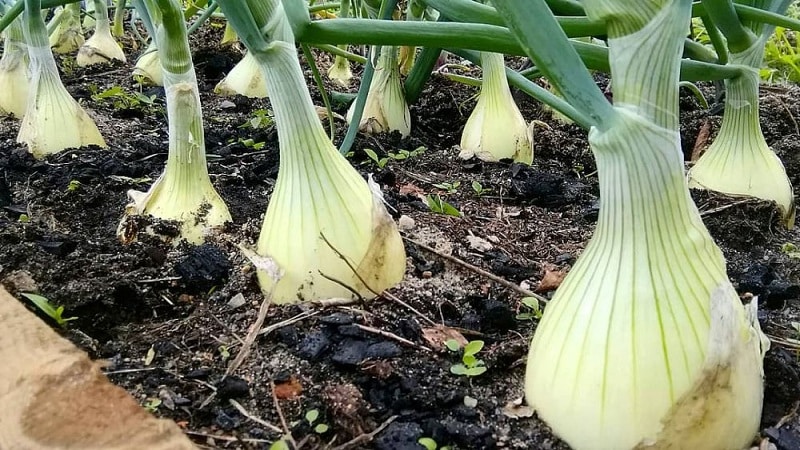
Dutch bow Exhibition It has a perfect oval bulb shape and a sweet taste, devoid of bitterness. When cutting, tears do not flow, and the pleasant taste allows you to eat it raw, like an apple. If you follow the rules of agricultural technology, you can grow giant bulbs weighing up to 1 kg.
In this article we will introduce you to the method growing onion Exhibition from seeds through seedlings. You will learn what its advantages and disadvantages are, as well as how to care for plantings to achieve the best results.
Description of the variety
Exhibition onions were bred by Dutch breeders of the company BEJO ZADEN B.V. at the end of the twentieth century. The variety was included in the State Register of Russia in 2000. It has received permission to be grown in all regions of the country as an annual crop.
Exhibition onions are grown mainly by seedlings in the regions of the middle zone, the North-West, Siberia and the Urals. In the southern regions they practice planting seeds and sowing in open ground.
The table shows the main characteristics of the variety.
| Indicators | Characteristic |
|---|---|
| Ripening period | 130 days from germination to lodging of leaves |
| Bulb shape | Oval, flattened |
| Weight | Average - 170-550 g, maximum - 1 kg |
| Coloring | The husk is straw-yellow, the scales are white |
| Taste | Sweet, no bitterness |
| Productivity | 4.3-5 kg/1 m² |
| Maturation before harvesting | 66% |
| Storage | 3-4 months, then begins to germinate |
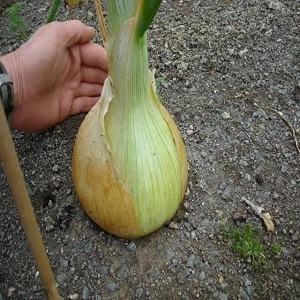
Pictured is the Exhibition bow.

Advantages and disadvantages of growing through seedlings
Variety Exhibitions are grown mainly by seedlings, which have a number of advantages over direct sowing in the ground.
The seeds have a low percentage of germination (40-45%), and seedlings quickly take root in a new place, provided that agrotechnical nuances are observed.
The seedling method allows you to grow heads with maximum weight.
Seedlings can easily tolerate transplantation even in the absence of an earthen lump on the roots. It is important to keep the main root intact and intact.
The only drawback is that this is a troublesome and labor-intensive method that requires constant attention to the seedlings on the part of the gardener.
Landing dates
The manufacturer recommends sowing seeds for seedlings from March 1 to March 10. In regions with harsh climatic conditions, the dates are shifted a week later, that is, sowing begins in mid-March.
The main task of the gardener is to grow strong seedlings before transferring them to a permanent place in early May.
How to grow seedlings
Growing Exhibition variety seedlings is a difficult task, but feasible even for a novice gardener, provided that the rules are strictly followed.

Seed preparation
Dutch seeds do not require soaking in disinfecting solutions and germination stimulants; they are already covered with a protective coating. However, to be safe, they are treated with a dark solution of potassium permanganate (1 g per 1 liter of water) for 5-6 hours, maintaining the water temperature at +40°C.
Then the seeds are washed with clean water and placed on damp gauze or a thick layer of paper napkins. Cover the top with a damp cloth or napkin and keep in a warm place until the sprouts appear, maintaining constant humidity. To stimulate germination, aloe juice is added to the water.
Ground
Seedlings are grown in loose, breathable soil.Ready-made substrate from the store is quite suitable for this purpose.
To independently prepare the soil mixture, use turf soil, humus, rotted mullein and river sand (sawdust, onion peels) in a ratio of 10:9:1. Soil from the garden is first disinfected by heating it in an oven, steaming it in a double boiler, or spilling it with a strong solution of potassium permanganate, copper sulfate, or Fitosporin.
Tara
Exhibition onion seedlings are grown in narrow and tall cups or black plastic bags without picking. They are available for purchase at gardening stores.
You can make the container yourself from thick film. Polyethylene is wound around a toilet paper roll or other suitable object, securing the edges with tape or a stapler. The bottom is carefully sealed and prepared soil is poured into homemade containers. The glasses are then placed in boxes. This is one of the most optimal ways to prepare containers, allowing you to easily remove seedlings without damaging the root system.
Sowing instructions
Place the first batch of sprouted seeds into containers filled with soil to a depth of 1 cm. Sprinkle the top with a 1-1.5 cm layer of soil and water generously with clean, warm water. The remaining seeds are planted as they hatch.
A plastic film is stretched over the top or glass is placed to create a greenhouse effect. The boxes are left in a dark room at a temperature of +20...+25°C for 7-10 days.
As soon as the first shoots appear, the shelter is removed, the seedlings are placed on the windowsill on the south side, but the air temperature should be lower - +14...+17°C. It is important to provide the seedlings with sufficient sunlight. If necessary, seedlings are illuminated with a phytolamp.
Further care
Proper care is the key to obtaining healthy and strong seedlings:
- The optimal temperature regime is +10…+22°С.
- The soil is watered daily, adding 1 g of potassium nitrate to 1 liter of water.
- The room is ventilated once every 3 days.
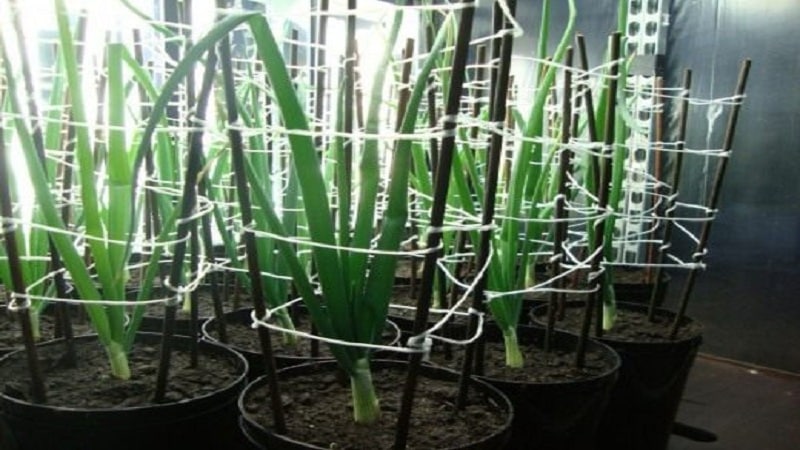
- As the seedlings grow, they are supported with homemade supports made of wire, wooden skewers and jute. Seedlings should stand upright, without falling over on their side.
- Long, drooping feathers are carefully trimmed, leaving at least 10 cm.
- Two weeks before planting in the ground, the seedlings are taken out to the balcony for hardening.
Planting in open ground
The seedlings are transferred to open ground in the first ten days of May. The site is chosen on the sunny side of the garden - Exhibition loves the sun.
The ideal soil is loose, breathable, saturated with nutrients, with a neutral or slightly acidic reaction (pH = 6.5-7.5).
The soil is not fertilized with fresh manure, otherwise the pulp will be too soft, watery and tasteless. In autumn, the soil is plowed, plant debris is removed and fed with a mixture of 2 buckets of humus, 50 g of superphosphate, 2 liters of wood ash per 1 m². In the spring, the area is loosened, leveled and watered with Fitosporin solution.
The holes are formed with your finger to a depth of 2.5-3 cm. The planting pattern is 20x30 cm.
The plantings are covered with agrofibre or a temporary greenhouse is installed to protect against night frosts in May.
Care

Rules for caring for Exhibition onions:
- Moderate watering. The plant does not tolerate either excess or deficiency of moisture. Watering frequency is 2 times a week in moderate weather and 3-4 times in drought. At the end of July, watering is completely stopped.
- Mulching the soil. Covering row spacing with straw, hay, sawdust, dry leaves, pine needles, moss, and peat retains moisture in the soil and inhibits the growth of weeds.
- Loosening and weeding. After each rain and watering, it is recommended to loosen the earthen crust to improve aeration of the underground part. Weeds are removed as they grow, preventing them from taking root. Mulching reduces labor costs.
- Feeding. The area with onion plantings is fertilized once every 2 weeks using a solution of mullein (1:10) or urea (10 g per 10 liters of water).
Diseases and pests
The most common onion diseases:
- Rot - a fungal disease that is difficult to detect at the initial stage of development. Fungi first attack the bottom, and white rot develops on it. Then the infection penetrates inside the bulb, softening its structure. The growth of the plant stops, the leaves fall to the ground. There is no treatment for the disease. The affected bulbs are destroyed.
- Smut appears as translucent silvery stripes on the leaves. If the affected parts are removed in time, the spread of the disease can be stopped. There is no specific treatment. Onions are planted again in the same place after 4-5 years.
- Nematode The stem plant eats the bulbs from the inside. The main symptom of infection is curled, yellow leaves. The underground part is rotting and cracking. Affected plants are completely removed from the site and burned. To prevent the spread of the pest, the soil is treated with slaked lime and healthy material is planted. It is undesirable to use chemicals for treating plants due to the risk of poisoning. Traditional methods are ineffective.
- Onion fly lays eggs in the ground and on scales. The greatest damage is caused by the larvae. They feed on plant tissue, softening the structure of the bulb. The ground part turns yellow and dries out. The pest becomes active in May–June.To combat adults and larvae, plantings are dusted with tobacco dust, black or red ground pepper. Calendula, tansy, marigolds, nasturtium, geranium, lavender, pyrethrum, petunia, and carrots are planted next to the onions. The smell of these plants repels insects. Once a week, water the onions with a saline solution (200 g of salt per 10 liters of water).
Measures to prevent fungal diseases and insect attacks:
- crop rotation;
- soil treatment with Fitosporin, copper sulfate, potassium permanganate;
- planting healthy material;
- weeding;
- normalization of moisture levels.
Harvesting
Exhibition onions ripen approximately 120-130 days after full germination. Harvest time depends on the growing region. In the south, onions ripen by the end of July, in the central regions - at the beginning of August, in Siberia and the Urals, harvesting begins in mid-August.
A sure sign that the onion is ready for harvesting is dry, fallen leaves. The root system dies off. It is important not to leave ripened onions in the soil for a long time - the heads take root again in moist soil, which significantly reduces the already short shelf life.
Important! To obtain large heads, cutting green leaves is strictly prohibited.
Onions are harvested in sunny and dry weather, pulling the heads out of the ground, digging with a pitchfork or shovel. The bulbs are cleaned, the roots are cut off and laid out on nets for drying, ripening and disinfection in the sun.
In rainy weather, the crop is dried under a canopy, in an attic or barn for 10-12 days.
After drying, the heads are sorted out: the damaged ones are not stored, but consumed immediately, clean and healthy ones are sorted by size and laid out in nets, wooden boxes, boxes. It is convenient to weave the bulbs into braids and store them in a suspended state.So each of them will be visible.
Temperature:
- The cold storage method involves maintaining the temperature in the storage in the range of -3°C...0°C. In such conditions, the crop is stored the longest.
- The warm storage method involves maintaining a temperature of +18°C ... +22°C, humidity - 60-70%.
- With the combined method, the temperature is maintained at +18°C...+22°C in autumn, -3°C...0°C in winter. This is the most cost-effective method in terms of energy consumption.
Conclusion
Planting and caring for Exhibition onions in open ground requires a meticulous approach. To achieve maximum productivity and harvest large bulbs with a sweet taste and pleasant aroma at the end of the season, it is recommended to grow the crop through seedlings. This rule especially applies to regions with short summers. The ripening period of the plant is about 130 days, and harvesting is carried out before the onset of frost. The storage period of onions is short - only 3-4 months.
The agricultural technology of the crop is based on proper care of seedlings, timely transfer to a permanent place, moderate watering, mulching the soil, removing weeds and applying fertilizers.