Harvest all year round without leaving home: how to grow peas at home on a windowsill and what you need for this
In cold winter, you want to get vitamins from fresh vegetables and herbs even more than in summer. And this is possible without leaving home.
Read the article about how to grow peas at home on a windowsill, balcony or loggia.
Growing peas at home
Growing peas at home is not much different from growing them in the garden. The main thing that peas need is light and moisture. The culture does not require special care.
First, decide on a place: peas can be grown on a windowsill, balcony or loggia. The main thing is to have good lighting.
On the windowsill
Peas can be grown on a windowsill all year round. The main condition is the presence of a well-lit window, which will provide the planting with the necessary amount of sunlight. If lighting is insufficient, it is recommended to use a fluorescent lamp.
On the balcony
You can grow peas on an open balcony before frost sets in. Although peas are considered a cold-resistant plant, the soil should not be allowed to freeze, as this will lead to the death of the peas and the plant.
In the loggia
Peas grow best at home in an insulated loggia. Most often, it turns out to be the most illuminated place in the apartment, while the ground in it does not freeze. Therefore, peas grow and ripen in the most comfortable conditions.
Choosing a pea variety
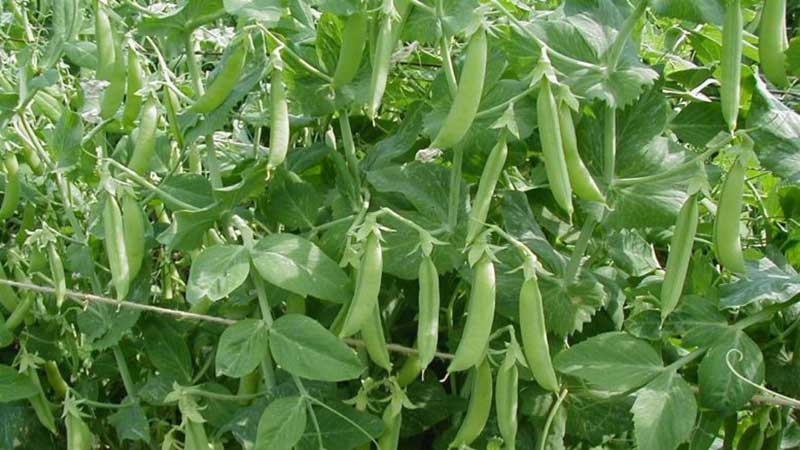
Let's look at the most popular pea varieties for growing at home:
- Oregon Sugar Pod – most suitable for winter growing at home. Grows up to 1 meter in height.
- Norli – an early ripening and high-yielding variety with short shoots (up to 1 meter).
- Sugar Ann - also an early ripening variety that will delight you with the harvest for a long time. The stems of this plant reach up to 1.5 meters in height.
Seeds for planting
Before planting, you must carefully select the seeds. You need to plant only whole, healthy, not old, but not unripe peas.
There is a simple way to select healthy grains. It is enough to immerse them in this solution: 1 tbsp. l. table salt per 1 liter of warm water. Healthy peas will sink to the bottom, sick peas will float to the surface. Naturally, you should plant only those seeds that have sunk to the bottom.
Step-by-Step Guide to Growing Peas at Home
Let's take a closer look at how to properly grow peas.
Comfortable conditions
Peas are an unpretentious crop that does not require special conditions. Prepare the seeds, provide the plant with sufficient lighting, regular and abundant watering, do not forget to create a support and sometimes feed the soil.
As a thank you, you will receive fresh green peas in the cold winter blizzard.
Preparation of planting material
Once you have selected healthy seeds, prepare them for planting. To disinfect and protect peas from possible diseases and pests, it is recommended to place peas in a 2% solution of potassium permanganate for 20 minutes.
After this, you can immediately plant the seeds in the ground, or you can germinate them before planting.
Do I need to germinate seeds?
Germinating pea seeds is an optional procedure. Sprouted peas will sprout faster, be more productive and nutritious, but they need regular and abundant watering.
Peas planted dry will germinate gradually, absorbing moisture from the soil. In this case, you will see sprouts about a week later.
The most common and easiest way germination peas - on a damp gauze or cloth. First you need to soak the peas for swelling - place them in a container and fill with warm water.
The water should completely cover the peas. It is better that the water level is about 5 mm above the peas, as they will absorb most of the liquid. Leave the soaked seeds for 12-15 hours.
After swelling, place the peas in a piece of damp cloth or gauze.
Important! The gauze (rag) should always be damp. If it dries out, the peas will die. You cannot fill the seeds with water at this stage. The peas will simply rot.
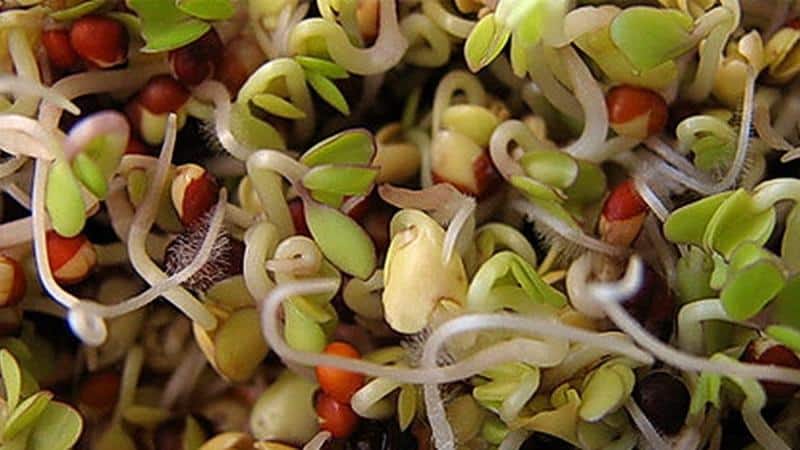
Next, we wait for the seedlings to hatch and stretch a little. It is recommended to plant peas when the seedlings are twice as long as the diameter of the pea. This takes approximately 3-5 days.
Landing technology
Peas are planted in rows, between which there should be 3-5 cm. The distance between the seeds of one row is 2-3 cm. Planting depth is about 4 cm.
This frequency of planting is due to the small volume of containers in which the plant can be grown at home. When the sprouts form two full-fledged leaves, they will need to be planted wider (piqued).
Soil and containers
Before picking, peas can be grown in a common box or container, or you can prepare newspaper “envelopes” for the peas so that the roots of the plant are not damaged during picking. To grow peas at home, use wooden or plastic containers.
You can use garden soil (but be sure to observe crop rotation - do not take soil in which legumes grew; pumpkin or nightshade soil is best suited). Or buy a ready-made mixture in the store.
If possible, add loosening agents to the soil - sawdust, humus, straw or small stones. You can also add sand. Peas love moist, loose, alkaline soil. Before planting, it needs to be thoroughly watered with warm water.
If you took garden soil for planting, it must be treated against fungus and pests. It is also recommended to add mineral fertilizers to the soil by dissolving them in water for irrigation.
Pea care
Caring for the plant consists of regular and abundant watering, periodic loosening and weeding of the soil, timely harvesting and construction of support for growing shoots.
It is also recommended to periodically feed the soil and treat the plant in order to prevent diseases and protect against pests.
Diseases
There are many pests and diseases that affect this crop. Basically, they are terrible when growing peas in open ground, in the garden. At home, the risk of infection is significantly reduced.
Peas are affected by viral, fungal and bacterial diseases. Pests peas are aphids and the larvae of some beetles and butterflies.
Prevention and treatment measures include following the rules of crop rotation, loosening the soil and carefully selecting healthy seeds for planting. An effective method of both prevention and treatment of peas is the treatment of plants with fungicides and insecticides. You can also use copper and phosphorus-potassium fertilizers.
Watering
As mentioned above, peas love moisture and need regular watering.Before flowering, it is enough to water the planting 1-2 times a week, making sure that the soil does not dry out. During the flowering and fruiting period, the frequency of watering must be increased to 3-4 times a week.
Soil feeding
It is recommended to feed peas fertilizers with copper content and potassium-phosphorus fertilizers. The first time is during planting, and the second, third and fourth time is during flowering. These three feedings are done once every two weeks.
Recipe for potassium-phosphorus fertilizer: dissolve 10-15 g of superphosphate and 10-15 g of potassium salt in 10 liters of water. It is advisable to let the solution sit for a day before watering.
Support
When the sprouts reach a height of 8-10 cm, it is necessary to build a support for them. These are wooden poles about a meter high, between which a rope or net is stretched, to which the peas will cling as they grow.
Picking
When the sprouts get stronger and form two full-fledged leaves, picking is carried out. To do this, you can transplant the plants into separate containers (small containers with a volume of about 0.5 liters) or plant them wider in a common box.
In this case, the distance between sprouts in a row should be at least 5 cm, between rows - at least 10 cm.
When picking, use the same soil as when planting. It is better to replant plants with a clod of soil in which it grew. Plant the peas to a depth of 5 cm, then carefully sprinkle with soil.
Temperature and light
Peas are a cold-resistant crop; they can withstand frosts down to -5 degrees. Moreover, the ideal temperature for the growth and development of this plant is from +17 to +24. At temperatures below or above this interval, peas do not develop to their full potential.
A very important factor for the growth of peas is lighting. The plant vitally needs sunlight at least 10-12 hours a day.
If it is impossible to provide sufficient lighting naturally, you will have to use a fluorescent lamp. It must be located no closer than 50 cm above containers with plantings.
Harvesting
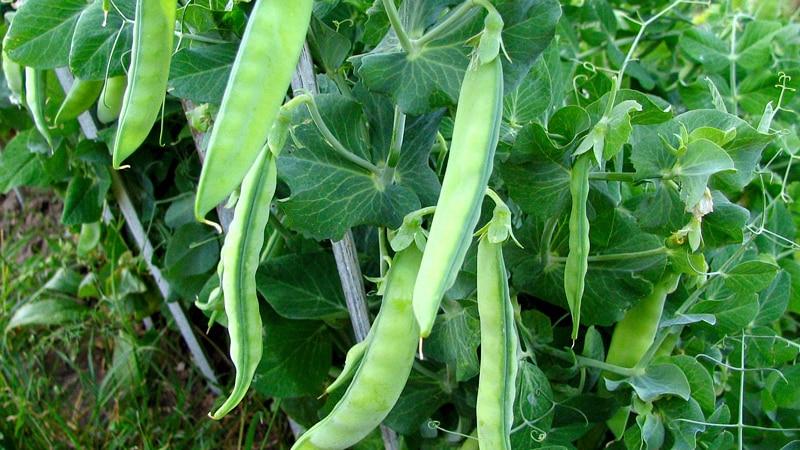
Peas bloom about a month after planting. And after another month you can harvest the first harvest.
In order not to interfere with the ripening of the pods, it is necessary to harvest every 1-2 days, preferably in the morning. If you care for peas correctly, they will bear fruit for up to 2 months.
The volume of harvest from one bush can reach 0.5 kg.
Tricks for growing peas at home
Plant peas in portions - once every two weeks or once a month. Then you will always have a fresh harvest. The main thing is not to forget about crop rotation: do not plant new seeds in the ground from the previous pea harvest.
Reviews about growing peas at home
Before planting this or that crop at home, we recommend that you read the reviews of gardeners and summer residents who have already appreciated all the advantages and disadvantages of this activity. Here are some of them.
Olga: “I planted peas purely out of curiosity, without particularly hoping for success, but in the end I recently harvested my first “ridiculous” harvest. Of course, the harvest could have been richer if some unfavorable events had not happened to my green peas, but what else will happen: there is a lot of time before summer, more than one batch will have time to ripen!”
Anna: “I planted 3 peas in one pot. As soon as it came up, I tied several thick woolen threads from the pot to the top of the window so that the peas would have something to curl around. I noticed that my peas don’t really like heavy watering - the leaves start to dry out.”
Margarita: “Peas do not require pollination and can be safely planted at home in any quantity. You may find black spots on the leaves; these are aphids. To prevent this, wash everything off with soapy water. At home, I made a small bed for my child from a 2.5 liter plastic bottle, cutting it to length. I covered it with soil and planted peas, and in the space between the seedlings I sowed arugula. It will be tasty and healthy."
Conclusion
Many articles have been written about the benefits of fresh peas. Growing green peas at home is not such a difficult task. Of course, you shouldn’t expect the same harvest as from summer beds.
But with proper care of the plant, there will be green peas on your table all year round. The resulting grains can also be dried and used for further planting - both at home and in the garden.