How to make a potato planter for a mini tractor with your own hands
Planting potatoes on your home plot is one of the most labor-intensive operations. But it’s not enough to have a mini tractor to optimize this process. One more person is needed for every 25-35 m with a bucket or basket, which will plant potatoes at the base of the furrow at regular intervals. Automation of this process is a great help for those who grow potatoes on their own plot.
What is a potato planter
A potato planter for a tractor is a mounted or trailed implement on a mini tractor or walk-behind tractor to automate the potato planting process.
Description and characteristics of the device
The potato seeder consists of the following main components:
- the frame on which everything else is attached;
- wheels with lugs;
- containers for seed potatoes;
- ripper for creating holes;
- tuber feeding mechanism;
- hole burying devices.
When making potato planters, many craftsmen use, whenever possible, various parts from other agricultural mechanisms. For example, a ripper is a cultivator coulter with small wings (shares), with which the soil is moved apart and a groove is formed for planting. Another example is discs from a disc cultivator, which bury potatoes and form a furrow.
The container for tubers is made of plywood or welded from 2-3 mm of iron.
The frame is made by welding from a profile (rectangular, corners or pipes).Its rigidity should ensure reliable penetration of the tool into the ground.
What is it for?
A potato planter for a tractor, for example, MTZ 82, ensures fast, uniform planting of potatoes in area and depth. This will allow you to better cultivate the soil and get a larger harvest.
Features of using potato planters for mini tractors and tractors
All landing equipment is divided into:
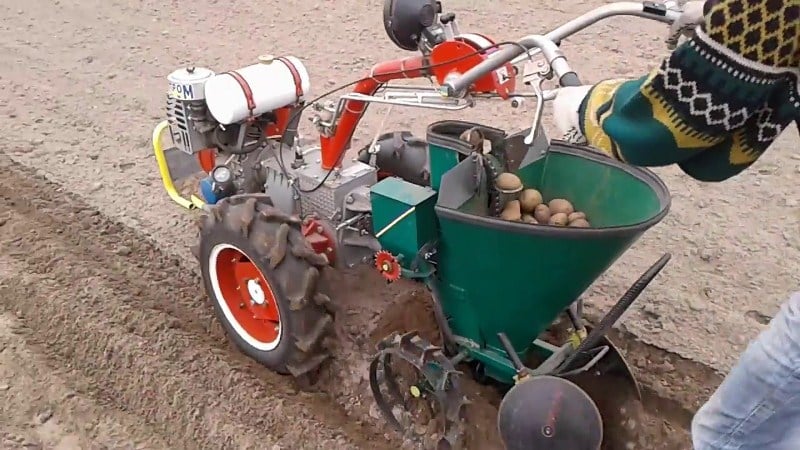
- lightweight models – small, single-row, oriented to work with the MTZ walk-behind tractor;
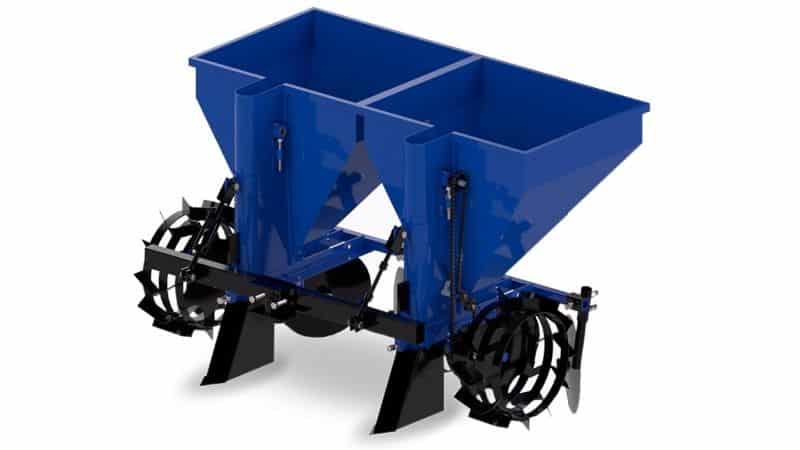
- average – suitable for working with a mini tractor, planting one or two rows at once;
- heavy – work on tractors of medium traction class, capture 3-4 rows at the same time.
The number of captured rows depends on the power of the tractor. The walk-behind tractor cannot provide the depth and quality of planting of a multi-row planter. It is irrational to attach a single-row planter to a heavy tractor.
Advantages
Having the skills, tools and appropriate materials, you can make a potato planter for a motor tractor with hydraulics with your own hands, the quality of which is not inferior to industrial ones:
- It will have parameters that are optimal for your mini tractor.
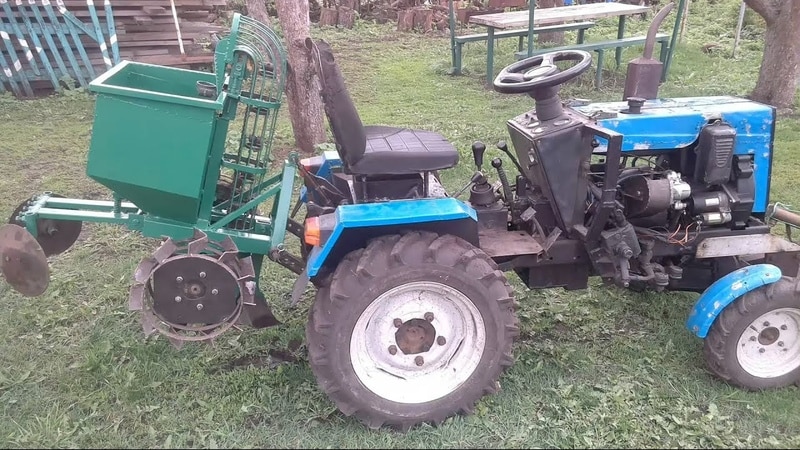
- Convenience features that are not included in standard designs, such as an operator seat and sunshade, can be added.
- It is possible to install a fertilizer application mechanism.
Types of potato planters
There are automatic, semi-automatic (without a tuber feeding mechanism) and manual potato planters.
By type of attachment to the tractor:
- mounted;
- trailed
By number of rows:
- single-row for mini tractor;
- 2-row;
- 3-row;
- 4-row;
- 6-row.
By production:
- spoon;
- belt;
- piercing.
By type of technological process:
- for planting sprouted potatoes;
- for planting unsprouted potatoes;
- mixed type.
Review of the best potato planters for tractors and their comparison
Of the industrial (factory-made) potato seeders, the most famous are those presented in the table.
| Brand | KS-1 | KS-1A | KSM |
|---|---|---|---|
| Type | Single-row, trailed | Single-row, trailed | Single-row, trailed |
| Weight | 25 | 33 | 44 |
| Performance | 0.15 ha/hour | 0.2 ha/hour | 0.25 ha/hour |
| Tractor power | From 6 l. With. | From 6 l. With. | From 6 l. With. |
| Price | 12,000-14,400 rub. | 14,000-15,000 rub. | 15,000-16,000 rub. |
How to make your own potato planter for a mini tractor
It is enough to draw a drawing of the planter or find a ready-made one and select the necessary materials and tools.
Materials and tools
To make a potato planter, the following tools are required:
- welding machine;
- Bulgarian;
- hammer and chisel;
- spanners;
- drill;
- spray gun with compressor;
- measuring tool, square, clamps.
Materials needed:
- corner or channel for the frame;
- support metal wheels;
- bearings for wheels and disks;
- sheet steel for the rear wall of the bunker with a thickness of 1.5-2.0 mm;
- galvanized sheet;
- two sprockets with 19-21 teeth;
- timing chain;
- axle for drive wheels;
- steel wire 3-4 mm thick.
Drawings and dimensions
This is a drawing of the most common potato planter.
Approximate dimensions:
- frame – 580 x 300 mm;
- drive wheel diameter – 300 mm;
- distance between wheels (track) – 580-600 mm;
- distance between sprocket axes – 570 mm;
- upper sprocket – 19 teeth, lower – 21;
- bearings – standard size 205;
- bunker – 370 x 400 x 400 mm.
Step-by-step instruction
Work order:
- We start by making the frame. It must provide rigidity during processing.
- We attach the first sprocket in the center on the axis of the support wheels.
- On both sides of the sprocket we attach bearings in cages and support wheels on the axle.
- First, we weld lugs in the form of metal plates onto the wheels.
- We weld the bearing races to the frame.
- We wind the wire onto a pipe with a diameter of 50-60 mm, cut it and get rings.
- By welding another half ring, we get a cup for serving the tuber.
- We weld the resulting cups to the timing chain at a distance of 8-10 cm.
- To supply potatoes to the planting area, we use a pipe with a diameter of 100-110 mm so that the tuber does not get stuck.
- We weld the U-shaped arch, followed by fastening the hopper and the upper axle with the upper sprocket.
- We will weld a bunker from corners, sheet metal in the lower part and tin in the top and sides.
- Be sure to roll the edges of the tin sheet so that there are no sharp corners.
- We attach the hopper, the upper axle with a sprocket (on two bearings) and the upper part of the elevator pipe to the frame.
- Having unfastened the lock, we put the chain on the sprockets.
- We attach reflectors in front of the elevator pipe to prevent potatoes from falling past.
- In the front part we install a coulter - a ripper to create a groove.
- At the rear of the frame we attach two disks with adjustable tilt and angles of attack, with the help of which the seeds are buried in the ground and a furrow is formed.
Tips and tricks
To quickly assemble the unit, we recommend using components of other mechanisms. For example, a coulter is a part of a cultivator without wings. You don’t have to cook the hopper, but use a stainless steel container from an old washing machine.
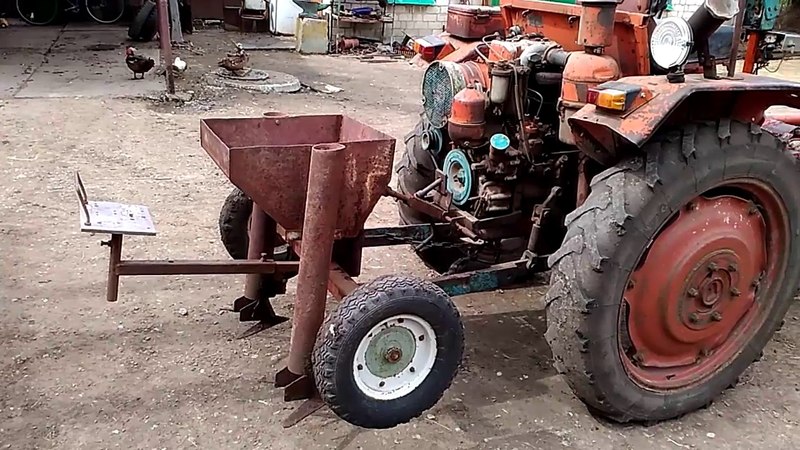
If it is not possible to assemble an elevator (there are no sprockets or chains), make a seat, a stand under the box and place a relative who will manually throw the tubers evenly into the pipe.Or install a wheel with spoons that will transport potatoes to the elevator pipe. Add mechanisms to adjust planting depth and furrow height.
The wheels should be wide so as not to trample the ground too much. Pay special attention to the rigidity of the frame, arch, ripper and discs. If the traction force of the minitractor is large and the soil is heavy, the structure will collapse.
This is interesting:
Features of proper potato storage: from A to Z.
Conclusion
Planting potatoes is a labor-intensive and tedious process. A homemade potato planter will greatly facilitate the work of a gardener. Made by a folk craftsman, it is not inferior in productivity and quality of work performed to industrial ones. Manufacturing costs are minimal and do not require complex machine tools. All you need is a welding machine and a drill.