Step-by-step instructions: how to grow potatoes from seeds at home
Most gardeners grow potatoes from tubers year after year, buying planting material at the market or choosing from their own harvest. This method is simple and allows you to get a harvest ready for harvest in a few months. However, it also has a drawback: after 5-7 years, the crop’s yield drops, and it begins to get sick often. This occurs due to the degeneration of tubers during repeated planting.
The gardener has two ways out of this situation: buy tubers from the first harvest on the market or grow your own planting material from seeds. The second option is considered more reliable. Read on to learn how to grow potatoes from seeds at home.
Advantages and disadvantages of growing potatoes from seeds
Growing potatoes from seeds is an activity that requires a certain amount of time and knowledge.. Indeed, in this case, the gardener will have to care for young plants, which are more capricious than, for example, tomatoes or peppers.
Despite this, some gardeners practice growing potatoes from seeds. This method of cultivation has many advantages.:
- The seeds produce elite tubers. They are the ones with the highest yields.
- Growing potatoes from seeds is the most reliable way to obtain high-quality material for further cultivation.
- Growing potatoes from seeds is cheaper than buying elite tubers.
- Not all varieties are sold on the market as tubers. If you take seeds from producers, you can grow absolutely any variety yourself.
- Potatoes grown from seeds are highly resistant to diseases and are not afraid of late blight.
- Seeds, unlike tubers, do not take up much space. They can be stored in any dry place in the apartment.
Attention! It is almost impossible to independently distinguish tubers from the first harvest. Unscrupulous sellers can sell 2-3 generation planting material at the price of elite tubers.
Many gardeners refuse to grow seed potatoes on their own. This is due to the disadvantages of this method:
- Potato seedlings are more difficult to care for than tomatoes or peppers. This crop is most susceptible to blackleg.
- It is not possible to obtain a large number of large tubers from seeds: vegetables are grown not for food, but as planting material.
- Potato seedlings are susceptible to diseases, so it will not be possible to grow them without the use of chemicals.
- Growing potatoes from tubers is much easier than from seeds.
Despite the presence of shortcomings, there are still more advantages. After all, growing potatoes from seeds once will provide the gardener with high-quality planting material for 4-6 years.
Rules for collecting and preparing potato seeds
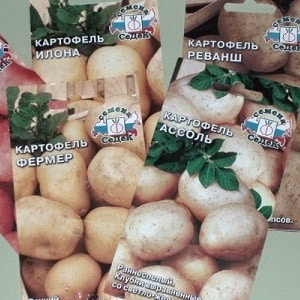
The easiest way to get quality potato tubers – buy seeds in a specialized store. Such planting material will definitely produce strong and healthy plants that will delight you with a high yield. Manufacturers, as a rule, process their products in factories, which makes the work of gardeners easier. The packaging will contain all the information, as well as a photo and description of the potato seeds.
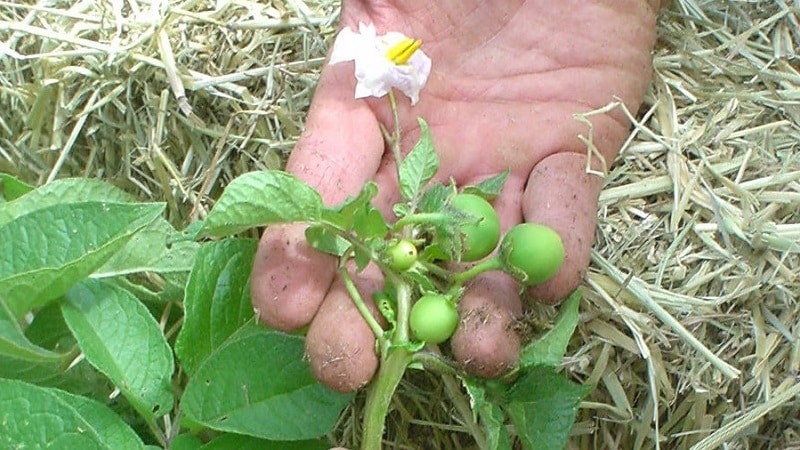
Can use your own seeds to grow potatoes. To do this, choose the strongest plants in the garden that have not been sick during the summer season. At the end of summer, the berries formed on the bushes are collected. Choose the largest ones - they contain the most planting material with good germination. Then they are placed in gauze bags and hung in a warm, bright place to ripen.
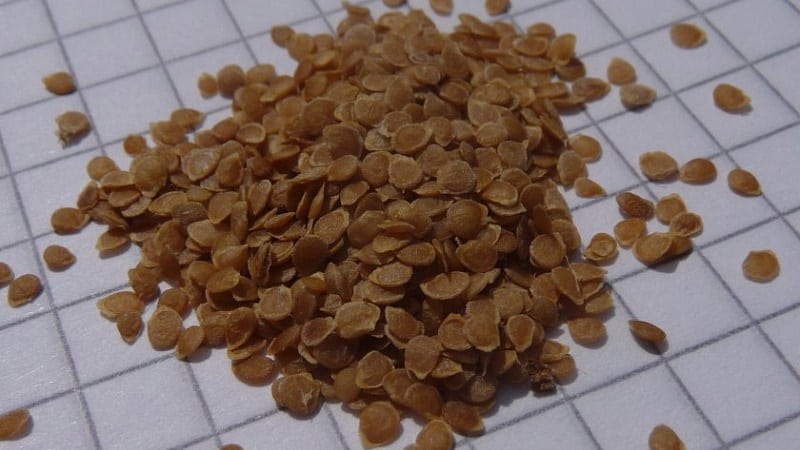
When the berries lighten and become soft, the seeds are extracted from them.. The planting material is washed from the pulp and laid out in one layer to dry. It is then placed in paper or fabric packaging. Potato seeds are stored for 2-4 years.
Advice! Potato seeds have low germination capacity. Experienced summer residents prepare 2 times more planting material than they plan to produce bushes.
Before sowing the shift must be prepared. This will speed up their germination, increase germination and protect against infections.
Step-by-step instructions for preparing seeds:
- Hardening. Dry planting material is stored at room temperature during the daytime. At night it is put on the bottom shelf of the refrigerator. This procedure is carried out over 3 days.
- Disinfection. The seeds are soaked for half an hour in a light pink solution of potassium permanganate or hydrogen peroxide. After treatment, wash.
- Soak. The seeds are wrapped in cloth, placed in a deep container and filled with purified (or boiled water) at room temperature for 7 days. Some gardeners place the seeds in a growth stimulator on the last day of soaking.
Seedling method of growing potatoes
Young potato plants grown from seeds are sensitive to negative factors environment.
 In most regions of Russia, sowing seeds directly into the ground is impossible. The seedling method is considered the most reliable.
Seeds for seedlings sow in the second half of March or early April. Experienced gardeners recommend familiarizing yourself with the indicators of the lunar calendar before sowing seeds.
Potatoes are planted in light, nutritious, slightly acidic soil. A universal mixture for seedlings or tomatoes and peppers is suitable.
Prepare the soil yourself:
- Mix 2 parts garden soil, 3 parts peat, 1 part sand and 1 part humus.
- Add a glass of ash to a bucket of this mixture.
- The resulting soil is disinfected by pouring a dark pink solution of potassium permanganate and Fitosporin.
To get enough seedlings, sow a large number of seeds (not all of them will sprout). To do this, use wooden boxes or wide but shallow plastic trays. Later, the seedlings are planted into individual peat or plastic pots with a volume of 300-500 ml. Containers must be disinfected with a solution of potassium permanganate or boiling water.
Important! To avoid water stagnation, make sure there are drainage holes in the bottom of the pots. It is recommended to add a layer of disinfected drainage (crushed stone, shell rock, crushed ceramics) to the bottom of the containers.
How to sow seeds correctly:
- grooves 3 cm deep are made in the soil in rows at a distance of 7 cm from each other;
- seeds are placed in the recesses at intervals of 3 cm;
- the planting material is covered with sand on top;
- moisten the soil from a spray bottle with water at room temperature;
- The containers are covered with film and placed in a warm, bright place.
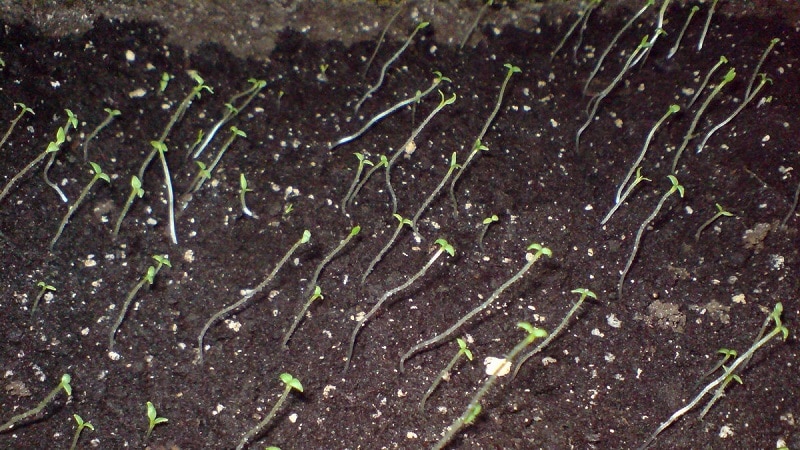
The first potato shoots appear in 9-14 days after landing.
Growing in peat tablets
The easiest way to grow potato seedlings is to sow seeds in peat tablets. The substrate in them is nutritious in itself and does not require additional enrichment. Disinfection of such soil is also not necessary.
The main advantage of peat tablets is that in the future you won’t have to pick. When planting plants in a permanent place, seedlings do not have to be removed from containers:
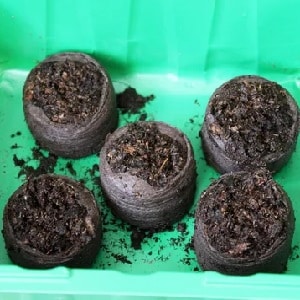 Peat tablets are placed in deep containers with the hole facing down. After this, they are poured with boiling water.
- When the liquid is absorbed, add a little more boiling water.
- The swollen blanks are turned over with the hole facing up and placed in a deep container.
- Three 3-centimeter indentations are made in each bag of peat. 1 seed is placed in them and covered with soil.
- If several seeds germinate in one tablet, then one stronger plant is left. The stems of the remaining shoots are pinched.
Interesting things on the site:
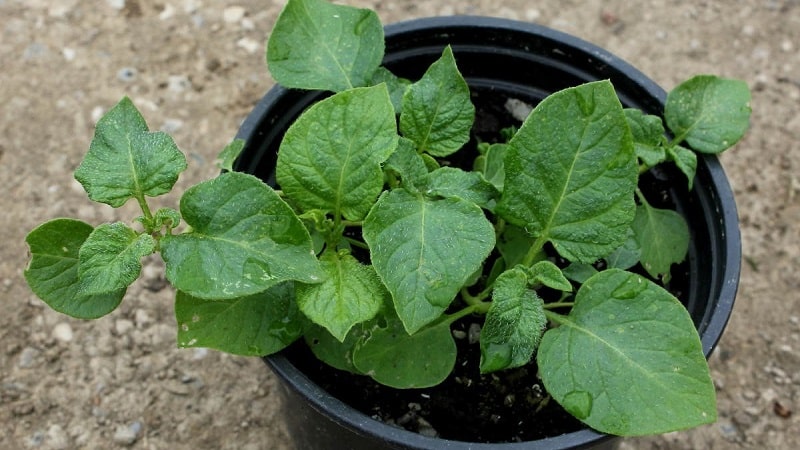
Seedling care
To get healthy and strong seedlings, you need to properly care for them. Here are the ground rules:
- The film is removed after emergence of seedlings. Those seeds that have not sprouted 2 weeks after sowing the seeds will not sprout.
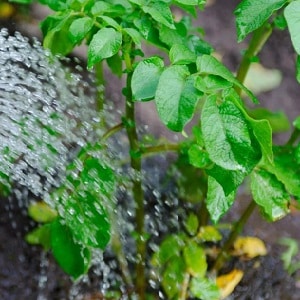
- The soil is moistened as it dries. Plants should be watered sparingly so that water does not get on the leaves. It is recommended to water young seedlings with a spray bottle or through a tray.
- Seedlings need 12 hours of daylight. If natural light is not enough, use phytolamps. Such devices allow you to obtain unstretched, strong seedlings.
- When the seedlings form 2 true leaves, pick it up (if the seeds were sown in boxes and not in peat tablets).The plants are carefully removed from the ground using a regular fork, being careful not to damage the roots, and moved to individual containers. After this, the soil is moistened. The next watering is possible after 7 days.
- When did the first shoots appear?, seedlings are fertilized for the first time. It is watered with a product prepared from 5 liters of water and 5 g of ammonium nitrate. The second feeding is done with the same solution a week after picking.
- 2 weeks before departure seedlings begin to harden in open ground. By this time, the temperature outside should reach +10-12°C. They are taken out onto the balcony or street, gradually increasing the time spent in the fresh air.
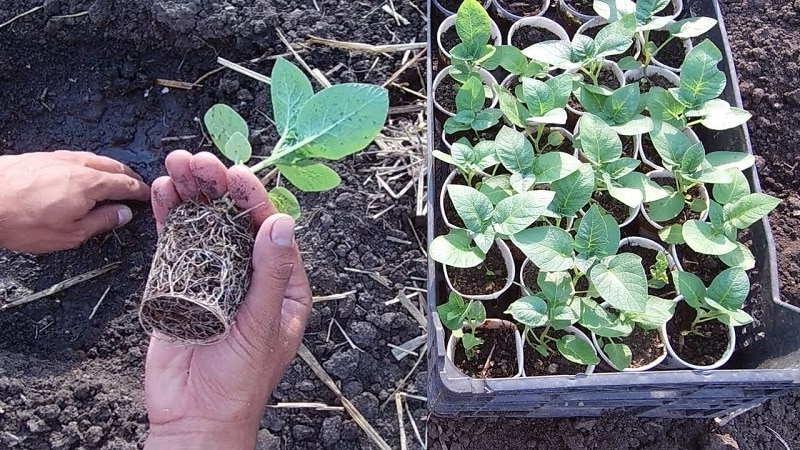
Landing at a permanent place
Depending on the region, seedlings are planted in a permanent place in early or mid-May. In the greenhouse, picking is carried out 2 weeks earlier:
- The holes are dug in a checkerboard pattern. The distance between rows is 70 cm, and between holes – 20 cm.
- A glass of humus, ash or long-acting granular fertilizers is poured into each hole.
- Seedlings are planted in the depressions. It is buried in such a way that only 2 leaves remain on the surface.
- The holes are filled with soil, which is slightly compacted around the plants.
- The soil is moistened with water at room temperature.
Until the seedlings get stronger, cover them with film at night. This will reduce the risk of its death due to night frosts.
Advice! Using phytolamps, seed planting potatoes can be grown all year round (even in winter) in bags at home or in a heated greenhouse.
A non-seedling method of growing potatoes from seeds
In the south of Russia, they practice sowing seeds directly into open ground. This method is considered less reliable, since often not all planting material germinates.
For potatoes choose the most illuminated area of the garden. Groundwater in this place should not lie near the surface.
The soil for planting is prepared from the end of summer. It is dug up and cleared of plant remains. To enrich the soil composition, green manure plants (lupine, rye, beans) are sown in the beds or 6 kg of humus is added for every 1 m². If the acidity of the soil is increased, add an additional 2 tbsp. ash for every 1 m².
Advice! Some summer residents bury tops (without signs of disease) of last year's cultivated plants and weeds. This “trick” allows you to get rich soil without extra effort.
In spring, the soil is dug up and cleared of weeds.. If green manure has been sown, then they are buried in the ground and watered with a means that accelerates their decomposition (“Baikal”).
For every 1 m² in the spring, add 25 g of superphosphate and 15 g of urea. The soil is watered with a hot solution of copper sulfate - 1 tbsp. l. on a bucket of water. Additionally, it is recommended to treat the soil with “Fitosporin” and “Trichodermin”. This will reduce the likelihood of plants becoming infected.
Note! The rules for choosing a garden plot and preparing beds for potatoes also apply when planting seedlings into the ground.
Potato beds are formed in rows, maintaining a distance of 70 cm between them.. Seeds are sown at a distance of 20 cm from each other. Before planting, water the soil generously with warm water. Sowing begins when the liquid is completely absorbed.
Seeds are buried 1 cm. For every 20 cm, sow 3-4 seeds. After 2 true leaves appear on the seedlings, excess plants are removed, leaving the strongest seedlings. Weak specimens are not pulled out, but broken off.
After sowing the seeds, the beds are covered film. It is removed when shoots appear.Then the plants are covered only when there is a threat of night frosts. Water them as the soil dries out. It is important to remove weeds around the seedlings.
Caring for potatoes in the ground
Throughout the season the crop needs to be properly cared for:
- After the pick Potatoes in the ground are gradually accustomed to abundant watering. For the first 2-3 weeks, the soil is moistened in small portions every 2 days. Then do abundant watering once a week.
 After each watering or precipitation, the soil is loosened and cleared of weeds. This destroys the earthen crust, which interferes with air exchange and provokes rotting of the roots.
- Until the potato bushes grow (before closing), it is recommended to mulch the beds with hay or humus.
- For the entire summer season potatoes are fed twice. The first time is 2 weeks after planting in open ground or the formation of 2 true leaves. To do this, use nitrophoska (30 g per 1 bush), “Kemira” (10 g for each bush) or silage (1 liter for each bush). The second time, fertilizing is applied during the formation of buds. Phosphorus-potassium fertilizers are used.
- Potatoes are hilled 2 times. The first is when the plants reach a height of 15-20 cm. The second is after the formation of the first bud. The soil is raised by 6 cm.
- Colorado beetles and their larvae on the bushes are collected by hand. Chemicals, such as Barrier, are also used to combat them.
- During epidemics, and also after prolonged rainfall, plants need preventive treatment. They are sprayed with antifungal drugs, for example, Fitosporin.
Read also:
Method of using the drug "Prestige" for processing potatoes
What types of fertilizers are best to use when planting potatoes?
When to Harvest
Harvest time depends on the potato. Some varieties are ready for harvest as early as July, while others are ready only in August or September.
Potato dig not with shovels, but with pitchforks. This way the tubers will receive less damage. Harvesting is possible only in dry weather.
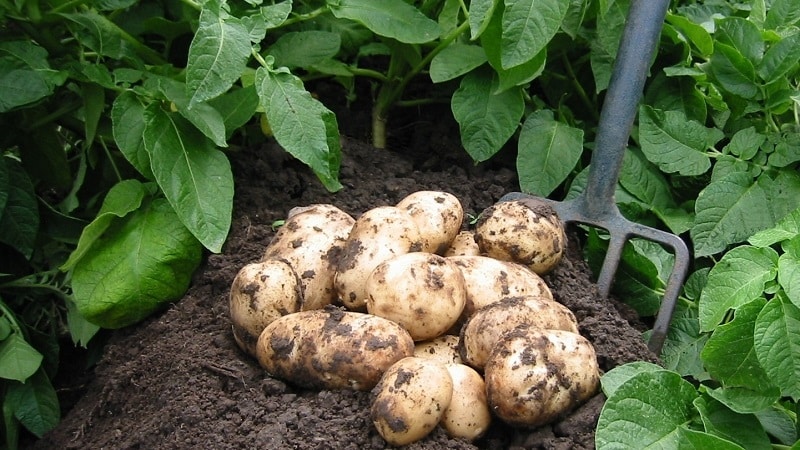
The harvested crop is sorted. All affected and infected tubers are removed. Whole specimens are placed in boxes and sent to a basement previously fumigated with sulfur.
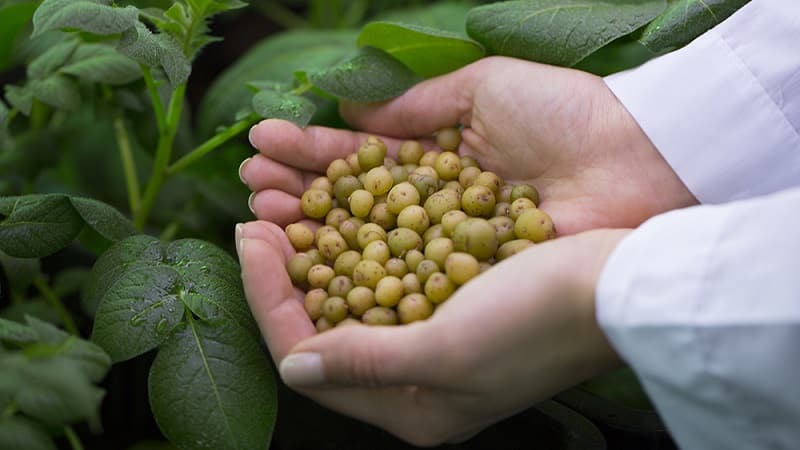
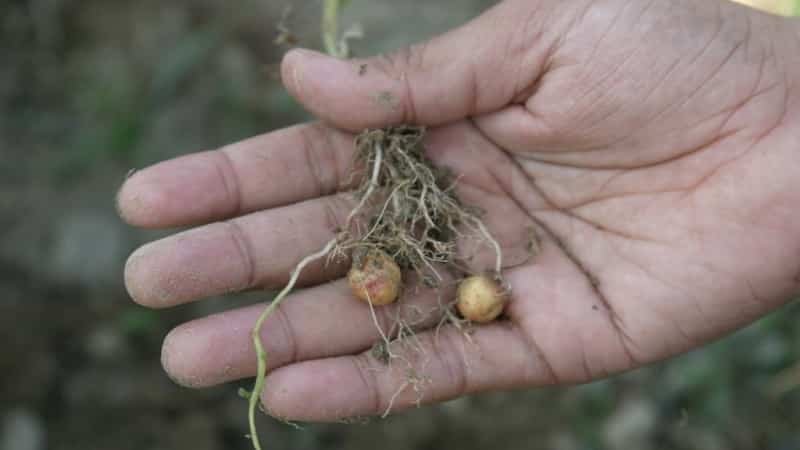
For reference. Potato tubers grown from seeds in the first year are small (10-30 g). They are used as planting material for the next year, then the potatoes will be large and the harvest will be high.
Common mistakes and difficulties when growing
When growing potatoes from seeds, gardeners often encounter a number of difficulties. The list includes the main problems arising when cultivating this crop and ways to solve them:
- Blackleg. This disease affects young plants. Often its appearance is associated with stagnation of moisture. To prevent disease, containers with holes and a layer of drainage at the bottom are used to grow seedlings.
- Loss of turgor. The main reason is hypothermia of the bushes. This happens when plants are watered with cold water or there are night frosts. Therefore, to moisten the soil, use liquid at room temperature; at first, the bushes are covered with film at night.
- Burns on leaves. To reduce the risk of their appearance, the beds are watered early in the morning or in the evening, when the sun is not active. The liquid is poured under the root, it should not get on the leaves.
- Formation of spreading tops and a small number of tubers. This is due to the introduction of a large amount of nitrogen fertilizers.It is better not to use such fertilizers for potatoes. It is enough to add humus to the soil at the preparation stage.
Experienced farmers advise to increase the yield of seed potatoes It is useful to plant 2 plants in one hole at once.
Conclusion
Growing potatoes from seeds is a long and labor-intensive process. Not every summer resident will decide to spend his time on it. Therefore, they often use purchased tubers and continue to plant them for ten years, despite the decrease in yield.
Meanwhile, following the advice and rules of care, even a novice summer resident can cope with growing his own elite tubers. The reward for the time spent will be large tubers with high immunity, which will give a rich harvest.