Preparing carrot seeds before planting: what exactly to do and how to process them
Success growing Any garden crop, including carrots, largely depends on the correct choice of seed material. To get quick and friendly shoots, the seeds are prepared before planting.
In this article we will tell you in detail what to do with carrot seeds before landing.
Timing of the procedure
Due to the content of a large amount of essential oils in the seed coat, carrot seeds take a long time to germinate. That is why it is recommended to prepare them for sowing.
Depending on the chosen preparation method, the procedure is carried out 1-2 weeks before the planned date of the sowing campaign.
Experienced gardeners recommend checking carrot seeds for germination 4-5 weeks in advance. Especially if they are already 2-3 years old. The best germination rate is obtained the next season after harvest, then every year it decreases by an average of 50%.
Attention! Sowing with material that has not been tested for germination can result in seedlings being rare or not appearing at all. This is most likely if the seeds are not fresh.
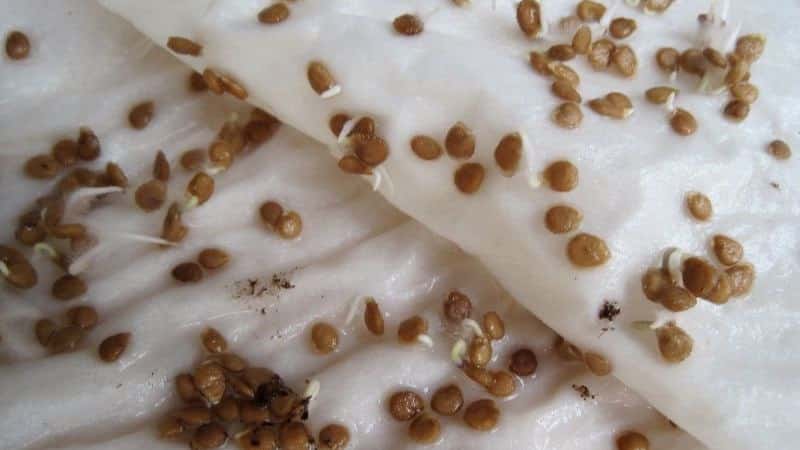
The germination test is carried out as follows. From all available varieties, several specimens are selected and sown in a container with soil. Be sure to note where which variety is planted. The percentage of germination of each variety is determined by the number of sprouts that appear.
What does processing give?

What are the benefits of preparing carrot seeds for sowing? Main advantages:
- material that has undergone pre-sowing preparation better withstands temperature fluctuations;
- young plants are less susceptible to diseases and pest attacks;
- shoots appear earlier and more friendly;
- productivity increases.
Those seeds that were obtained independently or purchased from unreliable producers require special pre-sowing preparation.
Selection and disinfection
Pre-sowing preparation begins with careful inspection, selection and disinfection.
Selection
Available seeds scatter on a flat surface and inspect. Small and damaged specimens are removed first.
The rest is mixed with a glass of warm water and stirred. The floating seeds are empty, they will not sprout, so they collect and throw it away. The remaining seeds are ready to go through the next stages of preparation.
Disinfection
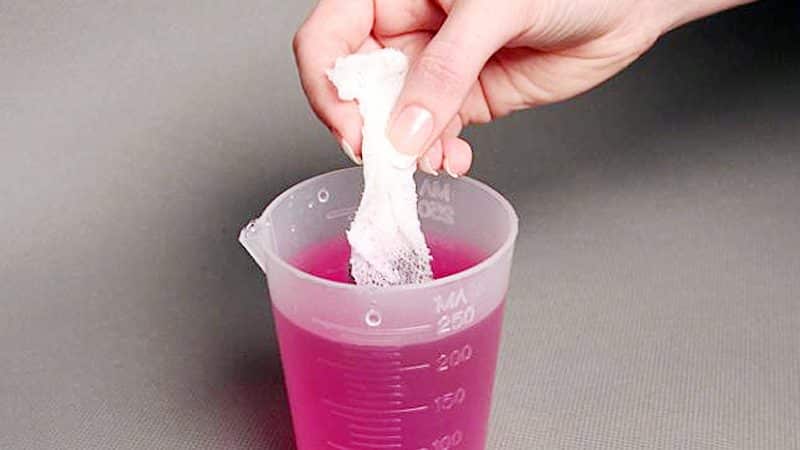
Dressing destroys pathogenic microorganisms living on the seed coat. The most accessible way is soaking in a solution of potassium permanganate. A solution of copper sulfate (1 g per 1 liter of water) is also suitable.
Calibrated (passed selection) carrot seeds are poured into a bag and placed in a disinfectant solution. After 15-20 minutes, the bag is removed and washed with running water.
Disinfection is also carried out not chemically, but thermally. Hot water (not boiling water) is poured into a thermos and seeds are placed in a linen bag. After 20 minutes, the bag is removed.
The material processed in this way is completely ready for sowing on the beds. Now friendly shoots are guaranteed.
Subtleties of the soaking procedure
Soaking helps to get earlier shoots. The material tested for germination and pickled is soaked in water, nutrient solutions, and exposed to cold and heat. Let's talk about the intricacies of this procedure.
Use warm water for soaking. Experienced gardeners recommend using melt water (preheated).
The grains are kept in warm liquid for 20-30 hours. The water is changed 2-3 times to avoid the fermentation process.
It is convenient to soak small carrot seeds in fabric bags.
Advice. Use coffee filters for soaking. Special paper perfectly allows moisture to pass through and does not become limp.
It is important to ensure that the materials are constantly damp during soaking. Drying out of swollen seeds will lead to their death.
The material soaked in this way is washed with water, dried until it flows, and sowing begins. If it was not possible to sow immediately after soaking, put the seeds in a damp cloth in a bag and put them in the refrigerator. This way they will not deteriorate and will be hardened.
Stratification
Stratification - exposure to different temperatures. This is a kind of imitation of natural conditions, allowing you to speed up germination and get more friendly shoots.
There are cold, warm and combined stratification.
Cold is needed for those seeds whose embryos need to ripen. The seeds are first moistened and then placed in a cool place. Most tree and shrub crops need this ripening.
Warm stratification is indicated for seeds with an underdeveloped embryo. It is carried out at a temperature of +23...+26°C for 1-2 weeks. For example, lemongrass and lumbago require such a procedure.
Attention! Whatever type of stratification you use, make sure that the material is constantly moist.Drying out is detrimental to the embryos.
Combined stratification is the effect of first warm and then cold temperatures, or vice versa. This procedure is indicated for the seeds of those plants that take a long time to germinate.
Carrots are one such crop. The moistened seeds are first kept warm for a couple of days and then placed in the refrigerator.
Soaking methods
The seed is soaked in various ways. In addition to ordinary water, the seeds are exposed to oxygen, nutritional compounds, and ash solution. Let's look at the most popular methods.
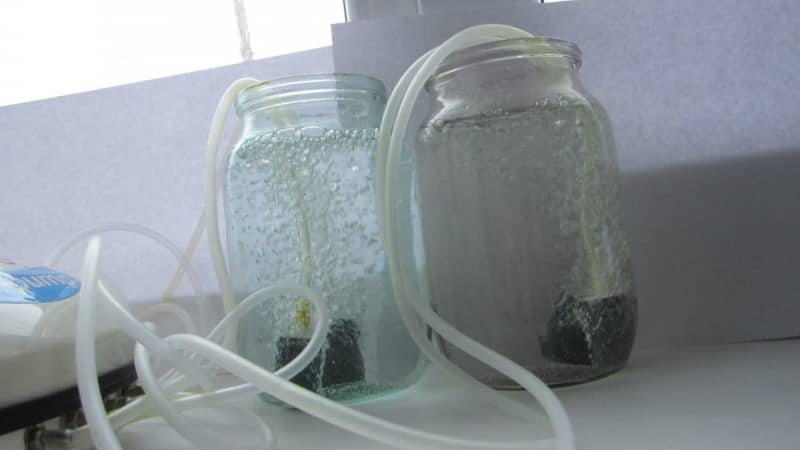
Bubbling

This is soaking the seeds in warm water (temperature +20°C) saturated with oxygen. After this treatment, the sprouts appear quickly and on average 5-8 days earlier.
At home, the procedure is carried out using an aquarium compressor placed in a jar of water. The larger the seeds, the longer the exposure time. It is enough to process carrots in this way for 18-29 hours.
Pelleting
Pelleting involves covering the seeds with a nutrient coating. This method makes sowing easier and reduces the seeding rate per unit area. The procedure is carried out 3-5 days before the start of the sowing campaign.
The nutritional composition is prepared as follows: a glass of liquid mullein is mixed with a glass of peat and a glass of humus. Pour 1-2 tsp into a liter jar. dry carrot seeds, add 1-2 tbsp. l. mixture and shake well. Then add another spoonful of mullein and shake again.
The procedure is repeated until each seed is covered with a shell. After this, the seeds are poured onto paper and dried.
Biostimulation
Biostimulation is soaking the seeds before landing in nutrient solutions. The good thing about this method is that it does not require significant labor and at the same time ensures vigorous shoots and increases resistance to diseases and vagaries of weather.
For biostimulation, sodium humate, Epin, Zircon, and Effekton are used. The nutrient solution is prepared in accordance with the manufacturer's instructions. The seeds are soaked in the mixture for 10-12 hours, then dried and sowed.
Soaking in potassium permanganate and hydrogen peroxide

Solutions of potassium permanganate and hydrogen peroxide are used to destroy pathogens that can persist for a long time on the surface of the shell.
Soak the seeds for 20-30 minutes, then rinse with running water. This procedure will protect the crops and increase productivity.
In ash solution
It is known that wood ash is a storehouse of useful substances. Soaking in an ash solution (1 tablespoon per 5 liters of water) for 6-7 hours will speed up the appearance of sprouts and help their rapid development.
In aloe juice
Aloe juice is another effective growth stimulator. It is prepared from leaves kept in the refrigerator for a week. Carrot seeds are soaked in juice for 10-12 hours.
In boiling water
But it is not recommended to soak carrot seeds in boiling water. Under the influence of high temperatures (above +60...+70°C), the seeds will cook and will not sprout at all.
Traditional methods for quick germination

Among the proven folk methods for obtaining uniform germination is soaking seeds in snow or damp soil right in the garden. To do this, the seeds are poured into bags and buried in snow or soil to a depth of 20-25 cm for 1-2 weeks.
Advice. For each variety of carrot, use different colored bags to avoid confusion. Also mark the place where the seeds are buried to make them easier to find.
Within 1-2 weeks of being in a humid environment, the seeds swell and harden. The extracted material is slightly dried until it flows and sown on the beds.
Common Mistakes
It happens that a lot of time and effort is spent on preparing the material, but the result is not satisfactory. Why is this happening?
We list the most common mistakes:
- Using carrot seeds that are more than 3-4 years old. The best germination rates are for fresh seeds collected last year. If the seeds are old, no treatment will improve their low germination percentage.
- Use of increased concentrations of nutrient solutions. When preparing compositions for biostimulation, follow the recommendations of the drug manufacturer. An increased dose often has the opposite effect.
- Soaking before winter sowing. Before winter, the seeds are sown dry; the swollen ones will die from low temperatures.
- Processing seed material that does not need it. Pre-sowing treatment is not recommended for all species. Carrot hybrids, granulated seeds, as well as those that have already been treated with fungicides and insecticides do not require any preparation.
Conclusion
Preparing carrot seeds for sowing guarantees friendly and timely germination in carrot beds. This procedure is especially important if the seeds are more than one year old. The time and effort invested will return in the form of a rich harvest of juicy and crispy root vegetables.