Harvesting grape cuttings in the fall and storing until spring
Autumn harvesting of grape cuttings is a way to propagate a crop without losing varietal characteristics. All stages of the method are easy to implement. In order to get strong plants next season, it is important to choose the right shoots, save them and prepare them for planting.
When to harvest grape cuttings
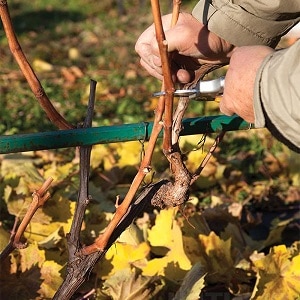
Preparation of cuttings begins 2-3 weeks after the foliage has completely fallen from grapes, while there were no night frosts. During the cool autumn period, there is no drought or sudden changes in daytime temperatures - pruning of bushes is combined with the selection of vines for cuttings. The moment occurs at the end of September - beginning of October. In the southern regions, the harvesting period moves forward slightly.
Reference. The advantage of autumn cuttings is that after proper storage and rooting, the probability of survival is almost 100%.
How to properly cut cuttings for the winter
High-quality and viable seedlings are obtained from grape vines that have produced the largest harvest this year. They are immediately marked so as not to make mistakes when pruning.
Criteria for selecting vines:
 matured and woody branches;
- no damage or signs of disease;
- when bending, a slight cracking sound is heard;
- the bark is light or dark brown, the cut is green;
- Their middle and lower parts with a diameter of 6–8 mm will be used for cuttings.
For work, select a sharp pruner or cutter, which must be disinfected. How to properly prepare grape cuttings in the fall:
- The first incision is made under the bud, the second in the middle of the internode.
- Cuttings are made 65–70 cm long so that there is a reserve of length for renewing the damaged end in the spring.
- Remove the stepsons, leaves and tendrils.
High-quality specimens have at least 4 internodes. A length of more than 50 cm will allow it to take root faster.
Reference. For additional testing, there is an iodine reaction method. Apply 1 drop to the cut and observe the wood. Mature shoots will turn dark purple or black. Those not suitable for storage will remain yellow-green.
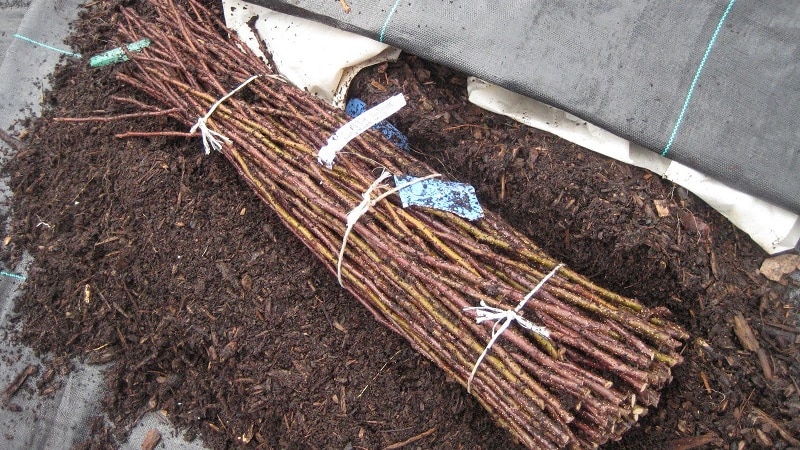
Chubuki are collected in bundles, tied with rope, wire or elastic band and attach a tag with the name of the variety, quantity and date of procurement.
Interesting things on the site:
Propagation of grapes by cuttings in autumn
How to store chibuki
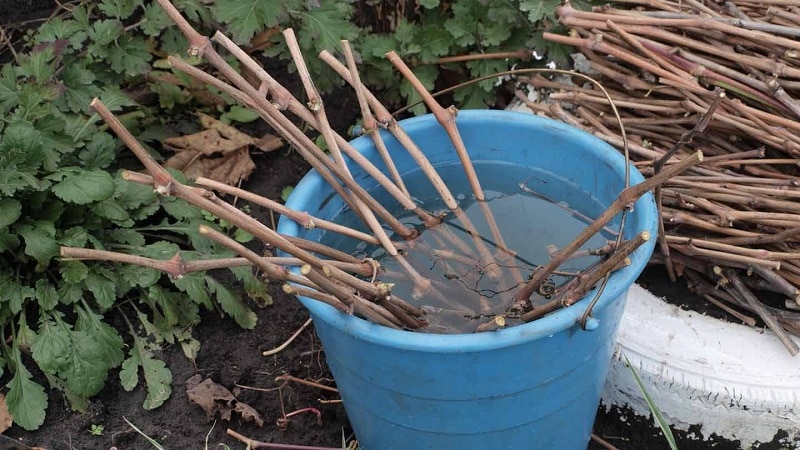
Before planting, planting material is prepared: leave in water for a day to saturate with moisture and not dry out over the winter. For long-term storage, a constant temperature of no higher than +4°C is required.
To disinfect the cuttings, place them in a weak solution of potassium permanganate. or copper sulfate for half an hour. Then dry in a shaded place. If desired, the sections are lubricated with plasticine, wax or molten paraffin. This will retain moisture in the branch until germination begins.
There are several storage methods.

Dropping on the street:
- Make trenches 50 cm deep, the length depends on the size of the shoots.
- The bottom is sprinkled with a 10 cm layer of sand.
- Bundles of blanks are laid out.
- Sprinkle with a 30 cm layer of earth and cover with a piece of film.
- To drain water, they dig a groove along the edge of the trench.
In a refrigerator:
- Soak planting material in cold water for 1-2 days.
- The bundle is wrapped in paper and then in a plastic bag or placed in a plastic bottle.
- Place in the refrigerator in the vegetable compartment or on the door.
The cuttings are checked once every 2 weeks. If some show signs of mold, they are all sorted out and put into a new bag. Dry cuts are immediately moistened.
In the cellar:
- The room is treated with a sulfur bomb or lime solution and wait for all surfaces to dry completely.
- 15 cm of wet sand is poured into the bottom of wooden boxes.
- Bunches of cuttings are laid out and covered with sand so that they are not visible.
Once a month, the planting material is inspected and the sand is moistened. Dried cuttings are immersed in water for 6 hours, then dried as usual.
Important! To prevent fungal infections, the chibouks are shifted twice during the winter.
Suitable storage temperature in the basement — +4…+5°С, humidity — about 60%. At higher rates, the grapes will begin to deteriorate.
In regions where there is constant snow cover in winter, the prepared cuttings are wrapped in film, covered with a layer of snow of at least 30 cm and trampled.
Read also:
How to germinate cuttings in spring
When to remove grapes from the shelter for germination depends on the climate of the region or the presence of a greenhouse. For the middle zone and the Moscow region, this time falls at the beginning of March, for the south - at the end of January - the first ten days of February.
Signs of cuttings suitable for further use:
- no dried or damaged;
- the ends remained green;
- a dark spot does not appear on the cut of a viable bud.
The material for disinfection is treated with a solution of potassium permanganate for 20–30 minutes. Then soak for a day in clean water at room temperature.

Rooting
New oblique cuts are made on each shank. A distance of 2-3 cm is left between the lower edge and the bud, the upper one is simply refreshed by removing 5 mm of the shoot. To stimulate the formation of roots below, additionally make 3-4 scratches across the cutting with a blade or needle. If desired, this part is dipped in the Kornevin solution.
Rooting methods:
- Sawdust. Lay soft paper in the box, add 2-3 cm of steamed sawdust, moisten it and place the bunches vertically. The container is placed on a heating radiator or heater. Water is added as it evaporates. Roots appear in 3-4 weeks.
- Priming. Prepare a mixture of equal parts of peat, sand, humus and turf soil. In small plastic pots or cut-off bottles with holes, make a thick layer of drainage and add soil. Plant the cuttings at a slight angle so that 1-2 buds remain at the top, and water.
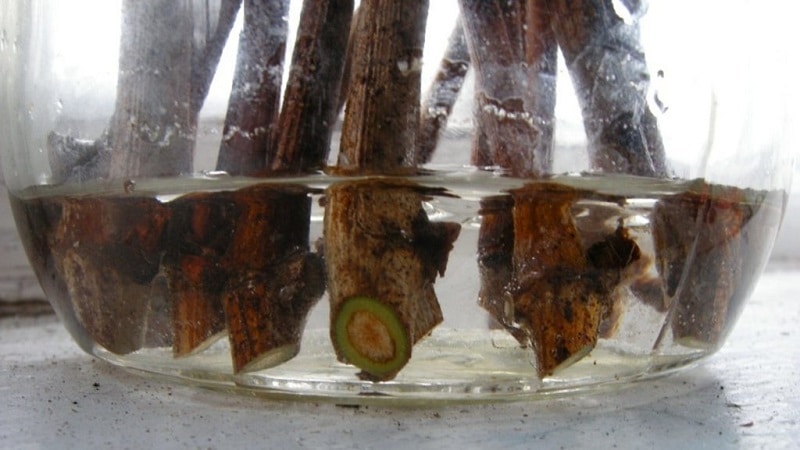
- In water. Place a piece of cotton wool in a glass jar and moisten it. Several blanks are placed inside. During germination, maintain a water level of no more than 1.5–2 cm so that the cuttings do not release the green mass to the detriment of the roots. When the shoots reach a length of 2 cm or more, they are transplanted into a separate container with drainage.
- Germination in open ground for the Black Sea region and southern regions in late May - early June. Choose a place well warmed by the sun and prepare a bed with loose soil. The top of the cuttings is covered with paraffin to restrain the growth of the crown. Plant in holes with a slight slope, water as a dry crust forms.
Future seedlings are kept in the light and fed once a week a weak solution of potassium or tincture of wood ash. Nitrogenous fertilizers cannot be used.

Landing
After 4–6 weeks, the root system will form and several leaves will appear. Stage-by-stage planting of grapes:
- The cuttings are taken out of the container and the roots are carefully examined; poorly developed ones are discarded.
- The elongated tops are pinched.
- They dig up the area using a spade, add humus and nitroammophoska. Heavy soil is loosened with sand.
- Make shallow grooves.
- The cuttings are laid out at intervals of 35–40 cm.
- Cover with earth so that the top bud is 7–10 cm above the surface.
- Compact the soil, water and mulch.
By next autumn you will get stronger seedlings, and after wintering they will begin to grow actively.
Conclusion
Proper preparation and storage of grape cuttings is the key to effective propagation of the crop. Before pruning begins, suitable vines are noted and only then are they divided into parts. During the winter, they monitor the moisture content of the planting material and protect it from temperature fluctuations. Germination increases the growing season by 2-3 months.