How to plant an apricot from a seed at home
Apricot is a heat-loving, but rather unpretentious crop that grows even in the central zone of our country. It is propagated not only by cuttings and root shoots, but also by seeds. Even if it grows wild, the tree will still produce tasty, although not too large, fruits. They are suitable for both processing and fresh consumption.
Propagation by seeds takes longer than by cuttings. However, such trees are more resistant to negative environmental factors and require less attention. Therefore, novice gardeners often choose this particular planting method. Let's look at how to grow an apricot seedling from a seed at home.
Is it possible to grow an apricot from a seed?
From apricot kernel grow a seedling both on the street and at home. This method of plant propagation will take longer than the vegetative method. The latter is suitable for owners of large plots: if there is space, you can grow many seedlings, eventually selecting the most successful ones.
Attention! Roasted apricot kernels and compote seeds are not suitable for planting. Their kernels are non-living.
If the plot is small, it is better to buy a ready-made varietal seedling. It will quickly reach fruiting age and produce delicious fruit.
Benefits of growing apricots from pits:
- Availability of planting material. The seeds are obtained by collecting fallen fruits from the tree.Apricots are sold on the market and cost less than ready-made seedlings or cuttings.
- Space for experimentation. Can grow from seeds variety, different from the mother’s, and not always for the worse.
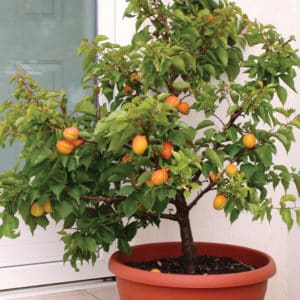
- Confidence in planting material. Unscrupulous owners often sell weak, infected planting material or seedlings with damaged root systems. When you grow apricots from seeds yourself, the seedlings will definitely turn out to be of high quality.
- Endurance. Grown apricots are distinguished by high frost resistance and resistance to negative environmental factors of a particular region (high humidity, dry weather, winds, etc.).
- High immunity. It is most pronounced for diseases characteristic of the region in which the seed was planted.
- Correct formation. The tree grows more beautiful than when cuttings are rooted.
- Good scion. Such trees produce hardy scions to which rootstocks take root well.
Despite these advantages, many gardeners prefer to grow apricots from cuttings. This is due to the disadvantages of the generative method:
- Unpredictability of the result. It is impossible to predict what will grow from a seed. The plant can retain its parental characteristics, acquire qualities of other varieties, or turn wild.
- Delayed fruiting. Such trees bear fruit 2-3 years later than those propagated vegetatively.
- The need for vaccination. To speed up fruiting and be sure of the quality of the fruit, the plant will have to be grafted.
- Duration. It takes much longer to grow an apricot from a seed than from a cutting.
Even wild apricot is not useful: such plants bear abundantly small but tasty fruits and are suitable for recycling.
Landing dates
Most apricots bear fruit in July. At this time, planting material is prepared. You cannot plant it immediately after harvesting, as the seeds simply will not germinate.
Before planting, the seeds must undergo stratification, which lasts 3-4 months. The optimal time to start it is November. The seeds will be ready for planting in a pot at the end of February or beginning of May, when the daylight hours are long enough and there is no need to use artificial lighting.
Selection and preparation of seeds
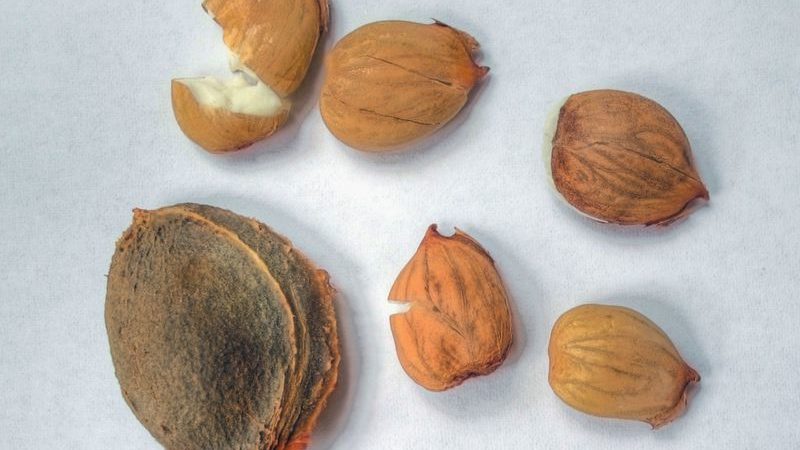
In order for the seedlings to be strong, hardy and capable of bearing fruit, it is important to choose the right planting material. Pay attention to the following signs:
- Gathering place. It is best to collect apricots yourself or order seeds from gardeners who live in a region with a similar climate. It is not recommended to buy fruits for planting in supermarkets and markets from wholesalers, since to preserve the freshness of the goods, the harvest for sale is usually harvested unripe. You can buy apricots at the market from private traders who collect the fruit from their gardens and sell them on the same day.
- Fruit ripeness. Apricots for planting should be as ripe as possible, or better yet, overripe. The ideal option is fallen fruits that have already cracked but are not yet rotting.
- Appearance of fruits. Apricots must be of the correct shape, with a color characteristic of the variety. Crooked, small fruits, specimens with spots, holes, growths, rot, mold, and signs of disease and pests are not suitable.
- Taste. The pulp and pit of the batch are tasted.If they are sweet and aromatic, the harvest on the future tree will be tasty.
- Appearance of the bones. The seeds should be smooth, clean, regular in shape and uniform in color. Spots, unevenness, cracks, chips, cobweb formations are signs of low-quality planting material.
- Variety. For planting, it is recommended to choose zoned varieties intended for cultivation in a specific climate. It is not advisable for people living in the northern and central regions to use heat-loving large varieties. Hybrids are not suitable for generative propagation.
Selected apricots undergo primary processing:
- Removing the pulp. The seeds are removed from the fruit and washed to remove the slightest particles of pulp under running water. Soft fibers on planting material will cause the development of bacteria and rotting.
- Disinfection. The seeds are soaked for half an hour in a light pink solution of potassium permanganate. This will reduce the risk of future plant infections from fungal infections.
- Drying. Place the bones on a cloth, cover with paper towels and dry off excess moisture.
Before stratification, the material is stored in paper or fabric bags. It is important that the temperature in the room with planting material is kept within +12...+20°C, and the humidity does not exceed 50%.
With increased humidity, the seeds rot, and sudden changes in temperature lead to the death of the kernel. Therefore, planting material cannot be stored in the kitchen or in the refrigerator.
Stratification
Stratification performs the function of hardening, during which conditions are created for the seeds that are similar to natural ones in winter.
As a result, the seeds accumulate useful substances and the kernel awakens, the shell cracks, and a sprout emerges from it.On average, the stratification period lasts from 90 to 100 days.
Step-by-step instruction:
- The seeds are soaked for 3 days in water at room temperature. The first time, use a light pink solution of potassium permanganate, then use plain water. The fluid is changed every 12 hours.
- A layer of disinfected sand is poured into the bottom of the container. The seeds are laid out on it in one layer and covered with a mixture of peat and garden soil.
- The soil is moistened with a spray bottle. The container with the seeds is removed to a place with a temperature of 0…+5°C.
Store planting material in the refrigerator, basement or cellar. In the southern regions, a box with it can be buried in the ground on a hill and left for the winter.
Attention! The readiness of the seeds for planting is indicated by the open flaps of the shell and the sprout peeking out from there.
At home, seeds can be stored in an unheated country house, in a refrigerator or basement.
How to plant an apricot seed in a pot
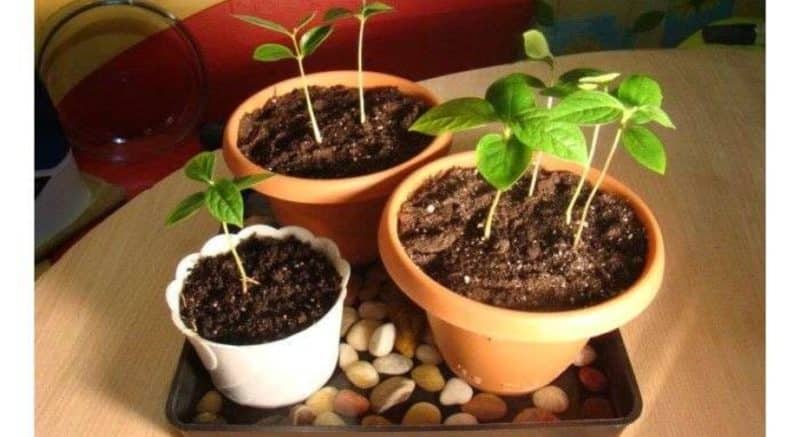
Planting apricot kernels at home is a simple procedure. However, its implementation requires preparation and compliance with a number of rules.
Plant the seeds in a suitable container. It is better to use shallow boxes in which it is convenient to plant the material in rows. A deep container will not work, since in it the plant will spend all its energy on forming roots, and the above-ground part will be weak.
The soil is prepared from humus, garden soil and sand (1:2:1). Small pebbles, broken ceramics or bricks, and shell rock are used as drainage.
The soil and drainage are disinfected by calcining in the oven, pouring with a dark pink solution of potassium permanganate or a solution of copper sulfate. To disinfect, containers are soaked for an hour in a dark pink solution of potassium permanganate or doused with boiling water.
Step-by-step instruction
How to plant an apricot from a seed:
- Place 3–5 cm of drainage at the bottom of the container. The rest of the volume is filled with nutrient soil mixture so that 3 cm is left free to the edges.
- The soil is moistened. Grooves 3 cm deep are made in it every 5 cm. The bones are placed in the recesses at a distance of 3 cm from each other.
- The crops are covered with earth, which is slightly compacted and watered warm, settled water.
- Cover the container with film or glass and put it in a cool, bright place.
Possible mistakes
Sometimes gardeners make mistakes due to which the seedlings turn out to be of poor quality.
Main problems:
- Refusal of stratification. In this case, the seeds will not have time to accumulate a sufficient amount of nutrients and will not germinate.
- Using old planting material. The longer the seeds lie, the lower their germination rate. It is better to plant seeds from the current year.
- Too deep. With such planting, the seeds will germinate slowly, and some of them will die in the ground.
- Lack of light. In poor lighting, the sprouts stretch out and become weak.
- Overwatering. Too wet soil creates optimal conditions for the development of fungi and bacteria. This provokes rotting of the planting material and the development of blackleg.
Caring for a planted seed at home
To ensure healthy and strong apricot seedlings when growing at home, it is important to provide them with optimal conditions:
- Before emergence, the seeds should be under the film. When they sprout, they begin to remove the glass, gradually increasing the ventilation time. Then the greenhouse is dismantled.
- Water the plants as the soil dries. Before the shoots appear, the soil is sprayed with a spray bottle, and the sprouts are watered at the root.Use water at room temperature, as icy liquid will kill the sprouts.
- After the appearance of 3 leaves, the plants are planted in separate containers. Do this together with a lump of earth so as not to damage the roots.
- The pot is turned relative to the window every two days so that the shoots are even and not directed towards the light.
- As soon as warm weather sets in on the site, the seedlings begin to harden. They are taken outside first for half an hour, then for an hour, gradually increasing the time to a day. Next, the seedlings in pots are kept outside.
- Once every 2 weeks, fertilize immediately after watering. Alternate mineral and organic fertilizers.
Transplantation into open ground
In open ground seedlings are transferred in the fall of this year or in the spring of next year, as soon as the snow melts. In the second case, preliminary hardening will be required.
Important! For apricots, choose a sunny, well-lit area of the garden. Groundwater should not lie closer than 1.5 m to the surface.
The soil is prepared in advance. The selected place is cleared of weeds, holes are prepared 20 cm deeper than the height of the pot and 20 cm wider than its diameter.
The soil removed from the hole is mixed with a bag of river sand, a bag of compost or rotted manure, 35 g of superphosphate and 25 g of potash fertilizers.
A 10 cm layer of disinfected drainage and a 10 cm layer of nutritious soil mixture are laid at the bottom. The plant is taken out of the pot along with a lump of earth and placed in a hole. The free space is filled with soil, compacting it. The seedling is watered and the tree trunk circle is mulched.
Further care
Young apricots require care, otherwise they will not survive the winter.
Rules of care:
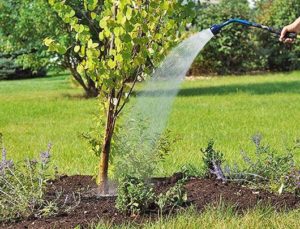
- Watering. The first year, seedlings are watered once a month if there is no rainfall. Use 1 bucket of settled water per plant.An adult apricot requires up to 6 buckets.
- Feeding. If the hole is properly prepared, you will not have to feed the tree for the first 3 years. Then, once a year in the fall, 1 bag of humus and 1 kg of ash are added to the tree trunk circle for digging.
- Loosening. After each watering, the soil is loosened to destroy the earthen crust.
- Trimming. In the second year, a crown is formed, leaving no more than 4 branches of each order. In the fall, sanitary pruning is carried out, removing old dry branches.

- Preparing for winter. The area is cleared of dry leaves, weeds, and plant debris. Young trees are planted as high as possible. If possible, a frame with heat-insulating fabric is formed around the plant.
How to plant apricot seeds directly in open ground
Experienced gardeners recommend planting seeds directly in open ground. In this case, the plants will be more hardy and will endure the winter more easily.
Plant bones in summer it is not recommended, since most of them will be taken away by rodents. Planting work is best done in late autumn, before the ground freezes. Such crops will undergo natural stratification, germinate in the spring and have time to grow stronger before the next winter.
Before planting, the soil in the selected area is dug up and cleared of weeds. For every 1 m2 add 1 bag of humus, 35 g of superphosphate, 20 g of potassium salt. If the acidity is high, add dry lime or ash.
A groove 10 cm deep is formed. A 5 cm layer of grass, peat or humus is placed on the bottom. Then seeds are laid out every 5 cm. The ditch is covered with earth, mulched with peat and watered.
How to graft a twig grown from a seed
Graft apricot not necessary, since even wild ones produce edible and tasty fruits.However, some gardeners use grafting to improve the taste characteristics of the crop and speed up fruiting.
A 2-3 year old base grown from a seed is used as a rootstock. For grafting, take a branch of a varietal fruit-bearing tree. Work is carried out in the spring.
The easiest way to vaccinate is in the cleft:
- As a scion, cut a branch with 3-4 live buds. All leaves are torn off, and a flat double-sided wedge 3-4 cm long is made on the lower part.
- A split is made in the central part of the rootstock, equal in depth to the length of the scion wedge.
- The scion wedge is inserted into the split of the rootstock so that the cambial layers coincide.
- The junction is wrapped with garden tape, and all open sections are covered with garden varnish.
- The tape is removed when the graft takes root.
Advice from experienced gardeners
Gardeners know several secrets of growing seedlings from seed: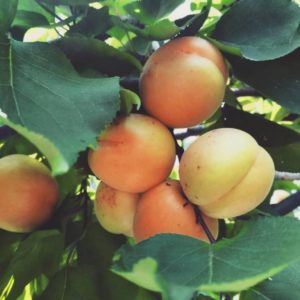
- Some of the seeds will not sprout, so it is recommended to sow planting material thickly. When shoots appear, weak specimens are removed.
- To speed up stratification, apricot kernels are placed in the freezer several times and then placed in the refrigerator again.
- When planting seeds directly into open ground in the first winter, it is recommended to completely cover the plants with mulch.
Conclusion
It is possible to grow apricots from seeds at home, but experienced gardeners recommend sowing planting material directly into open ground. In this case, fewer apricots will sprout than in a pot, but they will be stronger and will easily survive the winter.
Growing seedlings is not difficult. The main thing is to prepare the seeds correctly and follow the rules of planting and care.
A good story about growing apricots. Good luck!