Step-by-step instructions: how to braid onions for storage
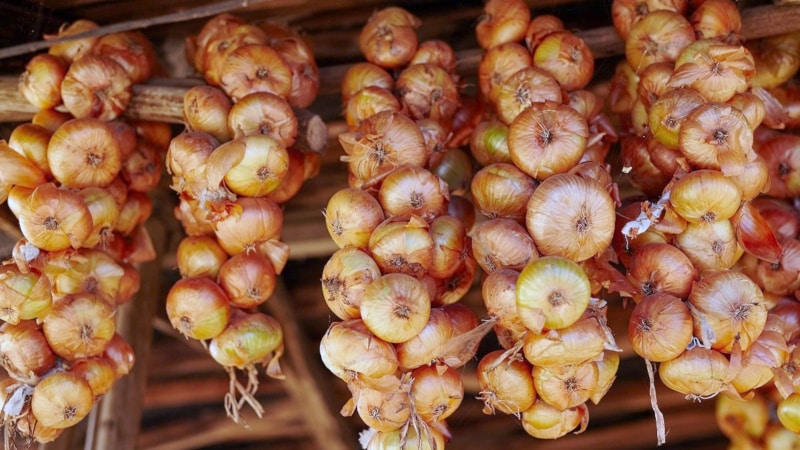
Onions are known for their taste and beneficial properties. It is added to many dishes, and it is a must in every home. stored stock of onion heads. For a long time in Rus', onions were tied into long, lush braids for winter storage. This tradition is alive today and is still popular.
In this article we will tell you how to braid onions for storage.
Why store onions in braids?
The onion braid is rightfully one of the best ways storage.
There are a number of reasons for this:
- Each bulb the spit is well ventilated, so the risk of disease and rotting is minimal.
- Vegetables are not saturated with the smell of containers and retain their aroma.
- If the bulbs do begin to rot, you can notice this in time and remove the rotten heads from the braid.
- Since all the bulbs are visible, it is easy to choose the right size head for your dishes.
- It is more difficult for rodents to reach the scythes suspended from the ceiling and spoil the harvest.
- If you tie an onion in a braid for the winter, it will not take up much space.
- This is not only convenient, but also aesthetically pleasing: bulbs of different shades and flowers are braided into braids, thereby decorating the kitchen in an original way. They fit especially well into country style.
The only drawback of braiding braids from a bow is labor intensity of work. But the convenience and beautiful appearance are worth spending several hours on tedious, monotonous work.
When is the best time to weave a bow?
The fact that the onion is ripe will be indicated by its dried lower leaves.Once this happens, it is dug up and prepared for braiding. Each bulb is carefully dug up with a shovel or pitchfork so as not to damage it and pulled out of the ground. It is not advisable to touch the tops - they can easily come off, and for weaving they will need to be long and strong.
Reference. If the time is right, but the onions still haven’t ripened, trample the bed - walk on top of it or rake off some of the soil from the bulbs. The procedure is carried out 2-3 weeks before harvesting.
It is better to make a braid of onions 3-4 days after digging and drying, when the tops have become soft, but have not yet dried completely.
Preparing onions for braiding
To weave a braid from a bow for storage, prepare the turnips properly.
This is done in three stages:
- drying;
- cleaning;
- sorting.
Before weaving onions into a braid for the winter, the harvest is dried. It is best to leave it outdoors in the sun, spread out on nets, paper or fabric. The optimal temperature is 24-26°C, and the drying time will be 3-4 days. The main thing is not to overdry - the tops should remain soft and elastic.
Important! The weather during drying should be warm and the air dry. If the days are rainy, dry the onions under a canopy or on the balcony. High humidity will lead to rotting and death of the crop.
The dried onions are cleaned of soil residues and the roots are cut to 1-2 cm. This is not necessary, but braids with heads without roots will look neater.
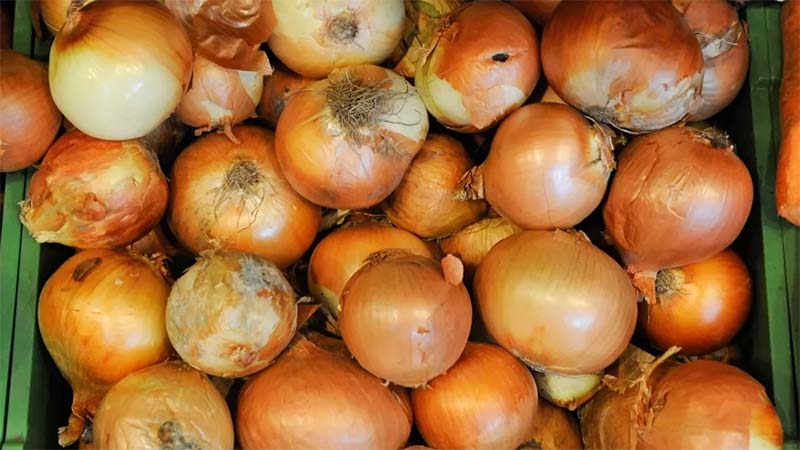
The peeled bulbs are sorted, uneven and broken ones are set aside, and bulbs of the same size are selected for each braid. If you want to make an unusual curly braid, divide the turnips by size and braid them, making the transition from large to small.
It is not recommended to alternate them: it will be inconvenient to weave them and monitor their safety in the future.
How to knit a bow into braids: step-by-step instructions with photos
There are several patterns for weaving bow braids for the winter. For each method you will need a rope made of any natural material 2-2.5 m long or more. Due to the weight of the bulbs themselves, the braids are heavy, and without a strong base, such a braid will simply fall apart. Also, instead of rope, use a bandage, tourniquet or twine.
Method 1
First of all, prepare the base for the braid - this is where you will need a strong rope. Measure it so that, bent in half, it is no shorter than 2 m.
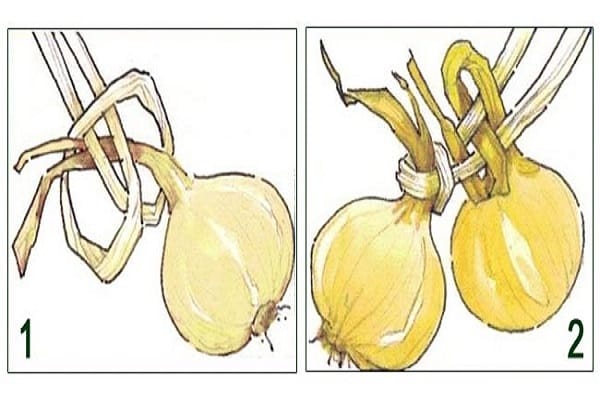
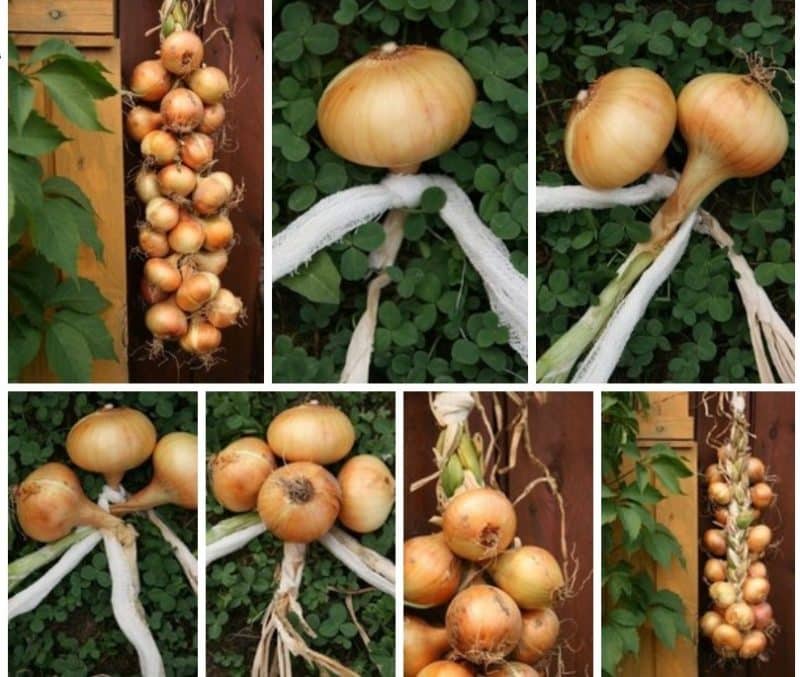
- Select the bulb with the longest and strongest leaves. Tie it to the center of the rope, tightening the knot at the very base. You will get three tails - the tops of the onion and two ends of the rope.
- Using these ponytails, start braiding your hair. Place a new onion head on each side, weaving it in at the base and continuing the braid with its tail.
- Braid the braid until about 10-20 cm remains of the rope. It is important that the braid itself is no shorter than 2 m.
- Tie the remaining ends of the rope tightly around the last tops, and then make a strong loop out of them, from which you will hang the finished onion braid.
Weave the bow tightly so that the braids do not fall apart, and secure each one at the very base of the leaves.
Method 2
Here we also need a base rope. Measure it as for the first method:
- Select the largest bulbs with long feathers.
- Fold the rope in half and secure the bulb in the middle to create three “tails” for the braid.
- Start weaving in the bulbs, distributing them evenly on each side.
- Every 3-4 heads, tighten the rope into a strong knot.
- At the end, secure the braid with several knots and make a strong loop.
Method 3
For this method you will need bulbs with long, strong tops:
- Tie three onions together.
- Start braiding your hair using their feathers, adding a new bulb on each side each time.
- Secure the tops of the last bulbs with a rope and make a strong loop.
This braid turns out to be short, since onion feathers without the support of a rope will not withstand the weight of a large number of turnips.
Method 4
Take the rope again and prepare the base as in the first and second methods:
- Tie the bulbs together in pairs, use a rope or weave the tops together, leaving one bulb separately.
- As in the previous methods, secure the first turnip in the middle of the rope.
- Place pairs of onions tied together in turn between the ends of the rope, alternating them in one direction and the other.
- After every 2-3 pairs, tie the rope in a knot and secure this section of the braid.
- Use the ends of the rope to secure the entire braid and make a strong loop out of them.
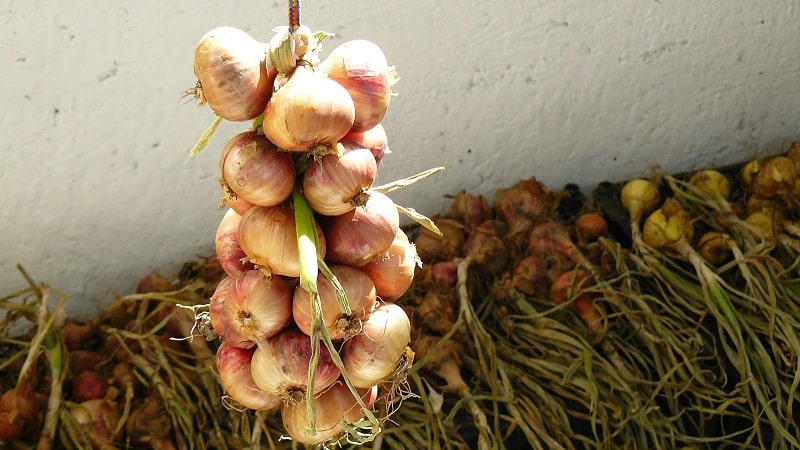
A braid of dried onions
Even if you didn't take care of the bulbs and dried them too much, they will still make a strong braid:
- Remove all the husks from the bulbs, leaving only the dry feathers.
- Make a ring about 70 cm long from a strong rope or ribbon and hang it on a hook or door handle to make it easier to work with.
- Braid two pairs of bulbs, fastening them together with a rope or tying the tops themselves into a knot.
- At the very beginning of the ring, fasten the first pair, then, crosswise with the first, the second.
- Next, take one onion at a time and wrap their tops around a double rope. Distribute the heads evenly, alternating each side.
- Leave a loop on top measuring 7-10 cm, from which the pigtail will be suspended.
- If the tips of the feathers stick out from the finished braid, carefully trim them with scissors.
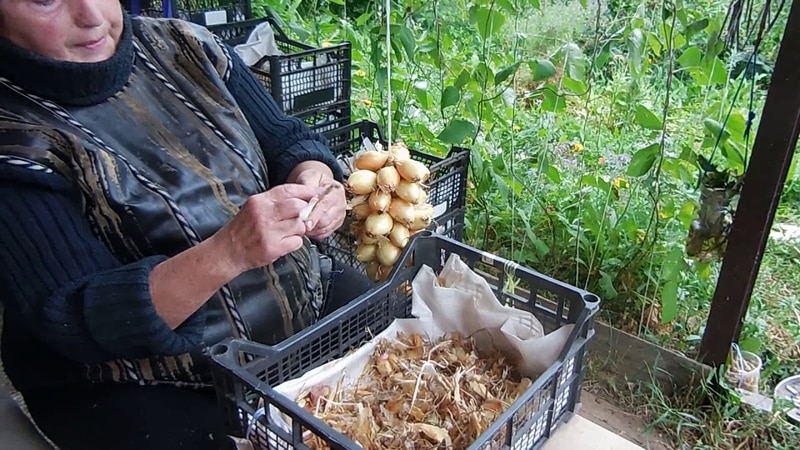
How to store onion braids
The ideal place to store onions is any dark, cool room with good air circulation, e.g. cellar or basement. The optimal temperature is 0…+16°C. The room should be dry - if the humidity level is above 60%, the bulbs will quickly deteriorate.
If the onion will be stored in an apartment, hang it as far as possible from heating appliances and heat sources. Temperature for storage in an apartment is +18…+22°C. If you eat the bulbs right away, they will not have time to spoil.
In such conditions, onions are stored for up to 6 months, provided that each of the bulbs was initially intact and healthy.
From time to time, carefully inspect all the bulbs. If at least one of them begins to rot, it is immediately removed from the braid to prevent further spread of the disease.
Conclusion
Braiding onions is the best way to harvest for the winter. The keeping quality of turnips depends on the room chosen for storage, high-quality drying of the bulbs and proper harvesting. But if you take into account all the recommendations, onion braids will delight you with their beauty all winter and spring.