Growing and caring for shallots, photos of the harvest and secrets of agricultural technology
Shallots are called differently: magpie, Ashkelon, family. The culture became widespread in Europe; it came to us from Asia Minor. For food They use small elongated bulbs with white, white-pink, white-violet and greenish flesh, thin green feathers with a delicate aroma and semi-sharp taste.
You will find detailed information about planting, growing and caring for shallots with photos in the article.
Description and characteristics
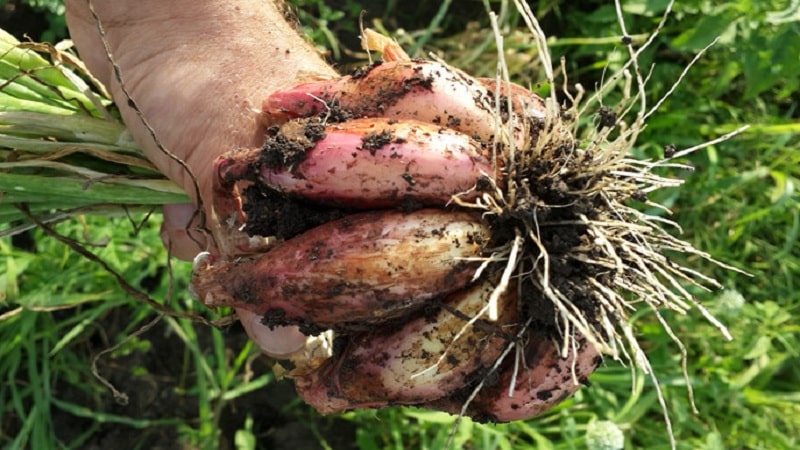
Shallots are a herbaceous perennial plant that forms peculiar “nests” of a large number of bulbs. For this, the crop received a second name - family onion. Shallots are early ripening plants; when planted in regions with a temperate climate, they ripen in 65-80 days.
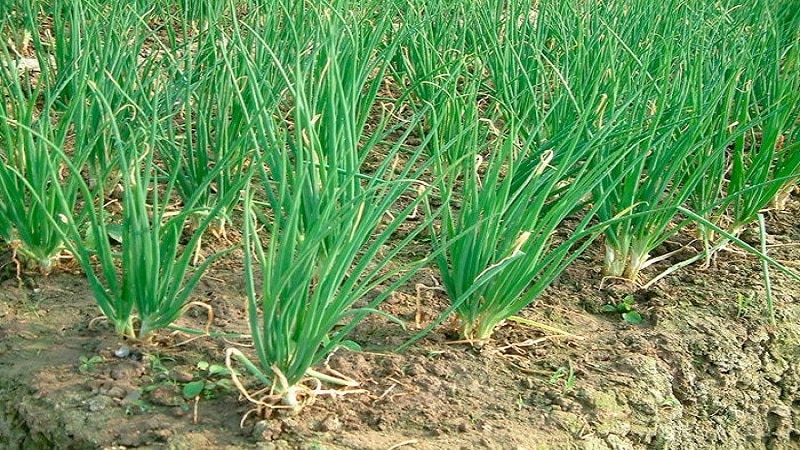
The root system is weakly branched. The feather is light or dark green in color, sometimes with a waxy coating, hollow inside, tubular, does not become rough for a long time, and has a delicate taste.
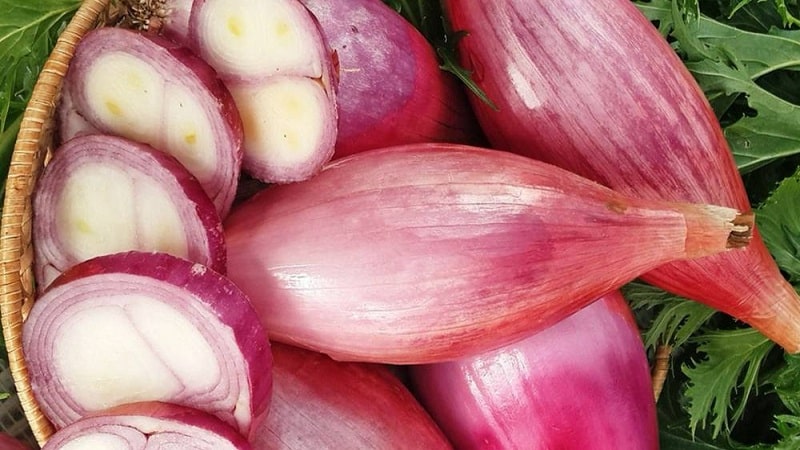
The bulbs are elongated, with thin scales. The average weight is 20-50 g. Hybrids reach 90-100 g. The color of the internal scales is white, purple, pink, green. The color of the outer scales is white or purple. Shallots are perfectly stored in an apartment or cellar until spring.
The inflorescences are collected in an umbrella located on the meter needle. The seeds remain viable for 2-3 years and are externally similar to onion seeds.
Shallots reproduce vegetatively, but over time the set loses its characteristics, the plant often gets sick and reduces productivity.In such cases, it is recommended to replace the seed with fresh one or grow a set from seeds.
The photo shows shallots.

Features of growing in open ground
Delicious shallots have the best productivity when grown on old arable, fertile and heavy soils. The best crop predecessors are peas, beans, zucchini, tomatoes, cucumbers, and cabbage. These plants saturate the soil with oxygen and nutrients necessary for onion growth.
It is not advisable to plant heirloom onions in an area where beets, corn, garlic or sunflowers previously grew. The soil after these crops is deprived of useful substances and needs additional fertilizing with mullein, phosphorus, potassium, and magnesium.
Carrots are planted next to shallots to repel onion midges. Strawberries, radishes, and cucumbers have similar properties.
Close proximity to spinach, parsnips, broccoli, and turnips is undesirable due to the inhibitory effect on onion growth.
Shallots are planted with sets and seeds.
It is advisable to plant family onions in open ground in the spring - in April-early May. At this time, the plant is saturated with a large amount of melt water, is not afraid of night frosts, and gains strength faster.
Shallots are also planted in the fall - in October. Planting is done about a month before the first frost. In such conditions, the bulbs withstand the winter with good rooting. The bulbs can withstand temperatures down to –20°C.
But in the regions of the middle zone, in Siberia and the Urals, almost 50% of the planting material freezes, despite stratification and increased resistance to diseases and insects. In this regard, farmers recommend planting shallots in the fall only in the southern regions.
In the greenhouse
Shallots are grown mainly in open ground, but to obtain green feathers in large quantities they are planted in greenhouses, greenhouses and on windowsills.
To get early greens, planting is done in February: the bottom of the bulbs with roots is cut off and planted in moist soil. The first harvest is harvested in March.
To re-fork the greens, dig up the onions and cut them to the middle. Then they are replanted in the ground.
The photo shows green shallot feathers.

The best varieties of shallots
The table contains the best varieties of shallots.
| Variety name | Ripening period | Bulb weight, g | Coloring | Number of bulbs in the nest, pcs. | Keeping quality |
| Emerald | 60-62 days | 20-23 | Husk - brownish-pink, flesh - white | 4 | 10 months |
| Albik | 60-62 days | 25-30 | Husk - yellow, pulp - white-green | 3-8 | 10-12 months |
| Kubansky | 85-90 days | 25-30 | The husk is brown-yellow, the pulp is white, white-green | 3-4 | 10 months |
| White Queen | 80-90 days | 60-70 | Husk - creamy white, pulp - white | 3-5 | 12 months |
| Bargalinsky | 85-90 days | 50-90 | Husk - pink-yellow, pulp - white | 4-6 | 10 months |
| Koinarsky | 60-65 days | 20-25 | Husk - brown-pink, pulp - white-violet | 3-4 | 10 months |
| Surprise | 68-70 days | 20-25 | White husk and pulp | 3 | 6 months |
| Olvia | 75-80 days | 20-25 | Husk - brown-pink, pulp - white | 3-4 | 8-10 months |
| Lyra | 72-74 days | 40-50 | Husk - brown-pink, pulp - white | 3-6 | 10 months |
| Pomegranate | 80-90 days | 20-40 | Husk - red, pulp - white-pink | 3-6 | 10 months |
Correct fit
Shallots are grown by seeds to renew planting material and by sets to produce bulbs and greens. The second method is more preferable due to the low germination rate of nigella. Planting is carried out in the spring throughout Russia and in the fall, before winter - in the south.
Landing dates
The timing of planting shallots depends on the method of its use:
- The crop is planted on feathers and turnips in open ground in March-April, provided that the soil has sufficiently warmed up. In this case, the green feather will appear in May, and the turnip in June.
- In April or May, seedlings are planted to obtain a full-fledged bulb.
- Planting before winter is carried out in October - November. Autumn planting produces green feathers in April and turnips in early summer.
Preparation of planting material and soil
Shallots are grown from small bulbs measuring 1-3 cm and weighing 10-20 g. From them, fewer bulbs are formed in the nest, but of a larger size. Large specimens are cut into pieces and a larger number of small turnips grow from them.
Planting material is selected from healthy plants with a large nest and dense greenery.
Methods for processing bulbs before planting:
- soaking in water at a temperature of +40…+42°C for 9-10 hours;
- warming up on the battery for eight hours to prevent early shooting;
- soaking in water at a temperature of +20...+28°C for 15 days;
- half an hour treatment with a strong solution of potassium permanganate;
- 12-hour treatment with saline solution (200 g per 10 liters of water).
When growing shallots from seeds, the nigella is placed in a fabric bag and soaked in water at room temperature for 24-30 hours. The water is changed periodically. Then the seeds are placed in a pink solution of potassium permanganate and dried.
The beds are located on the south side of the garden. The plant prefers fertile soil with neutral acidity (pH=6-7). When planted in acidic soil, shallots will grow small and tough.
In places with close groundwater, the beds are raised by 20-25 cm.
The soil is prepared in the fall: it is deeply plowed, weeds are removed, loosened and fertilized with a mixture of 6 kg of compost, 50 g of superphosphate, 200 g of ash per m².
In spring, 5 g of nitrogen fertilizers per m² are added to the soil to ensure a set of green mass.
Landing
Rules for planting shallots in spring:
- the bulbs are placed in furrows at intervals of 10 cm;
- Row spacing for large specimens is 20-30 cm, for medium-sized specimens 15-18 cm, for small specimens 8-10 cm;
- the optimal planting depth is 2-3 cm, the tops should protrude 0.5 cm from the ground (with deep planting, growth is delayed and the yield decreases, with shallow planting, the bulbs stick out from under the ground and dry out);
- After planting, the beds are mulched with peat or humus.
To speed up the forcing of green feathers, the sowing is cut to the shoulders.
The rules for planting shallots before winter are the same as for spring planting, but at the end the area is covered with peat with a layer of 3-4 cm. The depth of planting the bulbs is 3.5-4 cm.
Sowing shallots with nigella is carried out to renew the planting material - once every 10-12 years. Seeds are sown in spring, and onion sets are harvested in September. These are small nests of small bulbs suitable for planting next season. Sowing depth - 1-2 cm.
Further care
Shallots are watered at least three times per season. At the beginning of the growing season, the beds are watered frequently and abundantly. A month before harvest, watering is stopped so that the feathers have time to turn yellow and dry. In rainy summers, watering is carried out less often than in drought. In the absence of precipitation in cloudy weather, water the shallots once every 7 days.
After each watering, the earthen crust is loosened for better air flow to the root system. Weeds are removed as they grow.
Family onions are fertilized twice:
- I feeding - in the spring, after the appearance of the third leaf: 1 tbsp. l. urea per 10 liters of water;
- II feeding - after the appearance of five leaves: 1 tsp. potassium monophosphate per 10 liters of water.
Disease and pest control
Shallots are susceptible to fungal diseases: powdery mildew, downy mildew, fusarium, and neck rot. Sick plants are completely removed from the site, and healthy ones are irrigated with Quadris, Mikosan, and Pentafag preparations.
Disease prevention includes:
- disinfection of planting material in the preparation “Maxim”, “Fitosporin”, potassium permanganate solution;
- compliance with crop rotation;
- timely removal of weeds.
Onion plantings most often strike onion fly. The pest appears during the flowering period of cherry and dandelion. Affected plants lag behind in development and rot.
To combat insects, onion plantings:
- dusted with wood ash;
- treated with saline solution (200 g of salt per 10 liters of water).
Onion nematode - a dangerous pest that bends the bottom of the bulb. When infected planting material enters a garden bed, healthy plants become infected. To prevent infection, the bulbs are disinfected in a 4% formaldehyde solution.
Green shallot feathers are attacked by aphids. The acaricide “Verticillin” helps fight it.
Harvest and storage

Harvest dates depend on the variety. Early varieties are harvested at the end of July, late varieties - in August.
Experienced gardeners recommend focusing on the appearance of the plant: when ¾ of the feathers are dry and wilted, you can start harvesting the onions.
Digging is done with a shovel in dry sunny weather. The dry feather is left, the onion is kept under a ventilated canopy for 15 days to dry. Dry feathers are trimmed, leaving 2-3 cm or braided.
Advice. You should not delay harvesting due to the possibility of re-growth of roots and deterioration of the taste of onions.
Onions are stored in a dry and cool room at temperatures down to –1°C or in an apartment at temperatures up to +19°C, away from heating devices. The harvest is placed in boxes, nets, breathable fabric bags, and baskets. In such conditions, it does not dry out and does not germinate for 6-8 months.
Conclusion
Growing and caring for shallots is practically no different from cultivating onions. Planting is done with seeds and sets. The second method is more preferable due to the low percentage of seed germination in open ground. Renewal of seed material is carried out through sowing seeds. The collected bulbs are used for planting next season.
To obtain a rich harvest, onions are provided with abundant watering at the beginning of the growing season, loosening the beds to better supply the root system with oxygen, weeding and fertilizing with organic and mineral compounds. For storage use ventilated containers. The optimal storage temperature for shallots is from –1°C to +19°C.