What kind of potato diggers are there for the Neva walk-behind tractor and how to make one yourself
Potato diggers are indispensable in homestead farming. Mechanization greatly facilitates heavy physical labor and saves time. Potato harvesting equipment is constantly being improved and is always available for sale. Craftsmen construct digging devices themselves.
Potato digger for the Neva walk-behind tractor
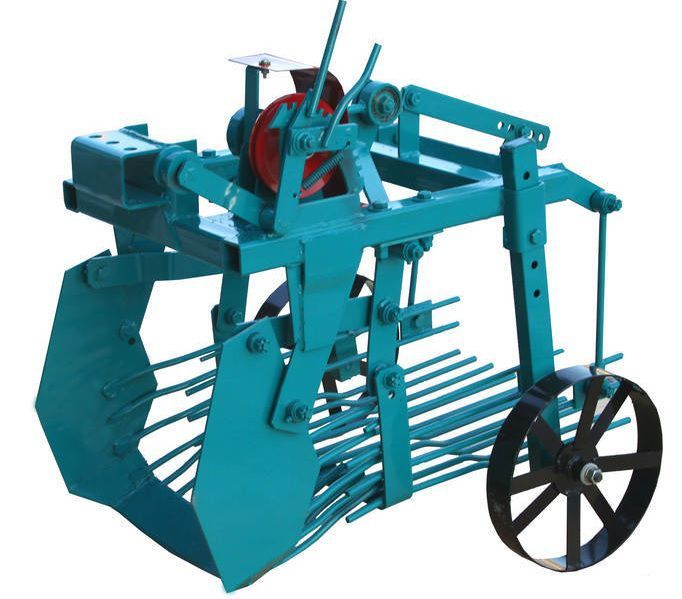
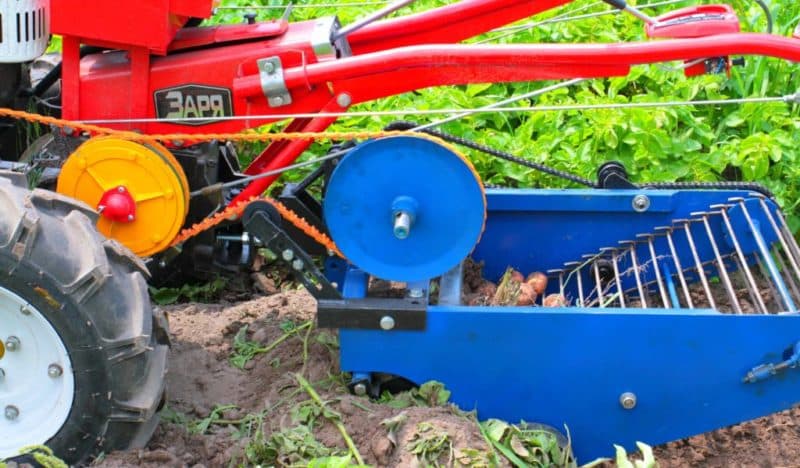
Potato digger - a special hinged mechanism that is attached to walk-behind tractor. During its operation, the teeth of the nozzle cut into the ground to the depth of tuber growth. The layer of captured earth, along with the potato bush, is pushed to the surface.
Most digging machines are suitable for the Neva model. When choosing, the possibility of compatibility is specified.

Types of units
According to the operating principle, potato harvesting mechanisms are divided into passive and active.
Fan or passive
The working part of a fan potato digger resembles an ordinary pointed shovel. Metal rods are fixed on top, shaped like a fan. The sharp edge goes deep into the ground, digs up and throws the tubers onto the twigs. Fan nozzles include model KV nozzles with qualifications 1 - 3.
Advantages of choosing a fan model:
- convenient for working in areas with light and medium soil in a small area;
- has a simple device, is easy to attach, there are no rotating parts;
- does not break due to heavy loads;
- affordable.
Flaws:
- not suitable for hard soil: some of the root crops may remain in the soil;
- the sharp end of the working part is capable of cutting tubers;
- The potatoes are picked by hand.
Active: vibration and conveyor
Active digging helps to better separate the soil from the tubers. The wheels of the units allow you to control the depth of the cutting device, so the potato tubers are not damaged.
Vibrating or rattling

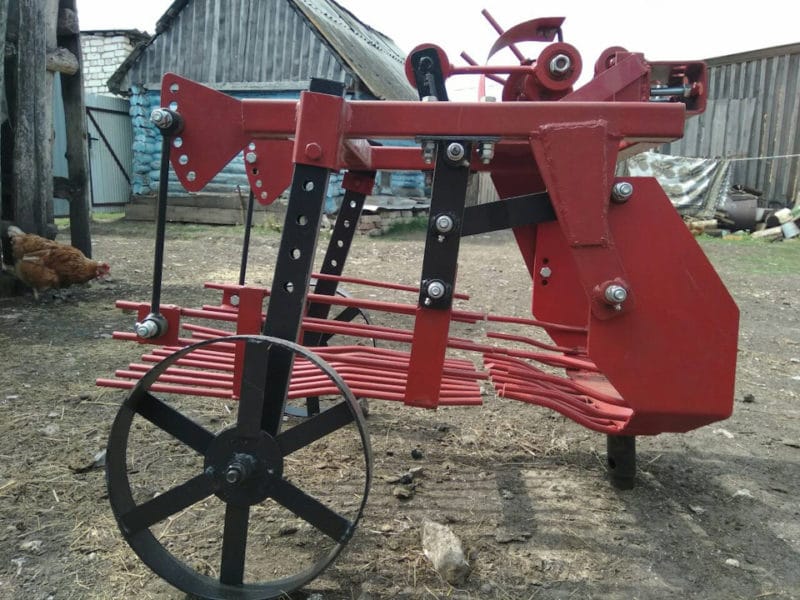
The soil is raised with a plowshare. Tubers with soil fall on a screen - a grid for sifting earth, which, as a result of vibration, falls down. The potatoes end up on top and are easy to assemble. Potato diggers ensure harvest quality up to 98%.
Conveyor
The peculiarity of the species is that the soil with the dug up potatoes is supplied to a conveyor belt. With this harvesting method, the tubers are not damaged. The devices harvest crops in any weather.
The best models: review and technical specifications
| Model | Weight, kg | Speed, km/h | Land coverage width, cm | Digging depth, cm | Productivity, ha/h | price, rub. |
| KKM-1 | 40 | 1,1-2,1 | 37 | 20 | 0,2-0,5 | 11000-12000 |
| KVM-3 | 39 | 1-2 | 37 | 20 | 0,1-0,2 | 7000-9000 |
| "Poltava" | 34 | 2-3 | 40 | 18 | 0,2 | 11000-11500 |
| Vibrating potato digger | 34 | 1-2 | 36 | 20 | 0,15-2 | 11000-15000 |
KKM-1 - model conveyor. Suitable for heavy soil over a large area. Not recommended for a summer residence.
When processing heavy soils, an additional knife is attached to the KVM-3 unit to increase vibration.
"Poltavachanka" - vibration equipment. The digger is compact and lightweight. It is used on medium-heavy soils with a humidity of no more than 30%. The wheels regulate the depth of tillage.
Vibrating potato digger guarantees fast and thorough cleaning.
How to design a potato digger for the Neva walk-behind tractor on your own
Agricultural equipment manufactured at industrial enterprises is purchased to work over a large area. Suitable for personal gardening homemade unit. The cost of making it is less than buying it in a store.

What to collect from
To make a simple fan digger, take an ordinary shovel and metal rods.
Designing a vibrating digger is more difficult. You will need factory drawings and certain materials:
- fastening rod 30 cm long;
- metal rods 120 cm long, 10 mm in diameter;
- square profile pipe 4 m long, 4 cm high and 4 cm wide;
- metal tubes 15 cm long, 3 cm in diameter;
- sheet metal length and height 40×40 and 70×30 cm, thickness 0.3 and 0.4 mm;
- metal squares 30, 40 and 60 cm long, 30 mm high and wide;
- wheels with a load capacity of 100 kg;
- spare parts for L-shaped fasteners;
- wheel axles.
It is recommended to use only high quality steel materials.
The following tools are also required for assembly:
- angle grinder (grinder);
- welding machine;
- engraver, drill;
- sledgehammer and set of wrenches;
- metal scissors;
- nuts and bolts (No. M12).
Instructions
Make the base:
- Divide the pipe into 4 parts: 2 - 80 cm each and 2 - 120 cm each.
- Boil into a rectangle shape.
- Sand the edges of the base with a machine.
Weld the jumpers:
- Weld the tubes along the edge of the base (step back a little from the length of the frame).
- Make holes in the tubes with a diameter of 10 mm.
Install the rods:
- From the edge of the base, count 5 cm from the side of the jumpers.
- Secure a square with a side length of 50 cm.
- Step back 20 cm.
- Weld a square 40 cm long.
- Make an indent of 40 cm.
- Fasten the smallest square.
- Cut strips of metal 40 cm long, 0.4 mm thick.
- Weld a strip under the slats at an angle of 45°.
- Weld the strips. The product will be in the shape of a triangle.
Make the working part - the ploughshare:
- In a sheet of 40x40 cm with a thickness of 0.3 mm, drill 2 holes for bolts in the vertical posts.
- Tighten the workpiece well at the bottom, retreat 50 cm.
- Screw the sheet on the opposite side in the same way.
- Weld a sheet of 70x30 cm with a thickness of 0.3 mm tightly to the first part.
- Using a sledgehammer, give the sheet a cone shape - hit it in the central part.
Make a lattice:
- Solder the rods to the working part: the gaps between the rods are 5 cm. The ends should not extend beyond the frame.
- Weld rods for fastening on the sides of the base and connect them with a square tube.
Attach wheels:
- Make openings with a diameter of 10 cm in the vertical posts. The gap between the holes is 4 cm.
- Weld L-shaped fasteners to the wheels and attach them to the racks or axles for the wheels.
How to use this unit
To begin, adjust the depth of travel of the plowshares: set the digging depth to 12-15 cm. The supports of the support wheels will help with the adjustment: to increase the depth, the posts are shortened, to decrease them, they are lengthened.
Do the preparatory work:
- Remove the pulley protective cover.
- Install the driving pulley of the digger onto the hub of the large pulley of the walk-behind tractor.
- Mark the centers of the 3 holes according to the holes in the small pulley.
- Drill 3 holes through the bushings to install the pulley.
- Connect the pulleys of the digger and walk-behind tractor with bolts.
- Install the belt drive protective cover.
Please read the specifications before assembly. Lubricate the parts and perform assembly with special keys:
- Connect the digger to the hitch assembly of the walk-behind tractor, tighten the bolts.
- Place the drive belt on the walk-behind tractor and digger pulleys.
- Check the operation of the tensioner and belt drive.
- Check the lubrication in the hinges.
- Start the engine, turn on the power take-off shaft smoothly, check the tension.
- For 5-10 minutes, rotate the digger at 200-250 rpm, gradually increase to 560. It is recommended to roll in for 25-30 minutes.
Care Tips
For long and reliable service of the digger, follow these simple rules:
- while digging, constantly check the fastening of parts on the shafts and bearing housings, do not allow them to overheat;
- eliminate defects only with the engine turned off;
- Harvest potatoes in dry weather;
- upon completion of cleaning, remove dirt and wipe dry;
- store in a dry, closed place;
- lubricate the chassis.
Conclusion
Buying a potato digger or designing it yourself depends on your financial capabilities and skills. In any case, the costs will be worth it. Using potato harvesting equipment to loosen the soil, dig carrots and garlic will make work on the land easier.