Step-by-step guide: how to grow celery at home on a windowsill and what you need for this
Celery is one of the most useful cultivated plants. It contains many valuable substances. Among them are vitamins B, E, C, PP, K, potassium, sodium, phosphorus, iron and iodine. It is not for nothing that celery was first used only as a medicine, and later it was discovered for cooking.
In winter, eating celery will help avoid vitamin deficiency. However, it is expensive in stores out of season and often contains harmful substances that it absorbs from fertilizers during the growing process. Therefore, many housewives prefer to grow its greens themselves. How to grow celery at home on a windowsill - read on.
Is it possible to grow celery on a windowsill?
If we are talking about the greenery of the plant, then yes. Root and stem varieties are grown in open ground or in a greenhouse.

Celery is an undemanding crop. He is comfortable at room temperature. In spring and summer it develops quickly even without additional lighting. In autumn it is recommended to use a phytolamp.
Note! Grow leaf celery In the fall you can do without a phytolamp. In this case, the plant will develop more slowly.
Suitable varieties
When planting a root or stalk, it is not necessary to take into account the plant variety. In any case, you can get greens using the vegetative method. Usually such planting material is purchased at the market or in a store, without even being interested in its origin.
When growing celery indoors from seeds, the plant variety matters. Practice has shown that early ripening varieties grow best at home. They are considered the most unpretentious in terms of lighting and temperature. Most often, such celery has the highest immunity. Early varieties include Nezhny, Bodrost, Zakhar.
Preparing for landing
To grow celery on a windowsill, you need to create the appropriate conditions.
For celery, a universal mixture is suitable. seedlings, which is sold in gardening stores. Some housewives prefer to prepare the soil mixture themselves. To do this take:
- 2 parts of the base - garden soil;
- 1 part baking powder - crushed coconut substrate, sawdust, sand;
- 2 parts of nutrient substrate - humus or peat.
Add 1 cup of ash to a bucket of this mixture. The soil is disinfected in one of the following ways:
- roasting in the oven;
- pouring boiling water;
- watering with a dark pink solution of potassium permanganate;
- watering with a solution of copper sulfate (1 tbsp. l of sulfate per bucket of water);
Containers for growing celery should be wide enough, at least 15 cm deep. Special pots and containers made of any materials are suitable: mayonnaise buckets, instant noodle trays, etc.
Containers are also disinfected. They are soaked for half an hour in a dark pink solution of potassium permanganate. Wooden boxes are wiped with this solution.
In addition to containers and soil, for growing celery you will need drainage - crushed ceramics, broken bricks, expanded clay, shell rock. The drainage is disinfected with a dark pink solution of potassium permanganate.
It is important to choose the right place to grow your greens. Window sills on the south or southwest side are best suited.
Planting celery in different ways
Celery is grown in three ways. Each of them has advantages and disadvantages.
From a root vegetable
The fastest and easiest way. It allows you to try the first celery greens within 2-3 weeks after planting. But with this method of growing, celery quickly throws out the arrow, which makes the greens unfit for consumption. Therefore, the harvest can only be harvested once.
Root crops for growing greens are bought at the market or in a supermarket and immersed for 15 minutes in a light pink solution of potassium permanganate. After this, the planting material is ready for use.
A 5 cm layer of drainage is poured onto the bottom of a wide and deep container. The rest of the volume is filled with soil so that 3-4 cm are left free to the edge of the pot.
Celery root is planted in the ground, deepened to half. The soil is watered generously with warm water and placed in a warm, well-lit place.
From the stalk
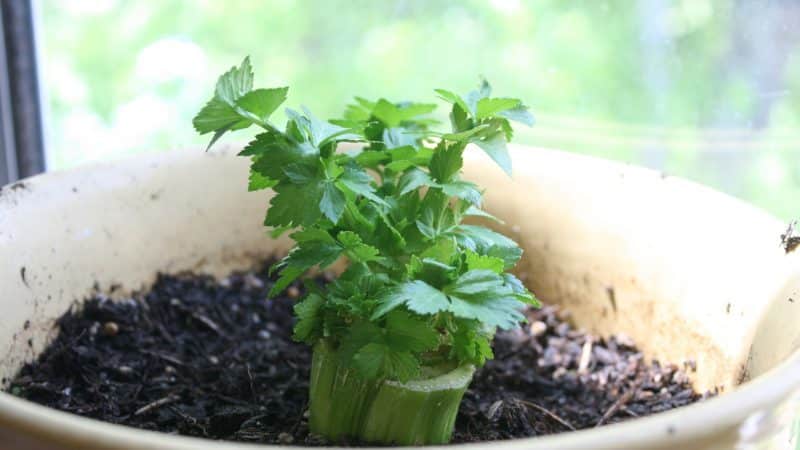
This method of growing celery allows you to quickly harvest. Caring for plants will be easier than with seeds. The first greens will be ready for pruning in 3-4 weeks. The yield will be lower than in the first case. The lifespan of celery grown in this way is 3-4 months.
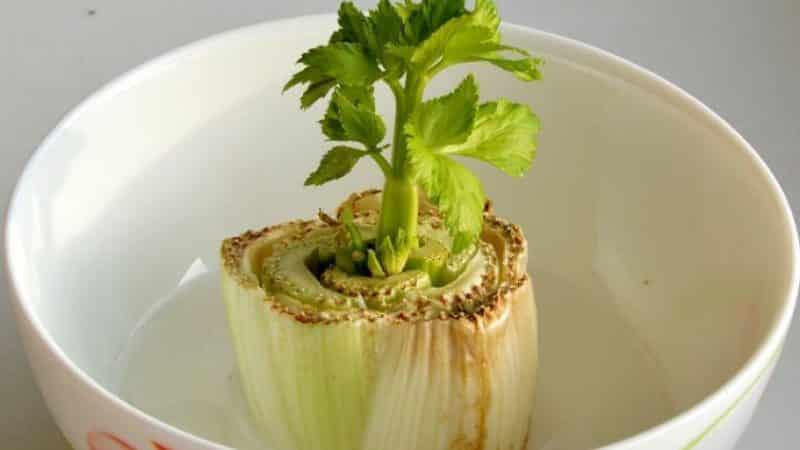
Petiole celery available in supermarkets at any time of the year. For planting, I use the stalk that remains after cutting the stems. It must be at least 3 cm in length.
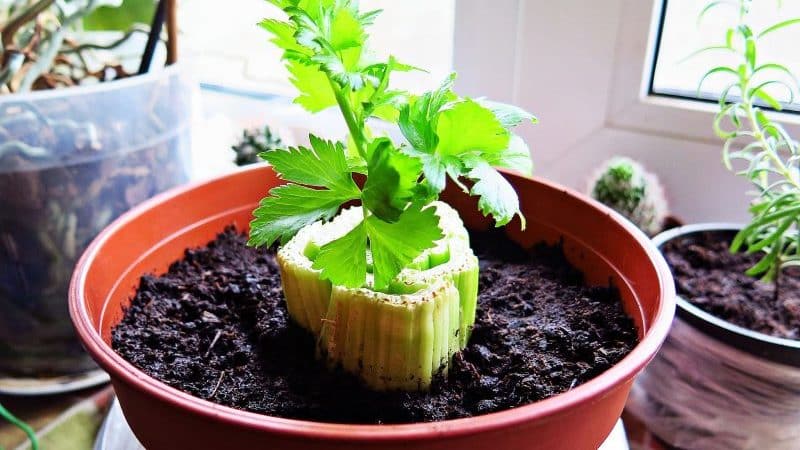 The planting material does not require pre-treatment. It is placed in a glass of water at room temperature with the stem trimmings facing up and placed on the windowsill.
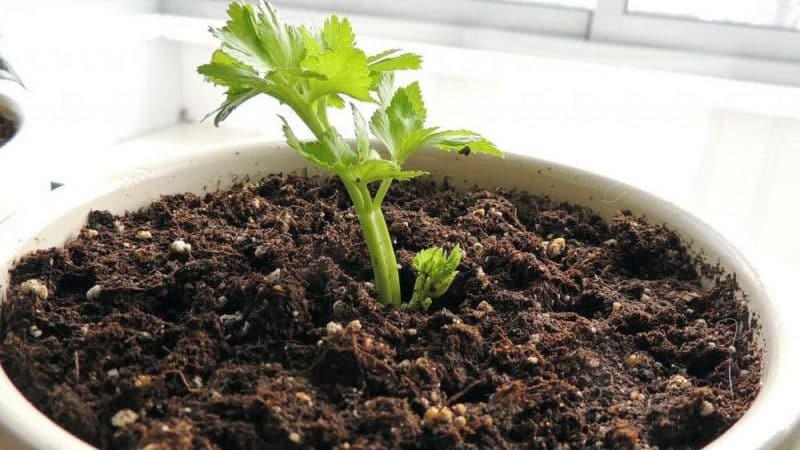
After some time, the cuts on the stems will dry out and become crusty. New shoots will appear on the stalk.This indicates that the plant is ready to be transplanted into a pot.
A layer of drainage is poured onto the bottom of the container, and soil is placed on top, which should fill the pot almost to the brim. The stalk is planted in the ground so that it is completely, together with the dried stems, in the ground. Only shoots should remain on the surface. After this, the ground is watered with water at room temperature.
Seeds
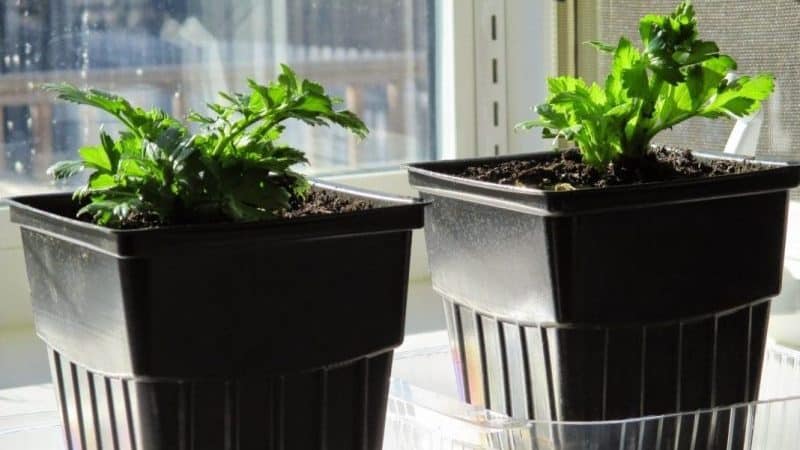
This is the most labor-intensive method for obtaining celery greens. In this case, the harvest will be harvested no earlier than in 1.5-2 months. Young plants are especially demanding when it comes to watering, temperature and lighting. The advantage of celery grown from seeds is the possibility of long-term harvesting (up to a year). After cutting off some of the leaves, new shoots quickly appear.
Celery seeds need pre-treatment. It will increase their germination and reduce the risk of infection of adult plants:
- Disinfection. Planting material is immersed for 30 minutes in a light pink solution of potassium permanganate at room temperature.
- Stimulation of growth. The seeds are soaked for 2 hours in aloe juice diluted with an equal amount of warm water.
It is not recommended to treat celery seeds with artificial growth stimulants. Greens accumulate substances used in their cultivation.
The container for celery seeds should be wide (wooden boxes, plastic trays) and deep (about 15 cm in height). A layer of drainage and soil are poured into the bottom of the container so that 2-3 cm are left unfilled to the edge.
Grooves 0.5 cm deep are made in the soil at a distance of 5 cm from each other. The seeds are scattered at intervals of 1-2 cm.
The soil is moistened with warm water from a spray bottle. The boxes are covered with film and put in a warm place.The soil is moistened as it dries.
12-14 days after sowing the seeds, the first shoots will appear. After this, the film is removed.
Sprouted plants are thinned out. There should be a gap of 2-3 cm between them on each side. Excess plants are not pulled out, but pinched so as not to damage the roots of neighbors.
Note! Celery seeds are often sown because they have low germination rates.
Celery care
To get a rich harvest of celery greens, it is important not only to plant it correctly, but also to provide care.
Basic principles of agricultural technology:
- Temperature. The optimal temperature for celery is considered to be +18…+22°C.
- Lighting. In spring and summer, the plant can grow on a windowsill without additional lighting. In winter and late autumn, it is recommended to use a phytolamp for 2-4 hours a day, placed at a distance of 30-45 cm from the crop.
- Watering. Water the celery with settled water at room temperature. In summer, this is done once every 2-3 days; in winter, watering is reduced to once a week.
- Ventilation. Plants need fresh air, so the room is ventilated regardless of the time of year. It is important to avoid drafts.
- Loosening. The soil is loosened after each watering. This will prevent the formation of an earthen crust and ensure normal air exchange. It is convenient to carry out the procedure with a regular fork.
- Feeding. Once every 2-4 weeks, apply vermicompost or complex mineral fertilizers. To increase the environmental friendliness of greens, instead of purchased products, use silage, banana peel infusion, or chicken manure diluted 1:10. Before applying fertilizers, the soil is moistened.
Diseases and pests
Even at home, there is a possibility of damage to celery. This happens for the following reasons:
- Neglect of disinfection. You need to disinfect the soil, drainage, pots, planting material and loosening tools. Infections persist on them.
- Dangerous neighborhood. Diseases and pests often spread to celery from nearby indoor plants.
- Drafts or lack of ventilation. This weakens the plants' immunity and increases the likelihood of infection.
- Violation of watering rules. Both dry and waterlogged soil provides an ideal environment for the development of infections.
- Poor soil. Lack of fertilizing leads to depletion of the soil in the pot and a decrease in the plant’s immunity.
Usually, at home, celery is affected by fungal diseases. These include:
- powdery mildew;
- white rot;
- septoria;
- cercospora blight
Prevention of diseases is the avoidance of factors that cause them. If the plants are sick, there is no point in fighting infections. Treatment chemicals penetrate the greens, making them hazardous to health.
There are not many pests in the apartment that can attack celery. Usually the plant is attacked by spider mites or thrips. A soap solution (1 piece of laundry soap per bucket of water) or a decoction of bitter herbs (wormwood, dandelion, yarrow) will help in controlling pests. The preparations are used for spraying plants.
Not always bad plant species indicates illness. If the celery looks lethargic, its leaves have turned yellow and are covered with spots, the reasons are sought in the following factors:
- Violation of watering rules. The problem occurs when there is a lack or excess of fluid. If the soil of a plant with signs of wilting is wet, watering will have to be stopped until it dries completely.
- Drafts.To save a plant dying due to drafts, it is moved to a warm place and fed.
- Lack of nutrients. In the absence of fertilizing, the soil becomes poor within a month.
Harvest and storage
Harvesting method depends on cultivation method. The list contains three options:
- When grown from a root crop, the harvest is harvested 3 weeks after landings. Cut off all the greens.
- When grown from a stalk, the first harvest is harvested 4 weeks after planting. Young shoots are left, new greenery will appear from them.
- Seeds. In this case, the first harvest is harvested 2 months after planting. In this case, part of the greenery is cut from each plant. This will allow new branches to develop.
It is better to collect greens as needed. If cut celery remains unused, it is not stored in the refrigerator, but in a glass of water at room temperature.
Tips and tricks
A few tips from experienced housewives will help in growing and using celery:
- Cut but unused greens can be frozen or dried. The taste will not deteriorate from this.
- Pregnant women are not recommended to eat celery. It causes increased uterine tone.
- Some housewives do not water celery, but pour a small amount of water into a saucer under the pot. Through a hole in the bottom of the pot, the required amount of liquid is absorbed into the soil.
- If the celery was sprayed with a soap solution or herbal decoction to control pests, the greens must be washed especially thoroughly. Otherwise, its taste will be bitter.
- To avoid loosening the soil without consequences, the soil in the pots is mulched. Peat, sawdust or straw are used as mulch.
Conclusion
Growing celery on a windowsill is a simple process that takes little time. To get healthy greens in winter, you don’t have to buy phytolamps and other special devices. All it takes is a little patience and available tools. Even inedible trimmings of petiole celery can become planting material.
Having spent very little time, you will receive not only a flavorful addition to hot dishes and salads, but also a remedy against vitamin deficiency. It is enough to eat a few branches a day to prevent a decrease in immunity during the cold period.